Over the last two months or so, forum user Hv23t has been working on a DIY heat pump water heater. It actually started with a scrap run. His neighbors saw what he was doing and asked if he could haul off a few things for them. In the end he was left with a couple dehumidifiers that didn’t work and a few hot water heaters that didn’t have any problems. Instead of scrapping these things, Hv23t decided to do some tinkering to see what could be done with them.

He started with modifying one of the electric hot water heater tanks he got. It was first checked for any leaks, and then he went about installing a coil of 30 foot long 1/4″ copper refrigerant tubing into the tank through one of the heating coil holes. This is similar to what the A7 AirTap does. To seal the tubing entrance/exit points, he reused one of the hex plugs in the tank. It was drilled and tapped for 1/8″ npt fittings. He then inserted 1/8″ npt to 1/4″ compression fittings in the two holes. The 1/4″ tubing was fed through the compression fittings and the hex plug was re-installed in the water heater tank.
The next step was to get one of the dehumidifiers working. Hv23t found that one of the dehumidifiers had hardly any R22 refrigerant left in it, so he pumped some more refrigerant into it and it came right back to life.

Not happy with that setup, he used a vacuum pump to remove the R22, and instead filled it up with propane. To do this, Hv23t modified a propane torch tip by brazing a 1/4″ flare fitting to the end of it.

The new setup using propane (R290) reduced power usage from 435 – 450 watts down to 365 – 410 watts. He also measured the temperatures in the 140s (F) on the hot side. Sounds plenty warm for hot water.

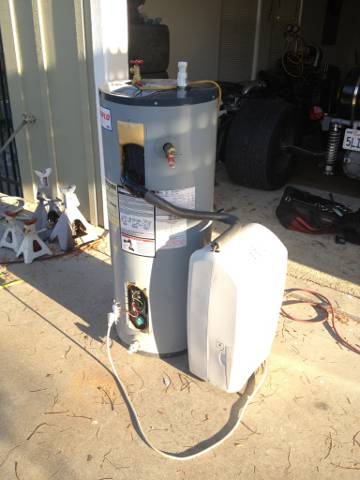
With the dehumidifier now working and even having its inefficiency increased, it was time to hook the dehumidifier up to the hot water tank and do a little modification to the dehumidifier as well. The 1/4″ tubing from the tank was brazed to the hot side of the dehumidifier’s heat pump. At the same time, the existing heat exchanger from the hot side was replumbed into the cold side increasing the cold side heat exchanger’s surface area.
After everything was replumbed, the water heater was ready for its first test. The tank started at 67 degrees F (19.5 C) and after 1 hour and 51 minutes the heat pump kicked off at the hot water heater’s set point of 100F (38C).
The test was a great success, but of course there were some issues to fix up. The biggest one being that the cold side heat exchanger frosted up like a brick of ice. This significantly hinders its ability to exchange heat which reduces efficiency. We’ll look at that issue, the installation and efficiency testing of the heater in the next article.
For more details on this project, see Hv23t’s forum thread.


{ 1 trackback }
{ 1 comment }
Nice work. Good to see Propane being used, its a very good refrigerant if you are careful with it. Are you considering using both Evaporator coils? ( I mean adding one from the spare you have, thus doubling the heat-exchanger size.
Comments on this entry are closed.