
The problem we had was that the lights in the basement were all on pull chain switches or just plugged into a wall socket. This meant turning everything on or plugging it in individually. The previous owners didn’t like this solution, so they simply kept the lights on in the basement 24/7! Thankfully, there weren’t a lot of lights down there. There were four 14W CFLs and two four foot flourescents which I’ve heard run at about 20W each. A little rough estimation shows that they were wasting around 70 kWh every month just from those four lights! Yikes. Obviously, something had to be done. That is where our story begins today.
So, we have all know a simple solution, right? One switch at the top of the stairs sounds like a great idea, doesn’t it? I thought so. So that is exactly what we did. Unfortunately, I’m not well versed in wiring so I can’t give even a descent explination of the actual wiring process. I can tell you what else we had to do though.
The first step was to mount the switch. Thankfully, there was even an electrical box at the top of the stairs already. Unfortunately, there were no wires running to it. So, we ended up using some wire molding to go up and over the doorway.
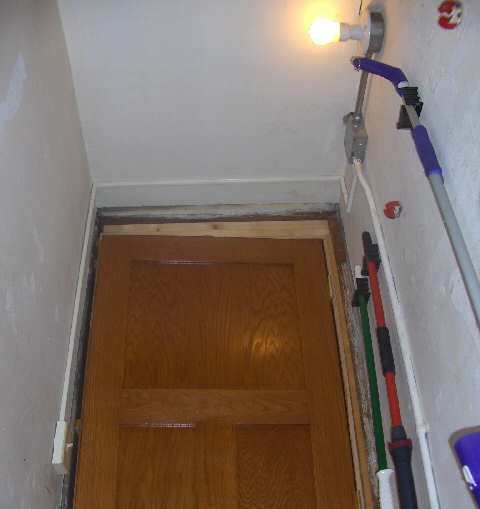
That all went great, but we also noticed that the top of the door hit the light if you opened it up far enough. So, we ended up moving the light over and up to get it out of the way too.

With the switch all tidied up and ready to go we continued down into the basement to wire up the rest of the lights to the switch. After doing the two on the one side of the basement we ran into another snag. The four foot flourescent tube light was not wired to anything, it was simply plugged into the wall. Being the master electrician that he is, my father in law simply ran out to his truck to grab a receptical, installed it in a junction box, and wired it in with the switch. Now the large tube light also works on the switch, brilliant!

So, a few hours of work and a few cheap materials and we’re done. The cost to me was a bit lower than average as I had some materials already laying around, and my father in law also provided some free of charge. I’m already reducing my carbon footprint, so that benefit started that fateful day. I also calculate that it will take just under four months to break even money wise. Sounds like a win win to me.
- (2) 5′ straight wire mold – $4.38 ea.
- (2) wire mold inside elbow – $3.68 ea.
- (1) wire mold flat elbow – $3.79
- (1) wire mold starter box – $5.89
- (1) wire mold conduit connector – $4.98
- 12 gauge wire – free
- switch – free
- switch wall plate – free
- receptical – free
- twist connectors – free
Total: $30.78
Energy savings: 70 kWh per month
Payback: ~3.7 months


{ 1 comment }
What a great project to save money and electricity!
Comments on this entry are closed.