When I posted the DIY Home Pressure Test, I said I was going to try it out on my house. I knew it was pretty leaky not only because it is old, but because the attic work I did late last year had a much smaller effect on my monthly gas usage than I had anticipated.
I started the test by turning on the two bathroom exhaust fans as well as the kitchen range vent. These three vents worked quite well to detect leaks in my opinion.
I tried to use an incense stick, but that really didn’t work out well. For starters, one incense stick just doesn’t put off that much smoke. So, I tried three at once. Even then, you have to put the sticks where you think the leak might be. Then you have to wait a bit for the smoke to raise to see if there is any disturbance. I quickly tired of the incense sticks and tried out the wet hand route. I just grabbed a rag, got it wet, and started walking around. With a wet hand, it is very easy to detect even a small breeze coming through a hole, and its really just a lot faster. Using this method would be my suggestion.

The experts say that most leaks are not from around doors and outlets, but are from the attic and basement. Those are the major leaks to take care of right away. So, with that info in hand, I headed towards the basement. The first place I checked to see if there was noticeable leaking from the basement was the basement door. There is a sizable gap below the door and with the exhaust fans running there was a major breeze coming from the gap. I won’t go into detail on the basement as I’ll be covering it in its own.
After the basement, I checked out my first floor. There wasn’t anything major here. This isn’t surprising considering most of this floor has been remodeled, and the previous owners did a pretty good job. There were just a few small leaks here and there around outlets, doors and windows.

Moving on, I went up to the second floor. I noticed a good breeze coming from the wall outlets and switches. Keep in mind that I have hollow walls on my second floor, so I was anticipating this being a fairly large area for leaks. To remedy this, it would be fairly simple to install switch/outlet gaskets. I had installed these on some of my outlets upstairs, but had added a few more outlets and those were leaking a fair amount of air where as the ones with the gaskets had no detectable leaks.

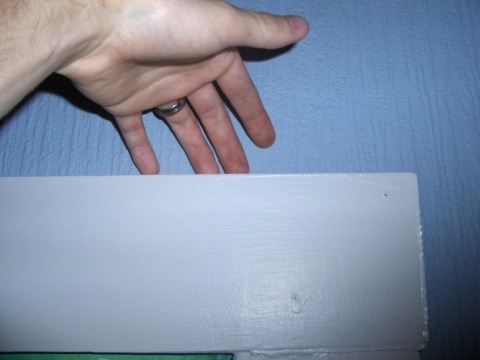
The next area I found that was leaking on my house was around the window trim. Again, with the hollow walls, any gaps around the window trim would lead to leaks. Unfortunately, all of my windows upstairs have huge gaps at the top of them as shown above. I’m not sure why this is, but that is the way it is. I’ll definitly be looking to shoot in some expanding foam and caulk around the edges of the rest of the trim board to make sure its all sealed.

The other area of the windows that I found leaks were where the window seals against the sill plate. These older windows I have don’t have gaskets on the bottom of them. So, you’re gaurenteed that even if the two surfaces are perfectly parallel, you’ll still have at least some leakage. If the surfaces are misaligned, as shown above, you’ll have even greater leaks.
With this simple test, I have been able to locate the key areas of leakage in the house. It really didn’t take long at all either once I figured out using the wet hand method works best by far. I would highly recommend this test to all our readers out there weather your house is new or old. Air leakage is a huge problem as far as energy efficiency goes, and fixing it is so much cheaper than buying more insulation or buying fancy heating and cooling systems. I can say without doubt, sealing up these leaks will save me a lot of energy this coming winter.


{ 1 comment }
Nice post. Thanks.
Comments on this entry are closed.