In our first article, we gave a very brief overview of AC Hacker’s heat pump system and the testing he had done. Now, we will dive deeper into the process he is taking to make up the system.
For the heat pump system, AC Hacker decided to go with a water to water design. This worked best for him because it requires less length of tube to be put into the ground. More tubing in the ground obviously increases cost, and even putting tubing in the ground is a major problem for DIY heat pump projects.
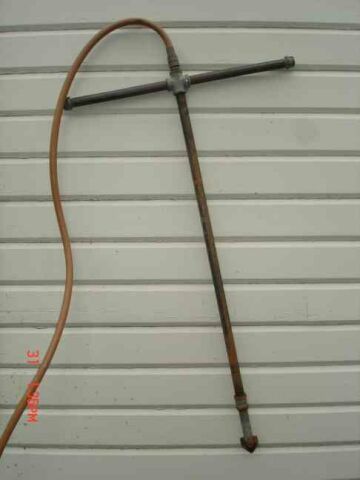
In order to get the tubing into the ground, boreholes need to be drilled. The average person doesn’t have any well drilling equipment handy so something must be made. The first version of AC Hacker’s drilling rig is show above. It is comprised mostly of pipe and a few fittings.
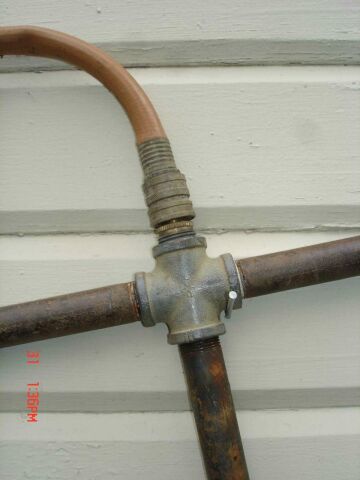
The top of the drill is a 4 way fitting with three pipes connected to it. Two of the pipes are for handles to turn it. The long pipe goes to the drilling tip, and the top goes to a swivel fitting that connects up to a garden hose.
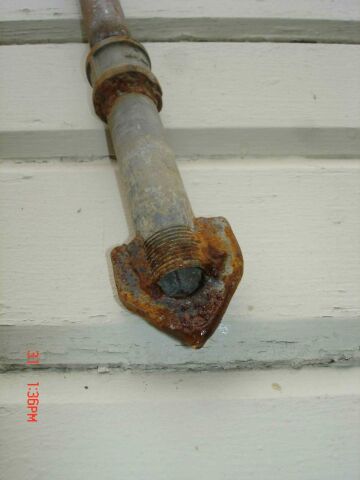
The business end of the drill is just the end of a pipe with some steel plate welded to it. The water from the garden hose blasts out the tip of the pipe and flushes out the debris from drilling, assists with drilling, and also stops the hole from caving in when drilling through sandy soil.
With this drilling rig, AC Hacker was able to drill down 13 feet in about 35 minutes. Not bad for a hand tool. However, at 13 feet, he started hitting hardpan. Hardpan is clay mixed with gravel. This is not fun or easy to drill through. However, it also keeps the water level up which can increase the efficiency of heat pump systems.
In our next article, we’ll talk about AC Hacker’s improved electric drilling rig he made. If you don’t want to wait, check out his forum thread.


Comments on this entry are closed.