
|
 12-04-12, 05:36 PM
|
#41 | |
|
Supreme EcoRenovator

Join Date: Mar 2009
Location: Portland, OR
Posts: 4,004
Thanks: 303
Thanked 723 Times in 534 Posts
|
Quote:
You might look into that. When I built my unit, I used adhesive-backed insulating foam tape on all of the exposed tubing in an attempt to keep the heat & cool in the system so that it would only go where I wanted it to go. I'm sure it had an effect also of drastically reducing vibration. Best, -AC
__________________
I'm not an HVAC technician. In fact, I'm barely even a hacker... |
|

|

|
|
01-12-13, 09:01 PM
|
#42 |
|
Supreme EcoRenovator
Join Date: Jan 2010
Location: elizabethtown, ky, USA
Posts: 2,428
Thanks: 431
Thanked 619 Times in 517 Posts
 |
My unit let its charge out again Wednesday after doing an awesome job for almost 2 months straight. Same cause: vibration stress cracked the u-turn coming out of the compressor discharge line. I moved the unit to the barn and took the cover off today. I'll take pics tomorrow when I do the repair.
A view of the failure area If you look at the attached file, you can see where the vibration is causing failures. The u-turn with the white wire running through it is the problem area. The first failure (this pic) was a bend in the access valve brazed into the line. The second leak was at the compressor shell below the slip coupling in the line. This time, the leak is in the same line at the crease you can see in the pic directly above the slip coupling. Upon further scrutiny, it appears that the wire I wrapped around the compressor and the bottom end of the line (where it does another u-turn into the bottom of the reversing valve) has broken. With nothing to limit its movement, the discharge line flexed itself to death. I am learning now why the HVAC manufacturers add extra piping to their systems. When I plumbed this unit for a reversing valve, I may have inadvertently made a pendulum between the discharge line and the reversing valve... On a positive note, the unit couldn't have failed at a better time! We are having an unusually warm spell this weekend. The temp in the barn today was 62 degrees F. This will make it easy to spend more time making this repair tomorrow. Last edited by Daox; 01-13-13 at 09:02 AM.. |
|
|
|
|
01-22-13, 02:25 AM
|
#43 |
|
Supreme EcoRenovator
Join Date: Jan 2010
Location: elizabethtown, ky, USA
Posts: 2,428
Thanks: 431
Thanked 619 Times in 517 Posts
|
Sorry all, no pics this time. My smart phone decided to lose its power button and won't power on now at all. The repair was pretty straightforward. Upon inspection, the discharge line had stress cracked at the u-turn above the compressor. Rather than dismantle the plumbing, I decided to over-build what is there already. I found a length of romex 14 AWG house wiring and stripped out a piece of it to use for filler. I then coiled the wire tightly around the discharge pipe and brazed the entire problem area with silfos 5. So now this problem area is triple thick and should never give me any more problems. I also reworked my vibration-stopping scheme by replacing the original piece of baling wire with plumber's strap. It basically ties the reversing valve to the compressor shell with a rubber spacer in between. I tidied up my control wiring, bolted lots of components to the frame, hid everything except the thermostat, recharged the unit and closed it up. If and when it warms up again, I'll take pics when I go back in and replace the caps to the access valves I forgot to screw on (it was getting dark).
jeff |
|
|
|
| The Following User Says Thank You to jeff5may For This Useful Post: | Xringer (01-22-13) |
|
01-22-13, 05:25 AM
|
#44 | |
|
Apprentice EcoRenovator
Join Date: Dec 2010
Location: Western Australia
Posts: 148
Thanks: 1
Thanked 48 Times in 34 Posts
|
Quote:
No wonder I like checking in with you guys! |
|
|
|
|
|
01-22-13, 09:15 PM
|
#45 | |
|
Supreme EcoRenovator
Join Date: Mar 2009
Location: Portland, OR
Posts: 4,004
Thanks: 303
Thanked 723 Times in 534 Posts
|
Quote:
I do hope you used some kind of gas to purge the lines before you brazed... otherwise, you get copper oxide flakes inside your system which can clog your orifice. Best, -AC
__________________
I'm not an HVAC technician. In fact, I'm barely even a hacker... |
|
|
|
|
|
01-23-13, 04:15 PM
|
#46 |
|
Supreme EcoRenovator
Join Date: Jan 2010
Location: elizabethtown, ky, USA
Posts: 2,428
Thanks: 431
Thanked 619 Times in 517 Posts
|
Yes, very good tip on the purge gas. NEVER braze refrigeration lines without purging with an inert gas first, especially when using propane for refrigerant! I've been using C25, mig welding gas, 75% argon, 25% CO2 for purge gas. I have a bottle sitting around the barn not being used much... until lately. Super dry stuff, more useful than nitrogen (i can use it to weld also, hotter arc than pure argon, less spatter than pure co2).
|
|
|
|
|
01-27-13, 03:53 PM
|
#47 |
|
Supreme EcoRenovator
Join Date: Jan 2010
Location: elizabethtown, ky, USA
Posts: 2,428
Thanks: 431
Thanked 619 Times in 517 Posts
|
Yay, no breakdowns since a week and change ago! We got a cold snap and the unit has been running pretty much non-stop. Just some minor tweaking going on now.
I set the defrost control to 45 minutes cycle time to prevent the outdoor coil from becoming a block of ice when the temps are in the 30's. In this range, the unit puts out gobs of heat until the evap coil suddenly (10 min or less) loads up with frost and heat output drops accordingly. It is also in this range that defrost takes the longest. I found out that in this temp range, I could not simply stop the fan while defrosting. There isn't enough heat in the coil/circulating refrigerant to melt the outdoor coil without adding airflow. So I added this: 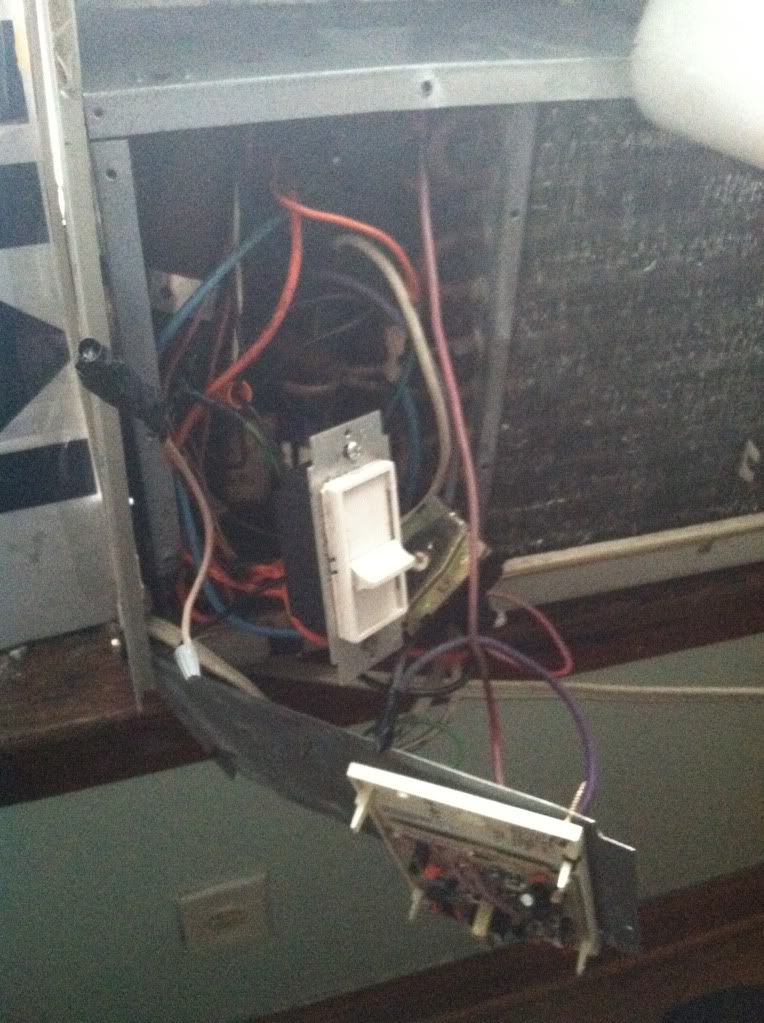 Defrost Fan slowdowner I added it to the low speed wire on the fan to slow it down enough so the indoor coil is moving just a tiny bit of air through it. Wired straight to the low speed wire, the outdoor coil never gets warm enough to terminate defrost. I imagine the motor is turning at 100-150 rpm in defrost mode. Now the unit takes maybe 3 minutes to defrost when it is frosted heavily. At about 2 min or so, I can hear the moisture start to sling around the shroud as it melts and drains. Below 30 degrees F, it hardly ices up at all. I can tell the evap is still collecting water at this temp, though. It steams like it's on fire for 30 sec to 1 minute, then goes right back to heating mode. Good enough for me... no frost means better heat transfer! I have found that this repurposed window shaker will satisfy my heating needs (68-70 f) completely at about 38 f outdoor, as above this temp the unit begins cycling off with the thermostat. Once I trust it, I'll make it look pretty and take proper power and heat transfer measurements. For now, it will slave away to save me some more money or bust. 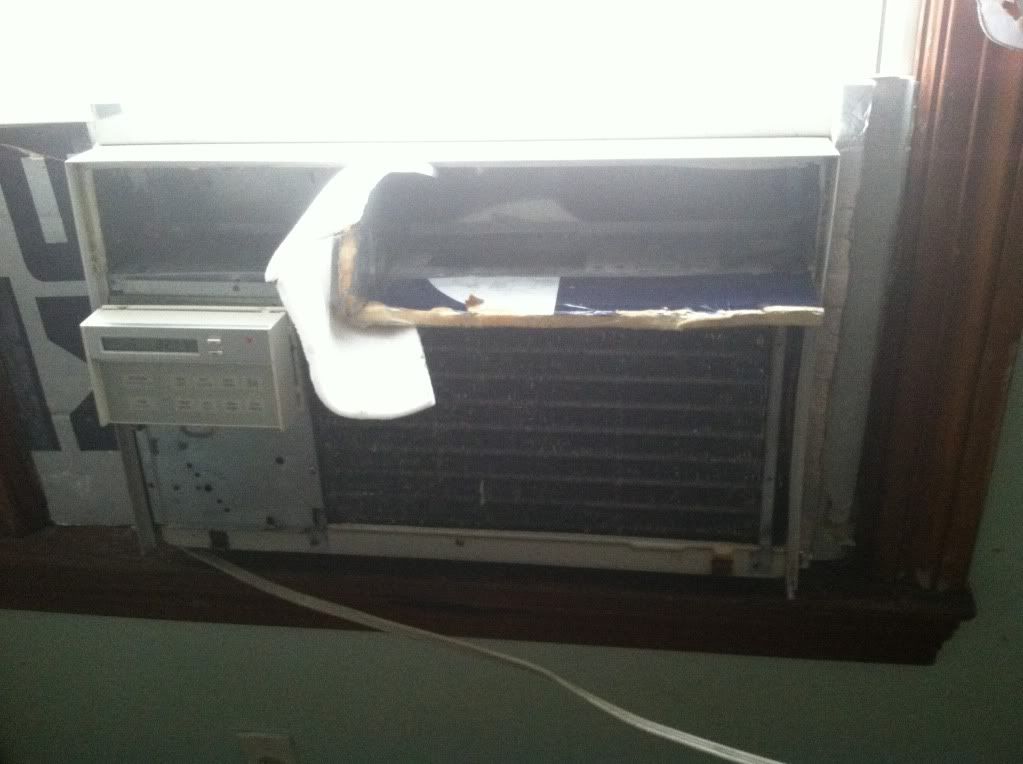 Last edited by jeff5may; 01-31-14 at 11:07 AM.. |
|
|
|
|
02-01-13, 10:12 PM
|
#48 |
|
Supreme EcoRenovator
Join Date: Jan 2010
Location: elizabethtown, ky, USA
Posts: 2,428
Thanks: 431
Thanked 619 Times in 517 Posts
|
It just so happens that the last 24 hours have been the coldest this year. Temp bottomed out at -14 c this morning. I've been running the unit just to see what it would do at this outdoor temp, and this morning it was blasting out 25 degree c air. Room temp had dropped to below 16 from above 20. Temp has since risen to -6 c and the unit is now maintaining the room at 25 c running constantly. If I shut the door, it cycles at around 30% to maintain 25 c. Not quite heating the whole house, but it is keeping the gas furnace from cycling every 5 minutes like it used to. It's still beating the pants off of two 1000+ watt space heaters.
Last edited by jeff5may; 02-18-13 at 04:26 AM.. |
|
|
|
|
02-01-13, 11:39 PM
|
#49 |
|
Lex Parsimoniae

Join Date: Feb 2009
Location: Woburn, MA
Posts: 4,918
Thanks: 114
Thanked 250 Times in 230 Posts
|
History | Weather Underground
And it stayed pretty dang cold too! Warmer up here in BeanTown. It sounds like you've got some pretty amazing cold weather performance out of your experiment.  Congrads! Congrads! I've got an old un-needed 18,000 BTU Sears Kenmore window/in-wall AC. It's it great shape. Uses 230vac and R22. Weights over 100 pounds. If I can get it un-installed in one piece, maybe I can convert it into a space heater for my basement. Might be nice to get some good BTUh blowing on me, when I'm down there working during the cold season.
__________________
My hobby is installing & trying to repair mini-splits EPA 608 Type 1 Technician Certification ~ 5 lbs or less.. |
|
|
|
|
02-02-13, 04:06 PM
|
#50 |
|
Supreme EcoRenovator
Join Date: Jan 2010
Location: elizabethtown, ky, USA
Posts: 2,428
Thanks: 431
Thanked 619 Times in 517 Posts
|
Xringer,
The only thing you really have to worry about with these units in heating mode, ignoring the obvious, is what to do when it gets cold outside. You have 3 options: 1. Don't use the unit below about 40 deg F 2. Hot gas defrost 3. Reversing valve I chose option 3. The unit I built has a thermostat with auto changeover between heating and cooling, so I can set it and forget it. I learned lots about plumbing going this way. Next time, I will add more bends in my piping to deal with vibration. Option 2 is for heating-only duty. It substitutes the reversing valve for a solenoid valve (to raise evap pressure to above freezing temp) and a suction line accumulator (to keep the burping evap from choking the compressor). Both options 2 and 3 need some kind of defrost control, which effectively works the same in both options. The valves most likely could be found in the same price range, also. The existing thermostat could be made to work with both options by adding a relay and a heat/cool switch (option 3). So the main factor is in the labor. If you just want the unit to heat, it would be much easier to plumb one line and a solenoid valve. Last edited by jeff5may; 02-18-13 at 04:29 AM.. |
|
|
|
 |
|
|


 Linear Mode

