
|
 10-26-08, 07:40 PM
|
#11 |
|
The Gardener
Join Date: Oct 2008
Location: Manitoba - Canada
Posts: 492
Thanks: 17
Thanked 8 Times in 7 Posts
|
I have a question about caulking. What happens after you caulk around the edge of your windows, and then you want to paint the wall later? Isn't it kind of hard to paint edging when there is caulking there? I'd like to caulk some of my windows, but I'm hesitant about the painting afterwards.
|

|

|
|
10-27-08, 07:13 AM
|
#12 |
|
Administrator

Join Date: Aug 2008
Location: Germantown, WI
Posts: 5,525
Thanks: 1,162
Thanked 374 Times in 305 Posts
|
I'd imagine its a bit harder to paint since there isn't as much of a sharp corner. However, its done all the time.
__________________
Current project - To view links or images in signatures your post count must be 0 or greater. You currently have 0 posts. To view links or images in signatures your post count must be 0 or greater. You currently have 0 posts. & To view links or images in signatures your post count must be 0 or greater. You currently have 0 posts. |
|
|
|
|
10-27-08, 07:33 AM
|
#13 |
|
Apprentice EcoRenovator
Join Date: Sep 2008
Posts: 183
Thanks: 1
Thanked 1 Time in 1 Post
|
paintable caulk. the end.
 oh, maybe i read that wrong. it's not hard. it's just not a 90 degree edge, just pick your spot for the line, tape it, or free hand it. |
|
|
|
|
09-12-09, 02:50 PM
|
#14 |
|
Administrator
Join Date: Aug 2008
Location: Germantown, WI
Posts: 5,525
Thanks: 1,162
Thanked 374 Times in 305 Posts
|
It was time to revisit the work I did last year and do some improvements. I noticed that the door stop/trim had come up or was just not nailed down well enough. Turns out, it just doesn't match up all that great. So, time to stop more leaks and caulk it!
Once again, every time I came downstairs, I saw light through the crack by the door. Not as bad this time, but worth looking into. 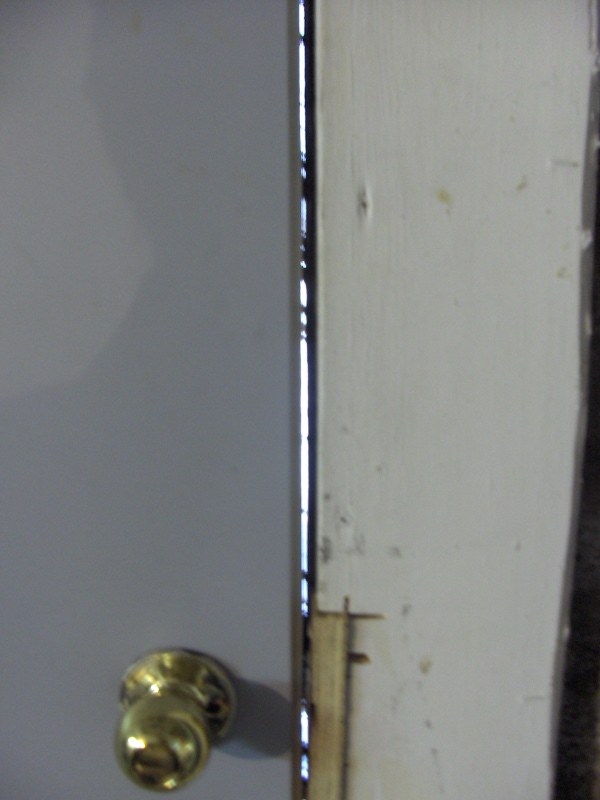 Sure enough, theres some pretty gaping cracks here.  I also took some time to make sure my weather stripping was all still tight. Some had loosened. I blame it on the tiny nails they provide. Anyway, I hammered them back in and caulked everything up. I also noticed some buckling between the weather stripping and the wood, so I caulked that too! 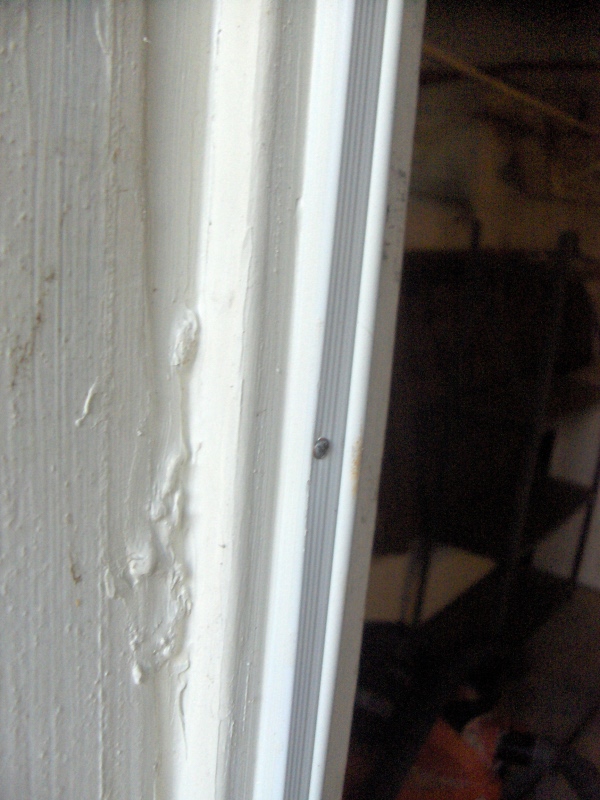 Here is the inside. Again, some pretty big cracks. 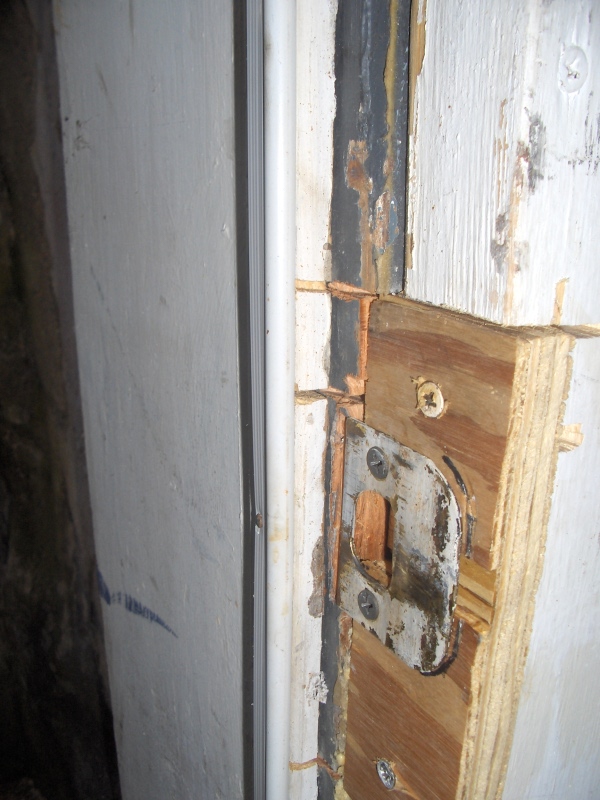 So, I made sure and loaded it up with caulk sealing all around the inside door jam.  Also, just thought I'd share. I've had these guys walking through my yard almost every day for a few weeks now. 
__________________
Current project - To view links or images in signatures your post count must be 0 or greater. You currently have 0 posts. To view links or images in signatures your post count must be 0 or greater. You currently have 0 posts. & To view links or images in signatures your post count must be 0 or greater. You currently have 0 posts. |
|
|
|
|
09-13-09, 11:41 PM
|
#15 |
|
Apprentice EcoRenovator
Join Date: Aug 2009
Posts: 123
Thanks: 14
Thanked 1 Time in 1 Post
|
RE- "Slicking" caulk:
Keep a spray bottle of water with you - once you've sealed the joint, spray the caulk with some water, then finger slick it. It won't stick to anything wet, so your finger won't get nearly as messy. DON'T follow the 30% rule - you don't need to over fill the joint to properly seal it. If you don't know what this is, don't worry about it. If you were ever told that you have to over fill a joint to seal it, this only applies to joints more than 1" in width, where expansion is an issue. When the depth of the gap is more than 1/4", back fill the gap with either foam or wadded paper. This will prevent the caulk from getting too thick, causing it to not cure properly. The properly filled joint will slick down almost flush, but slightly concave, if on a flat surface. If in an angle, the caulk line's edges will be visually uniform, and taper from the middle concavity to the surface material until the caulk line is nearly undetectable. There should not be a ridge between the surface of the caulk and the adhesion surface. Slicking your sealants will provide up to 35% greater seal and longevity in your sealant material. Go to Wally World, and get a set of Cake Spats. You'll never need to use your fingers again. If that won't work, often times, flea markets will have professional caulking tools, including bulk guns and slick-sticks (spatulas). I have a 2 foot bulk gun, some Albion cone tips, and a full set (almost doubled, if I can find the others) of spats, because as a Mason Apprentice, I had to learn to caulk. Once you really get used to the job and your tools, you can do nearly 70 ft/min, and make it look good while you're doing it. I'm not that good yet, but I can caulk just about anything and make it look like it's supposed to be there. RE - Painting caulk - just use Acrylic or Latex caulk. If you already have silicone installed, wipe it with vinegar before painting. RE - Poly foam and spray paint: Water based paints won't melt the foam, not that it was an important piece or anything. Oil and solvent based paints will give the foam texture, and thinning the paint will help that effect. It's not the paint itself that melts the foam, but the solvents and petroleum based chemicals in the paint, including Xylene (Xylol) and Toluene, Mineral Spirits, and other chemical thinners. Last edited by Christ; 09-13-09 at 11:43 PM.. Reason: Corrected professional work capacity from 100 ft/min to 70 ft/min |
|
|
|
|
09-24-09, 12:06 PM
|
#16 |
|
Efficency nerd
Join Date: Dec 2008
Location: S. E. Michigan
Posts: 14
Thanks: 0
Thanked 0 Times in 0 Posts
|
on sealing
I have found that the spiders in the house know where the drafts are. If you see a spider web, then there is probably air movement through that place. |
|
|
|
|
09-24-09, 12:14 PM
|
#17 |
|
Administrator
Join Date: Aug 2008
Location: Germantown, WI
Posts: 5,525
Thanks: 1,162
Thanked 374 Times in 305 Posts
|
Thats what Higgy told me one time too. My response was that if that is the case, my entire basement just be leaking cause they're everywhere lol. Sadly, that might actually be the case too!
__________________
Current project - To view links or images in signatures your post count must be 0 or greater. You currently have 0 posts. To view links or images in signatures your post count must be 0 or greater. You currently have 0 posts. & To view links or images in signatures your post count must be 0 or greater. You currently have 0 posts. |
|
|
|
|
09-29-09, 10:37 AM
|
#18 |
|
Supreme EcoRenovator

Join Date: Mar 2009
Location: Portland, OR
Posts: 4,004
Thanks: 303
Thanked 723 Times in 534 Posts
|
Daox,
Thought you'd appreciate my caulking/insulation project, it's been going on for about 15 years now... Here's a shot of a corner of the kitchen showing the fully layered roof, a section of partially completed wall and a section of fully completed wall. I have put three layers, each of 2-inch thick rigid foam insulation into the entire roof of my house. I cut the foam to fit as closely as I could, which usually meant that I needed to use a piece of plywood and a heavy hammer to pound them into place. Since my house is 117 years old, nothing is square and straight, so any big gaps I filled with expanding foam. Any small gaps I filled with a caulk gun. I did this at every layer, so the infiltration should be quite low. Here's a shot of an adjoining wall showing three stages of the layering process. The house had the old style rough-cut 2x4, when they were actually 2 inches by 4 inches. I built up the 2x4 so they were finally 2x6. Then I put the foam in. As you can see, I will need to build up the window opening. When I started this project, I had never heard of "thermal bridging", which refers to the fact that heat loss can occur through the 2x4 (or 2x6 in my case), lowering the R-value of your insulated wall by 15%. On the walls left to do, I'll work out some way to stagger the 2-inch build-out so that there's a break in the thermal bridge. I'm figuring the R-value of the foam to be R-4.5 per inch, so a 6-inch ceiling/wall is R-27. When I started this project, R-27 roofs were over code, and R-27 walls were considered to be insanely extravagant. Now, code for new construction is R-40 in the roof and R-21 in the walls. If I add 2 inches of isocyanate foam to the roof, I'll be at code. I've been using Expanded Poly Styrene (AKA: EPS) because it is closed cell and non-hydroscopic, and is cheaper. So R-4.5 per inch, will be R-4.5 20 years from now.. Isocyanate foam is hydroscopic and will gradually absorb so moisture and will gradually reduce in R-value. The price of insulating board has risen substantially since I started this project, but the cost of heating fuel has risen much faster. Best Regards, -AC_Hacker %%%%%%%%%%%%%%%%%%%%%%%%%%%%%% Last edited by AC_Hacker; 09-29-09 at 10:46 AM.. Reason: text beautification |
|
|
|
|
09-29-09, 11:06 AM
|
#19 |
|
Administrator
Join Date: Aug 2008
Location: Germantown, WI
Posts: 5,525
Thanks: 1,162
Thanked 374 Times in 305 Posts
|
I certainly can appreciate that! I will be doing something similar with my upstairs sometime in the future as it currently has no insulation in the walls. I haven't decided exactly how I want to do it, but I actually am aiming to have R40 walls or as close to that as I can get. This will probably eventually come from residing the house and adding rigid foam to the outside.
If you have any tips or ideas lemme know!
__________________
Current project - To view links or images in signatures your post count must be 0 or greater. You currently have 0 posts. To view links or images in signatures your post count must be 0 or greater. You currently have 0 posts. & To view links or images in signatures your post count must be 0 or greater. You currently have 0 posts. |
|
|
|
|
09-29-09, 11:28 AM
|
#20 | |
|
Supreme EcoRenovator
Join Date: Mar 2009
Location: Portland, OR
Posts: 4,004
Thanks: 303
Thanked 723 Times in 534 Posts
|
Quote:
If I were you, I'd learn all I could about Passive House construction techniques and Passive House rennovation. Unless you start from scratch,you'll never be able to achive full Passive House standards (Rennovations may hit 50% Passivhaus standards, but you'll certainly be working a lot smarter. The 'Thermal Bridging' concept came from the Passivhaus initiative. There's a design spreadsheet that the Passive House folks sell called Passive House Planning Package (AKA: PHPP). I've been trying to get it on the cheap for some time now. No luck yet. The PHPP would not be required to proceed with your insulating project, but by successive applying 'what-if' ideas, you'd quickly gain a very astute intuition. LINKS: Best Regards, -AC_Hacker %%%%%%%%%%%%%%%%%%%%%%%%%%%% Last edited by AC_Hacker; 09-29-09 at 11:46 AM.. |
|
|
|
|
 |
| Tags |
| air, caulk, expanding foam, leak, seal, window |
|
|


 Linear Mode

