
|
 10-07-08, 06:57 AM
|
#1 |
|
Administrator

Join Date: Aug 2008
Location: Germantown, WI
Posts: 5,525
Thanks: 1,162
Thanked 374 Times in 305 Posts
|
This past weekend was unofficially 'seal the house' weekend. I went outside and caulked almost all the upstairs windows. This week I'll probably finish up upstairs and start downstairs. Anyway, here is an example of what I found.
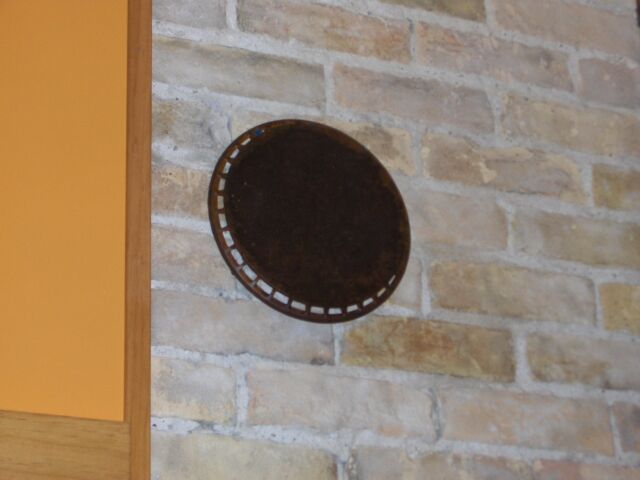
Before. That is about a 1/4" all together.  After. Still need practice caulking and making it pretty. 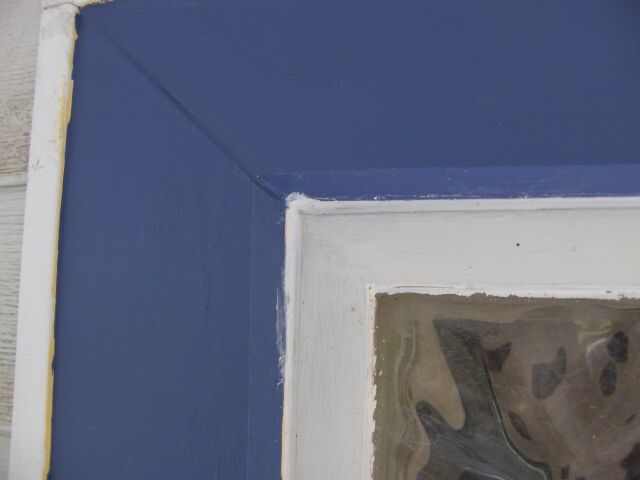 I also caulked between the wood and siding trim. There were some pretty huge gaps there too. In addition to the windows, I was up working in the attic again sealing everything off and getting it ready for insulation. This is the kind of stuff I was running into and filling with expanding foam (Great Stuff).  When you peel up the insulation, you can literally see the dust that has been filtered out from the air moving through the gaps. 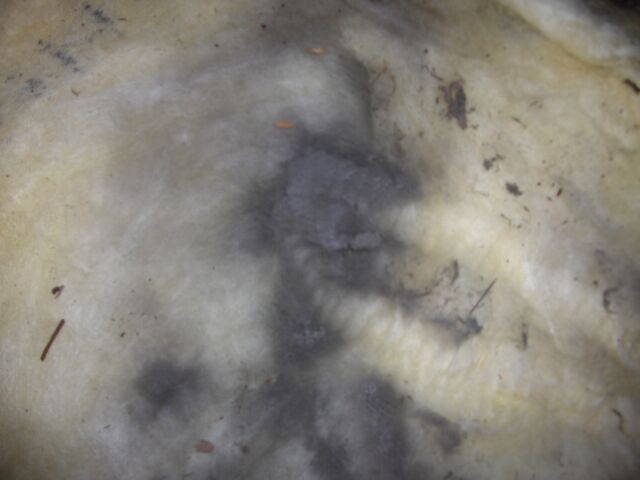 Next on the list was in the Kitchen. I have a roughly 6" hole in the chimney which leads right up to the attic where it is cut off (doesn't go through the roof). This needed plugging if I want to keep heat in there. When I was up there I could even feel a draft.  So, I took some foam insulation I had laying around, cut two circles, and used liquid nails to glue them into the hole.  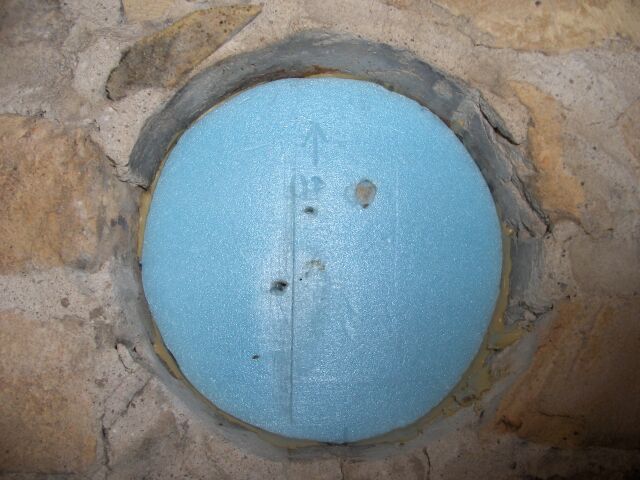 I spray painted the second piece. That didn't work so well. Did you know spray paint eats away at foam? Well, I do now. However, it did kind of give it a nice textured look. 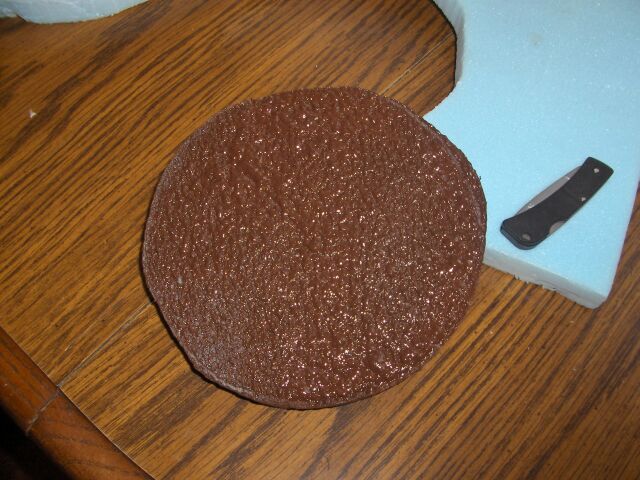 But, then I was bad and didn't wait for the glue to dry on the first piece. I pushed the new piece in and they both went in too far. This made a mess, and I'm not happy about it.  Thankfully, there is a plate that'll be going over all this and it'll hide my mess. I only painted the foam so there wasn't any blue behind the plate. Now, I just have to figure out how I'm going to hang it. 
__________________
Current project - To view links or images in signatures your post count must be 0 or greater. You currently have 0 posts. To view links or images in signatures your post count must be 0 or greater. You currently have 0 posts. & To view links or images in signatures your post count must be 0 or greater. You currently have 0 posts. |

|

|
|
10-07-08, 07:34 AM
|
#2 |
|
Apprentice EcoRenovator
Join Date: Sep 2008
Posts: 183
Thanks: 1
Thanked 1 Time in 1 Post
|
i did actually know that spray paint eats Styrofoam... kinda neat, huh. lol
good work. tomorrow is a trip to home depot for me to get about 10 more tubes of caulk... maybe some of that expanding foam too, cause I have a gapping hole above the drop ceiling in my top floor bedroom that I could just feel heat pouring out of when i was working up there on a hot day last week. for 'neat' caulking, you basically need a crap load of paper towels (usually i'll take one and break it into 6 pieces) and just use your finger to smooth the caulk. it's so wasteful though... i was thinking the other day that I need a pastry bag or something to scrap the excess caulk into, then reuse it from there. |
|
|
|
|
10-07-08, 09:46 AM
|
#3 |
|
avid DIY'r

Join Date: Sep 2008
Location: MS. Gulf Coast
Posts: 154
Thanks: 0
Thanked 1 Time in 1 Post
|
I'm sure most of you may know this.... a popscicle stick, or tongue depresser thingy (bigger stick) works great for caulking. a little less messy on the hands, and gives a nice, smooth and even joint. the gap you're trying to caulk dictates the size stick to use.
|
|
|
|
|
10-11-08, 08:15 AM
|
#4 |
|
Lurking Renovator
Join Date: Oct 2008
Posts: 9
Thanks: 0
Thanked 0 Times in 0 Posts
|
I've always used the handle end of a toothbrush or small nylon brush, great for cleaning cracks and crevasses before adding your caulk.
__________________
"live your life as an experiment"-- B. Fuller If we can't be free, at least we can be cheap"--F. Zappa To view links or images in signatures your post count must be 0 or greater. You currently have 0 posts. |
|
|
|
|
10-12-08, 05:09 AM
|
#5 |
|
avid DIY'r
Join Date: Sep 2008
Location: MS. Gulf Coast
Posts: 154
Thanks: 0
Thanked 1 Time in 1 Post
|
that's a great idea! I'll try that next time.
|
|
|
|
|
10-14-08, 08:51 AM
|
#6 |
|
Administrator
Join Date: Aug 2008
Location: Germantown, WI
Posts: 5,525
Thanks: 1,162
Thanked 374 Times in 305 Posts
|
Well, still working on sealing things up this weekend. My cousin's father in law came over with his hammer drill and hung the plate for me. Looks a lot better than my melted foam.
  The next thing on the list was my horrible outside access basement door. You can see from the picture that a little air was getting through it. It also likes to leak water in when it rains. 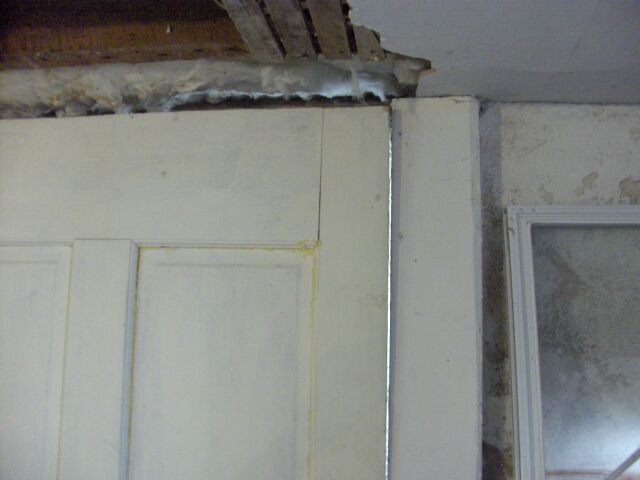 So, I had the recommendation to get a metal door replacement. I got a tip that you can get damaged doors from the home improvement stores super cheap. So, I went and checked it out. I ended up finding a nice grey door with two holes in it (lock and handle). There was a little damage on the top where the metal didn't fold over just right, but nothing that prevented normal operation. So, I picked it up for $3. The block off for the door cost more than the door itself at $5! So, along with those two things and weather stripping, this is my $20 fix. I do still need a good way of sealing the bottom edge though. The door butts up against the side of the lowest step. Any ideas? 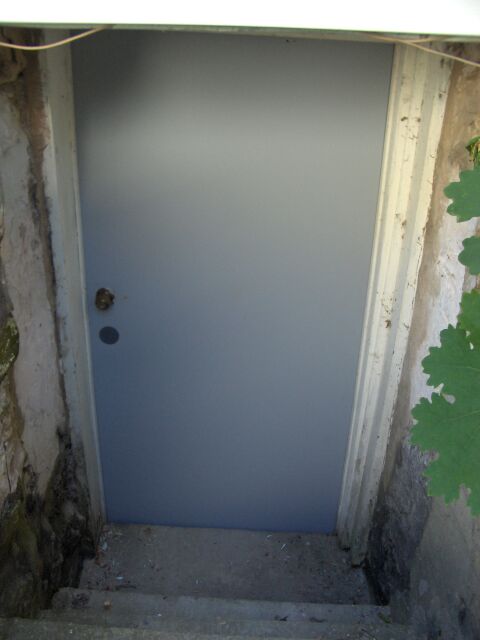
__________________
Current project - To view links or images in signatures your post count must be 0 or greater. You currently have 0 posts. To view links or images in signatures your post count must be 0 or greater. You currently have 0 posts. & To view links or images in signatures your post count must be 0 or greater. You currently have 0 posts. |
|
|
|
|
10-15-08, 11:23 AM
|
#7 |
|
avid DIY'r
Join Date: Sep 2008
Location: MS. Gulf Coast
Posts: 154
Thanks: 0
Thanked 1 Time in 1 Post
|
How about a piece of foam the size of the step?
|
|
|
|
|
10-15-08, 11:44 AM
|
#8 |
|
Apprentice EcoRenovator
Join Date: Sep 2008
Posts: 183
Thanks: 1
Thanked 1 Time in 1 Post
|
i'm still working on my stuff. i did something dumb yesterday, but i really don't care. I caulked, entirely closed, 4 of my 5 basement windows. the 5th is in a room was sold to us as a 'bedroom' (now my game room), so i just stuffed cut up pipe insulation in the holes. but here yesterday was 80 degrees, and through those windows i still felt massive drafts. so yea, all sealed up now! lol.
|
|
|
|
|
10-15-08, 12:18 PM
|
#9 |
|
Administrator
Join Date: Aug 2008
Location: Germantown, WI
Posts: 5,525
Thanks: 1,162
Thanked 374 Times in 305 Posts
|
As long as you don't need to get the windows open! I can't imagine caulk is easy to remove once dried.
__________________
Current project - To view links or images in signatures your post count must be 0 or greater. You currently have 0 posts. To view links or images in signatures your post count must be 0 or greater. You currently have 0 posts. & To view links or images in signatures your post count must be 0 or greater. You currently have 0 posts. |
|
|
|
|
10-20-08, 12:14 PM
|
#10 |
|
Administrator
Join Date: Aug 2008
Location: Germantown, WI
Posts: 5,525
Thanks: 1,162
Thanked 374 Times in 305 Posts
|
Well, one more weekend of caulking. I finally got most of it done. Just need to finish up on the tops of some of the windows. I didn't have a short ladder to get the top strips. I did caulk enough to make my hand sore though! None of the windows on the entire house were caulked. The window trim had sizable gaps in some areas, and up to 1/4" between the window trip and siding. I'm glad I got it done before winter.
__________________
Current project - To view links or images in signatures your post count must be 0 or greater. You currently have 0 posts. To view links or images in signatures your post count must be 0 or greater. You currently have 0 posts. & To view links or images in signatures your post count must be 0 or greater. You currently have 0 posts. |
|
|
|
 |
| Tags |
| air, caulk, expanding foam, leak, seal, window |
|
|


 Linear Mode

