
 |
|
|
#1 |
|
Apprentice EcoRenovator
Join Date: Jun 2010
Posts: 206
Thanks: 1
Thanked 18 Times in 17 Posts
|
Goofing off in Quartzsite, I built a prototype SVO burner, sort of based on the ones that metal casters use, I picked up a cast Iron pot, made a hole in the side, put a 1/4" copper tube down the center of a 3/4" iron pipe. Copper pipe to drip oil, iron pipe to deliver air supplied by a $5 used air mattress inflator, after a bit of mucking about got it to run well enough to get the burner pot red hot on one side. Will build a mark ll to heat our hillbilly hot tub when I get home in the spring. will post pics then.
|
|
|

|
|
|
#2 |
|
Administrator
Join Date: Aug 2008
Location: Germantown, WI
Posts: 5,525
Thanks: 1,162
Thanked 374 Times in 305 Posts
|
Interesting. I definitely would like to see pics.
__________________
Current project - To view links or images in signatures your post count must be 0 or greater. You currently have 0 posts. To view links or images in signatures your post count must be 0 or greater. You currently have 0 posts. & To view links or images in signatures your post count must be 0 or greater. You currently have 0 posts. |
|
|

|
|
|
#3 |
|
Apprentice EcoRenovator
Join Date: Jun 2010
Posts: 206
Thanks: 1
Thanked 18 Times in 17 Posts
|
potburner
Click on Potburner This is a slide show of the prototype burning a mix of WMO and petro diesel. The air supply is a vacuum cleaner. As you can see it was a bit tough getting up to heat because of the snow. the plan is to put the pot under a 20 gal water tank, plumbed into the hillbilly hot tub. Burning WMO because I had it, & have not begun collecting WVO. The pot seemed to waver a little, would die down and smoke (not much) then build up and burn cleanly. the big valve handle set at about 45deg controls the air, the little oil feed valve controls the drip. the drip tube runs inside the air tube, and at the end of the air/drip tube there is lodged a piece of honey comb similar to the material in a catalytic converter. Last edited by nibs; 03-09-11 at 07:36 PM.. |
|
|

|
|
|
#4 |
|
Apprentice EcoRenovator
Join Date: Jun 2010
Posts: 206
Thanks: 1
Thanked 18 Times in 17 Posts
|
http://www.flickr.com/photos/technic...52774178/show/
Since I want to heat a tank of water with this heater, I tried replacing the pot with a piece of exhaust pipe, drilled to allow the flame to be directed at the underside of the water tank. (pot and jack are just temp supports here) Yesterdays pics were using a vacuum cleaner for air, I replaced the vac with a 12V air mattress inflater that I picked up for $5. I will continue to tweak the flame tube to optimize air/fuel mixture. It burns pretty well smoke free, now comes the supports for the water tank then the plumbing for the tub, we are hoping to get away with no pump, but if we do have to pump the water, we will use a 12V RV water pump powered by a PV panel. Last edited by nibs; 03-12-11 at 08:15 PM.. |
|
|

|
|
|
#5 |
|
Apprentice EcoRenovator
Join Date: Jun 2010
Posts: 206
Thanks: 1
Thanked 18 Times in 17 Posts
|
Here are some pics of the burner as it evolves, I got a heater fan from an old jeep truck, and mounted the 'gun' on it, it works much better and is more quiet than the vacuum cleaner or mattress inflator, can also control the speed by feeding it 6V or 12V. you can see the fuel delivery tube held in the center of the air pipe by the three set screws.Yesterday I connected a 12V rv water pump because it did not seem to want to flow on its own just from heating the water. I picked up the pretty red water tank in Quartzsite for just $10, Had to weld a coupling for water inlet, it had one leak, but it sealed up with rtv, if that lets go, will have to weld it, so far so good. Today I mounted a snap switch to control the pump. To light the burner, I put a propane torch on the ignition pipe right at the fuel tube tip, then pour about 2 table spoons of diesel into the drip tube, the propane burner lights it up, and after a few minutes I remove the propane torch. Ran into fuel problems today, the jugs I used to use to put WVO into our motor home, were just abandoned about 4 years ago, I started using them again, only to find that they had grown some gunk which mucked up the new VO we got last week.
The burner is a bit slow yet but am working on getting it to heat the water quicker. Any tips will be welcome. water heating pics Last edited by nibs; 03-29-11 at 12:39 AM.. |
|
|

|
|
|
#6 |
|
Apprentice EcoRenovator
Join Date: Jun 2010
Posts: 206
Thanks: 1
Thanked 18 Times in 17 Posts
|
So I was kind of disappointed with the svo burner put it on the shelf for a month or so, busy with other stuff, but over the last week began working on it again.
Decided that the big problem was heat loss, so built a metal box, and built a series of U shaped tubes. Mounted them so that some are in the fire box and some are on top of the firebox (2 rectangular clay chimney sections) put in the stainless steel expanded metal to try and make a hot place to burn all the oil vapor. Oil vapor condensing on the water pipes is a problem. Closed up the rear end with fire bricks, put pieces of cement board against the sides of the firebox and one on top of the pipes on the outside of the firebox. Then filled the whole thing with perlite. Lo & behold once we got it lit, which was a bit of a struggle, as I had "improved" the oil gun, - gonna put it back the way it used to be cause it worked better than the improvement. Any way got it lit on propane, then turned on the oil, had to keep a little bit of propane going to keep things hot enough, but we got the hot tub up to temp in about two hours. from 90 deg to 105 deg. Just about the same speed as the propane heater we were using. svo water heater Please no cracks about my soldering - it did not leak - & thats good enough!!! The big prob is trying to get the firebox hot enough to vaporize all the svo, while cooling it with water running through the pipes. Still gonna have to tinker with it, but burning svo to heat our hill billy hot tub will save us about $65/month on propane & we had to use elec to pump the water anyway so that is not an additional expense. Last edited by nibs; 05-20-11 at 01:59 AM.. Reason: note re soldering |
|
|

|
|
|
#7 |
|
Apprentice EcoRenovator
Join Date: Jun 2010
Posts: 206
Thanks: 1
Thanked 18 Times in 17 Posts
|
Well, out of frustration I decided to try building a Babington burner, right off it worked well, and yesterday after reworking the plumbing, to suit the new burner, YAHOO we heated the hot tub using veggie oil. To bring the temp up from 92 deg F to 104 deg F took about 2.5 hrs, compared to the 2 hrs it would have taken using propane. Best of all, the fuel is free, except for costs for collecting. will provide pics soon.
|
|
|

|
|
|
#8 |
|
Apprentice EcoRenovator
Join Date: Jun 2010
Posts: 206
Thanks: 1
Thanked 18 Times in 17 Posts
|
burner mcdown
Here is a slide show of the current stage of development for my hillbilly hot tub heater running on SVO & or WMO. 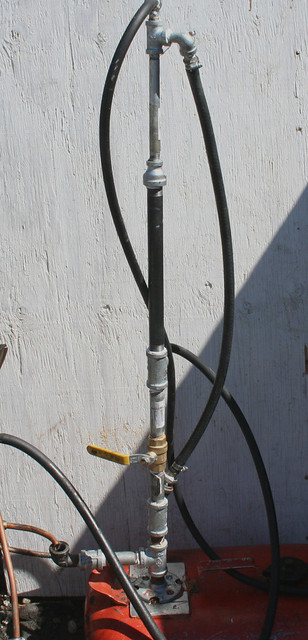 The first pic is of the fuel supply system, mounted on an outboard motor fuel tank, I took out the fuel gage and put the xmas tree there. The fuel is pumped to the top of the pipe, then the next pipe takes the pump overflow back to the tank, the third pipe is the fuel supply for the burner, the yellow ball valve handle allows me to dump all the oil back into the tank. the lower elbow with a pipe is the overflow from the babington ball being returned to the tank. 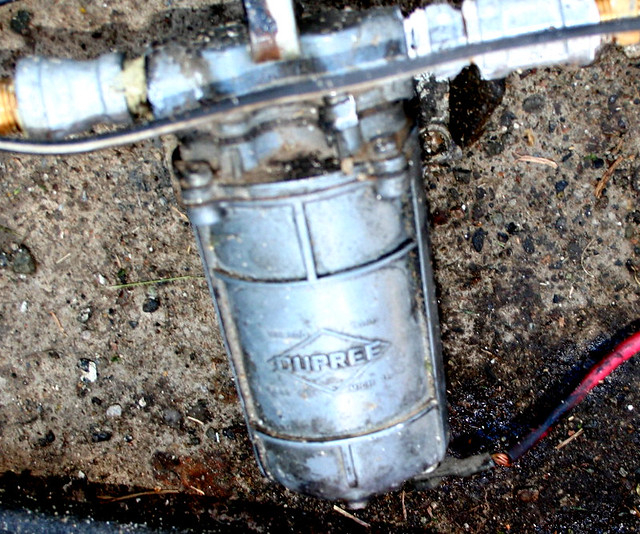 Next is a rotten pic of the solenoid type fuel pump which puts the oil into the top of the xmas tree. 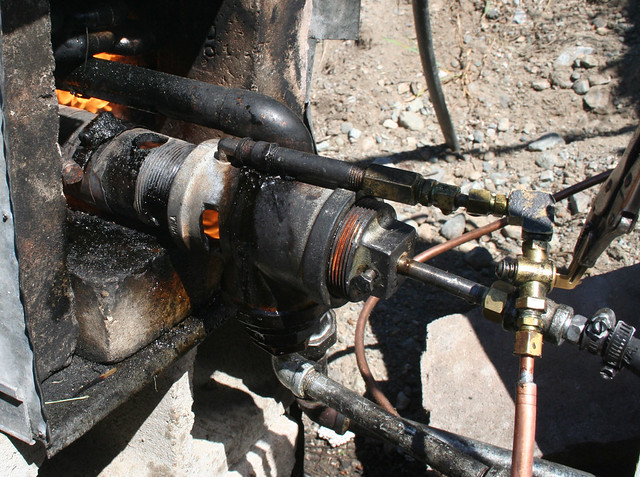 I think the next pic (if I recall proper like) is the burner heating the water tubes, the valve with the vice grip is the oil line, the 1/4 plumbing nipple is the compressed air line feeding the air jet on the ball. The lower pipe is the oil return from the babington ball, on its way back to the tank. 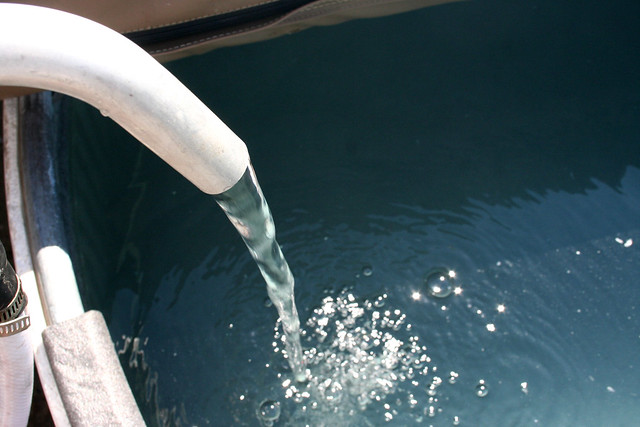   Then a couple of pics of the hot tub, & heated water supply, simply a livestock watering tank 6' dia 2' deep, 380 gallons +/-. we have about 1.5" inches of insulation on the sides of the tank, and 2" underneath. 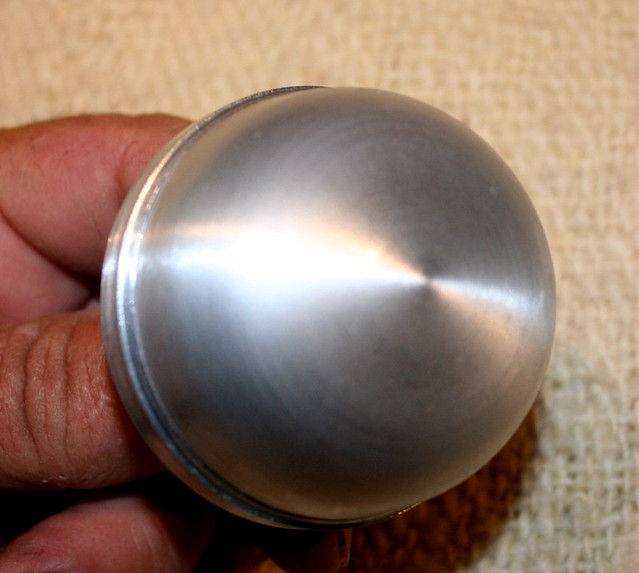  The last pics are of the new ball I am making, it is larger than the last two I made, and is waiting for a set of drill bits to drill the orifice for the compressed air, which vaporizes the SVO for ignition. The orifice will be 10 thousandths of an inch, the current ball is much smaller 5/8" diameter and compressed air orifice is 13 thou" we are running it at 50 psi.. The bigger ball, with smaller orifice should give me better control and use less oil. The burner - named Bernie McDown replaces a propane hot water heater, which cost us about $60 a month to heat the tub, we sit out in the tub most evenings, and watch the stars, burning svo and or wmo it saves us at least 3 bottles of scotch a month. I like to add a little used motor oil to my SVO it seems to keep the critters (bears & coyotes) away from the french fry smelling WVO, I also put the oil through a mesh screen and into a metal tank, when I first get it, to keep the critters out of it. To find out more about Babington burners, just search on babington, there is tons of information available. Tony. Daox, if you read this feel free to bring the pics over from Flickr, for some reason I cannot. Last edited by Daox; 08-02-11 at 09:16 AM.. |
|
|

|
|
|
#9 |
|
Administrator
Join Date: Aug 2008
Location: Germantown, WI
Posts: 5,525
Thanks: 1,162
Thanked 374 Times in 305 Posts
|
Yeah, I see its a bit of a pain to bring the pics over. First, you have to right click on them. It'll say 'all rights reservered' and you click on one of the 'view all sizes' links. After that you can do another right click and properties on the picture and grab the URL from there.
You can always upload the images to the forum when making a new post. Anyway, its very cool to hear about the updates on the project. You say you had some WVO laying around, do you have a steady supply of it now?
__________________
Current project - To view links or images in signatures your post count must be 0 or greater. You currently have 0 posts. To view links or images in signatures your post count must be 0 or greater. You currently have 0 posts. & To view links or images in signatures your post count must be 0 or greater. You currently have 0 posts. Last edited by Daox; 08-02-11 at 09:20 AM.. |
|
|

|
|
|
#10 |
|
Apprentice EcoRenovator
Join Date: Jun 2010
Posts: 206
Thanks: 1
Thanked 18 Times in 17 Posts
|
This morning I am waiting for the shop to warm up then will be working on replacing the 2" flame tube with a 3" tube, and will add more copper tubing hoping to increase the water temp rise, one of the problems here is difficulty obtaining enough veggie oil, so want to maximize the efficiency.
The other change I am making this week is the addition of an automotive stick on oil pan heater, to heat the oil in the reservoir, this should allow me to burn any kind of waste oil, and allow us to operate the hot tub in colder weather. |
|
|

|
 |
|
|