
|
 02-27-09, 08:21 AM
|
#31 |
|
Administrator

Join Date: Aug 2008
Location: Germantown, WI
Posts: 5,525
Thanks: 1,162
Thanked 374 Times in 305 Posts
|
I also took some time to fiddle around with the mower itself. First off, I removed the gas tank. We definitely don't be needing that anymore.
 I also removed the starter solenoid that you see in the pictures. I also removed the starter solenoid that you see in the pictures.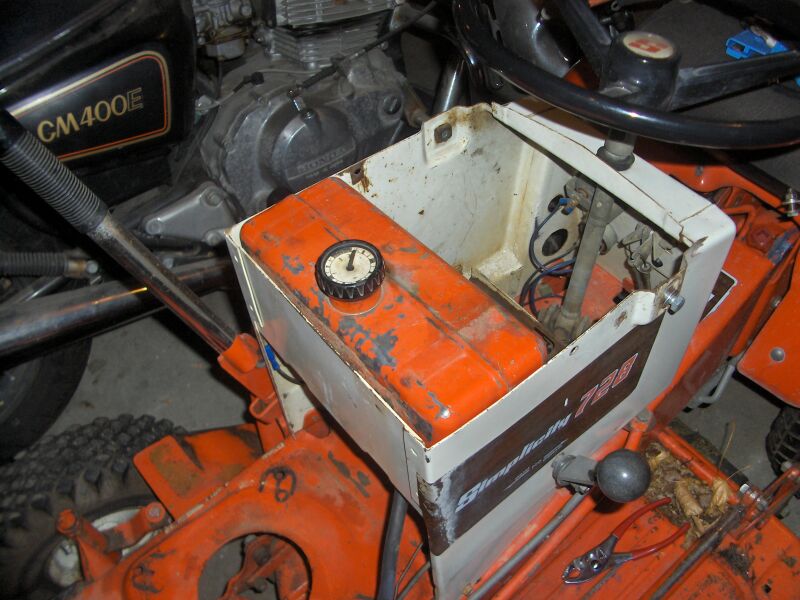  After removing those bits, I marked where the motor will sit, and played around with how the batteries will sit into the mower. You would think with all those smaller batteries that it would be easier to find places for them. Well, you might be wrong. The mower isn't really all that big. But, I think I have found places for all 24 batteries. 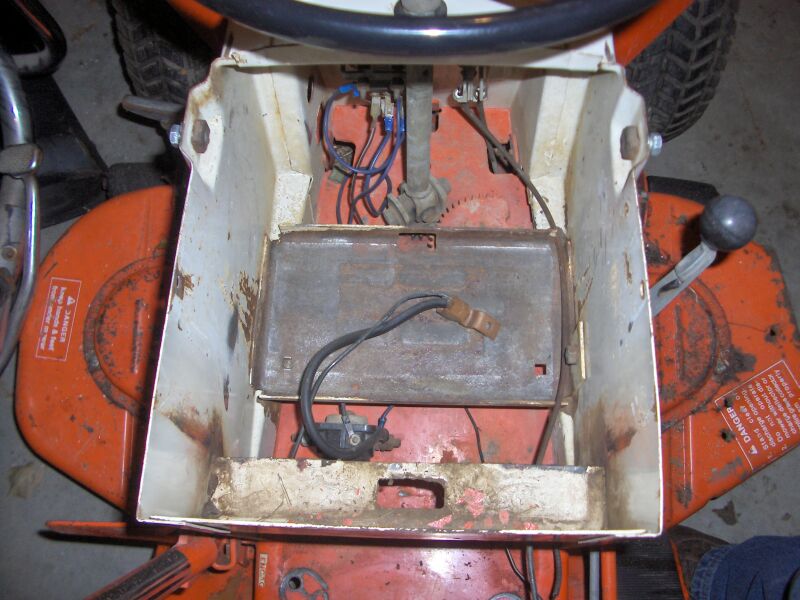  Last edited by Daox; 02-27-09 at 02:46 PM.. |

|

|
|
02-27-09, 09:49 AM
|
#32 |
|
Home-Wrecker
Join Date: Sep 2008
Location: SE Wisconsin
Posts: 546
Thanks: 3
Thanked 165 Times in 96 Posts
|
The commutator and brushes on your motor look great!
Having a tail-shaft is nice too. It opens up some possibilities. I wouldn't have been able to do a home-brew coupler the way I did without the tailshaft on my motor. As for color scheme - gloss black with neon green lightning bolts!  Rich's nephew, Tom, who was out at the last EV build day also wants to build a n EV riding lawn mower. You will have to talk with him if you make it out to this weeks build.
__________________
To view links or images in signatures your post count must be 0 or greater. You currently have 0 posts. To view links or images in signatures your post count must be 0 or greater. You currently have 0 posts. |
|
|
|
|
02-28-09, 12:58 PM
|
#33 |
|
Administrator
Join Date: Aug 2008
Location: Germantown, WI
Posts: 5,525
Thanks: 1,162
Thanked 374 Times in 305 Posts
|
I'm keeping at it. This morning I drilled and tapped the holes in the end of the motor and reassembled it.
I printed out a template to help with the drilling. That pattern isn't exactly centered on the motor, but there really aren't any alignment requirements since the motor just has belts going to it. This really simplifies things. I decided on a 6 bolt pattern since the casting wasn't quite as thick as I had hoped, and I also went with 3/8-24 (fine thread) tapped holes to give it extra holding power. This is probably overkill, but its a lot easier to drill and tap two more holes than it is to fix a problem later on.  I drilled pilot holes first with the template to get things started. 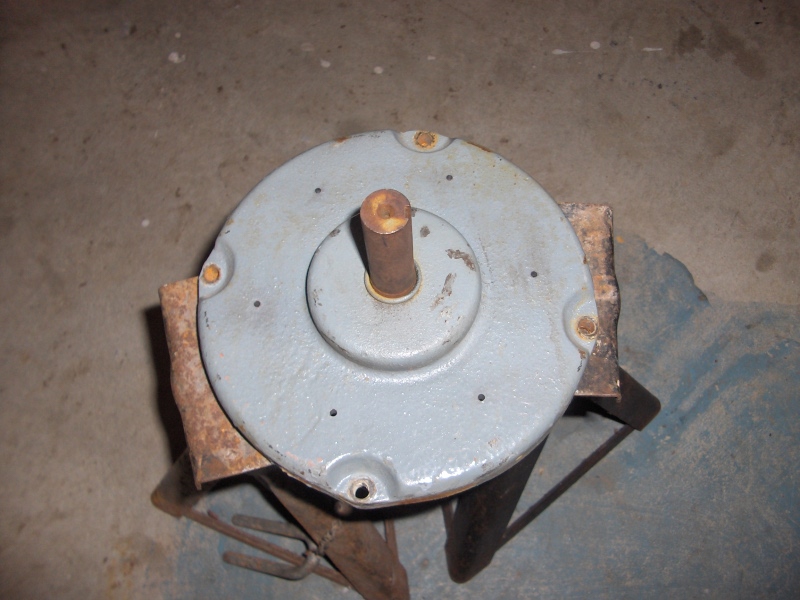 My battery drill battery ended up dying on me after the first two holes. Waiting for it to charge, I went ahead and tapped the holes. 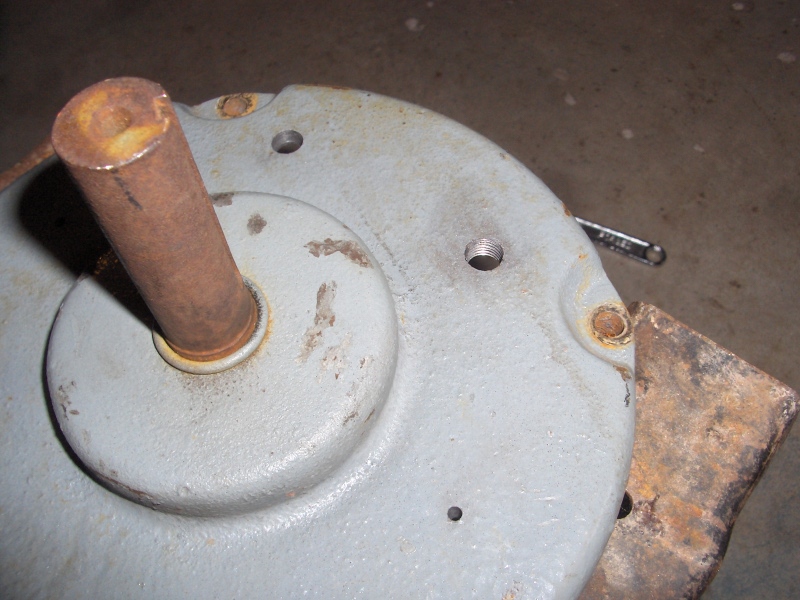 A little while longer, the battery was done recharging (yay for fast charge lithium) and I popped the rest of the holes in and tapped them as well. 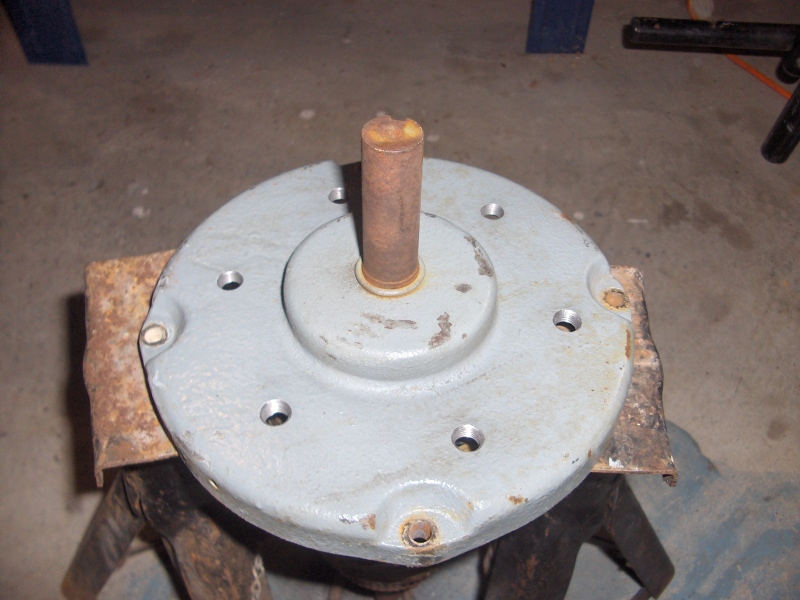 And, finally I reassembled the motor. 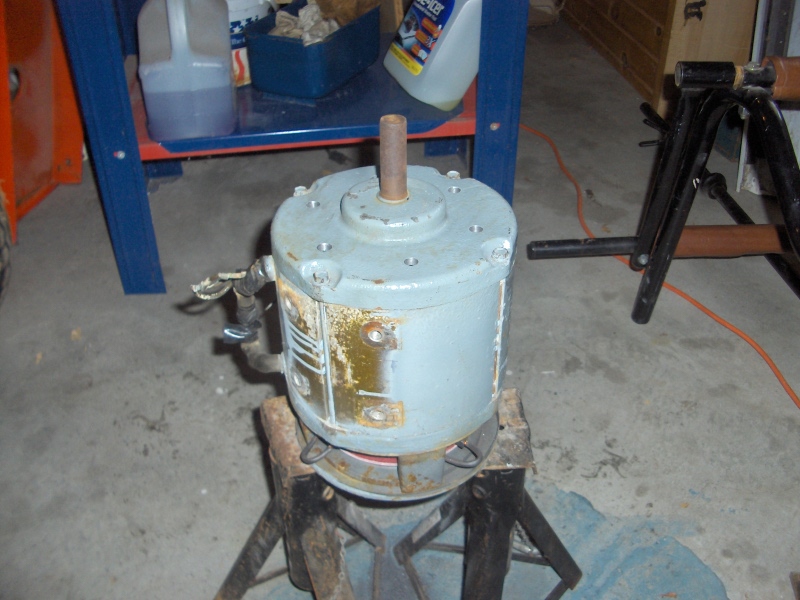 I also ran to the local bearing supply company and picked up two pullies. Since the motor is rated at 3200 rpm I'm guessing I won't be way too far off going with slightly larger pullies. I'm guessing the gas engine spun around 3000-3500 rpm. If I'm way off, I can always get new pullies. 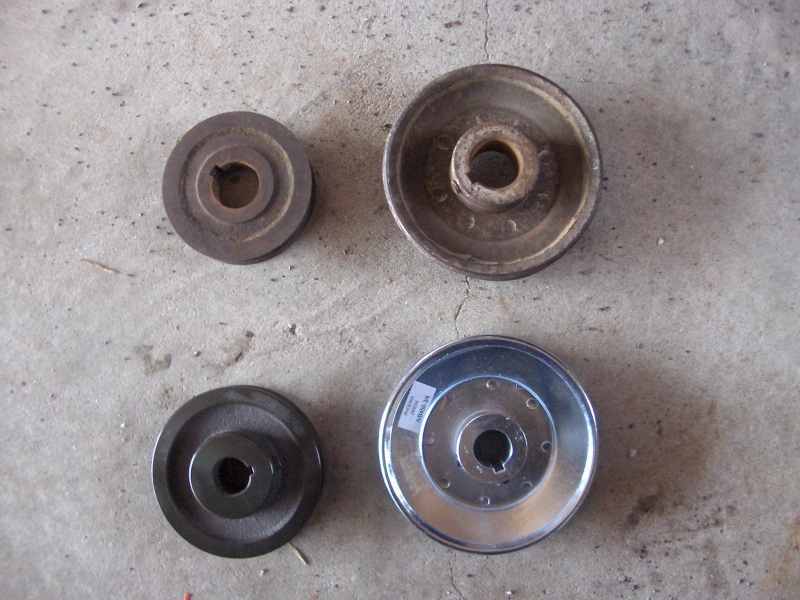 The one problem I may have to find a fix for is the drive pulley. The stock one has no hub on the side and is much thinner. I'm not sure how both of the pullies will fit on the motor shaft. If worst comes to worst I'll simply chop off the hub, and drill and tap a set screw hole in the middle of the V like the stock pulley. 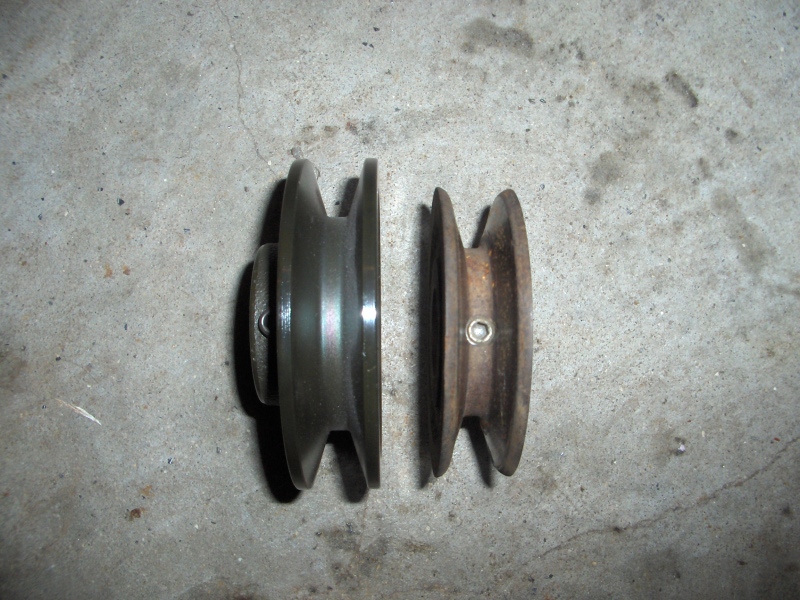 |
|
|
|
|
03-05-09, 09:27 PM
|
#34 |
|
Administrator
Join Date: Aug 2008
Location: Germantown, WI
Posts: 5,525
Thanks: 1,162
Thanked 374 Times in 305 Posts
|
I've been working on the battery racks for the past few days. Its is going to take a while since there are 24 batteries! I started with the back end. I wanted to get as many in the rear as I could to free up space in the front of the mower. I was only able to get 6 in the back, but thats 6 less I need to find space for up front.
This rack will hold four batteries. The one on the other side will only be able to hold two.  I'll make some sort of clamping mechanism to hold the batteries solidly. Also, another piece of angle will be welded above it for the additional two batteries. 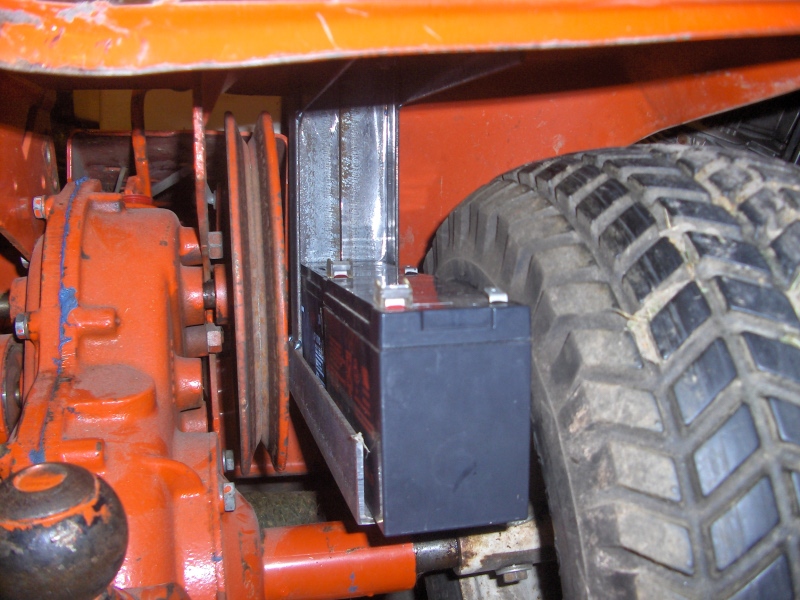 |
|
|
|
|
03-06-09, 07:04 AM
|
#35 |
|
Infrequent noob
Join Date: Aug 2008
Location: 1000 Islands region, Ontario, Canada
Posts: 402
Thanks: 37
Thanked 20 Times in 19 Posts
|
Cool - another update. Watching with interest.
__________________
.
|
|
|
|
|
03-17-09, 02:48 PM
|
#36 |
|
Administrator
Join Date: Aug 2008
Location: Germantown, WI
Posts: 5,525
Thanks: 1,162
Thanked 374 Times in 305 Posts
|
I haven't had a chance to do any real work on the mower unfortunately. However, I have been looking at what else I'll need to have once I get the batteries mounted.
First off, I setup one of my contactors to operate off the stock key/switch. So, that will remain on the mower and be my on/off switch. It even has a momentary setting for starting the gas engine. Perhaps I'll use it as a soft start if need be. I also got an ammeter from Ben Nelson. It is rated to 200A which I hope will be way more than I need. I figure if I'm pulling 100A constantly I'm going to have about 45 minutes of run time. I'd like to have a bit more than that. I don't remember exactly how long it took to cut the grass before, but 45 minutes is probably cutting it close. I've also been looking at voltmeters for the mower. Something like this would be nice. However, I'm also looking into a way to monitor each battery so I know if there is a weak one. If I don't monitor them all individually, I'm bound to have problems with killing batteries. So, I googled and found this tutorial on how to make cheap battery monitors. Unless I get some bad feedback on this design, I'll probably go ahead and make one for the mower. 24 LEDs will light up, as soon as one battery's voltage drops too low, the light goes out and I know its time to bring the mower in. It will also allow me to find that bad battery and replace it if need be. |
|
|
|
|
03-17-09, 03:37 PM
|
#37 |
|
The Gardener
Join Date: Oct 2008
Location: Manitoba - Canada
Posts: 492
Thanks: 17
Thanked 8 Times in 7 Posts
|
I'm tellin ya...you need to make it look like a time machine from the 50's B movies.
|
|
|
|
|
03-23-09, 09:12 AM
|
#38 |
|
Administrator
Join Date: Aug 2008
Location: Germantown, WI
Posts: 5,525
Thanks: 1,162
Thanked 374 Times in 305 Posts
|
For reasons of documentation I am putting this here.
The on/off contactor I'm planning on using for the mower pulls .8A @ 12V. This is less than I had heard they pull. |
|
|
|
|
05-04-09, 02:04 PM
|
#39 |
|
Administrator
Join Date: Aug 2008
Location: Germantown, WI
Posts: 5,525
Thanks: 1,162
Thanked 374 Times in 305 Posts
|
Well, progress on this project has been stopped cold in its tracks. I've been too busy fixing other things and what not and just haven't had time to work on it. Of course, now its spring and the grass is starting to grow and I want to use it. The battery mount progression on the mower has been horrible and I don't have much done at all. So, I'm really thinking about trying to get some larger used deep cycle batteries from the local truck repair place or forklift repair place. That way I would only need to mount three batteries. I'll be stopping by the truck place this week to see if I can scrounge up some batteries.
|
|
|
|
|
05-18-09, 09:18 AM
|
#40 |
|
Administrator
Join Date: Aug 2008
Location: Germantown, WI
Posts: 5,525
Thanks: 1,162
Thanked 374 Times in 305 Posts
|
Well, no luck at the truck stop unfortunately. I guess semis don't use deep cycles, but just normal starting batteries. I did get the number of their battery supplier though, and it looks like they deal in anything and everything battery related.
In the mean time, I have gotten the motor mostly mounted to the chassis. I'm going to rig up some regular starting batteries I have laying around and go for a short ride to see how many amps the mower pulls in action. This should give me a really good idea of how much capacity the battery pack will need. Pics to follow soon! |
|
|
|
 |
| Tags |
| conversion, electric, lawn mower, tractor |
| Thread Tools | |
| Display Modes | |
|
|


 Linear Mode

