
|
 05-16-11, 09:42 PM
|
#1 |
|
Apprentice EcoRenovator
Join Date: Jun 2010
Posts: 206
Thanks: 1
Thanked 18 Times in 17 Posts
|
We are building a 10'X10' passive solar greenhouse, foundation for the back wall is in, the back (north) wall is rock and mortar/with concrete behind, 2' thick and 6'high Its only 2'4" high to date, the north side of the wall looks like a wood fence, then there is 2" to 4" of styrofoam insulation, then the rock wall. The idea is that the rocks will absorb daytime heat, and release it into the greenhouse at night, the styrofoam is to keep the heat from being dissipated into the air outside. We are slip forming the rock wall through bolting the form and the wood wall on the north side. Have figured out a neat trick for the cleanup when we pull the forms off. Took an old bed sheet and fixed it to the inside of the form, then painted sugar syrup onto the bed sheet, the night before, this retards the mortar setting, when we pull the form off the mortar in contact with the sheet cleans right up, you can hose it or scrape it, much like the exposed aggregate folks do. All the articles we have read on slip forming rock walls say clean up is a bear. Well it is still work, mainly because we are still learning how to handle the retarding and rock placing, but is definitely easier.
We picked up 4 double glazed sliders from patio doors, which will be the south wall. for the side walls we have some windows and a glass door for the entry. Will likely use polycarbonate wavy sheets for the roof. If someone will tell me how to put pictures up on the site using flickr, I will photo the progress. Last edited by nibs; 05-19-11 at 11:33 PM.. |

|

|
|
05-17-11, 06:34 AM
|
#2 |
|
Journeyman EcoRenovator

Join Date: May 2009
Location: Buffalo, NY
Posts: 344
Thanks: 3
Thanked 17 Times in 15 Posts
|
I assume you've already logged in to Flickr and uploaded your photos. So look at a photo, click "More ways to share" to the right of "Actions", then "Grab the link". Hit the BBCode button. Paste that block of text, or at least the part betweeen the [img] and the [/img], and post that code on the forum.
Any link to an image file placed between [img] [/img] tags shows up as a photo embedded in your post. |
|
|
|
|
05-17-11, 09:15 PM
|
#3 |
|
Apprentice EcoRenovator
Join Date: Jun 2010
Posts: 206
Thanks: 1
Thanked 18 Times in 17 Posts
|
Not having any luck showing pictures, keep getting kicked out of the reply frame.
http://www.flickr.com/photos/technic...46398114/show/ Here is slide show of construction to date. Opens with footing and anchor bolts through mud sill tied together with rebar. next finished footing, then todays pics, you can see the white sugar soaked sheet on the forms, the rock wall with styrofoam insulation behind, then you can see me showing the all thread rod in plastic tube ready to have the form put back, and the ready rod waiting for the next form and covering pipe. The last pic is of the north side, with ready rod in place through spreaders to spread the load of the concrete, these will be taken away and the ready rod holes filled with foam. To our neighbor itwill look like a wood fence. Last edited by nibs; 05-17-11 at 09:28 PM.. |
|
|
|
|
05-19-11, 09:53 PM
|
#4 |
|
Apprentice EcoRenovator
Join Date: Jun 2010
Posts: 206
Thanks: 1
Thanked 18 Times in 17 Posts
|
Yesterday we raised the North wall another 12" (we do small raises because we are geezers)
Here is a slide show of the work we did. greenhouse2 In the last slideshow we showed the forms ready to be installed, with sugar syrup coating. First pic shows the forms in place and the top one filled, the lower one was filled a few days before, but is reinstalled to hold mortar from dropping right out of the form. Then you can see the new raise rock & mortar, the way it looks when the form comes off (about 1.5 hours after it is filled). Then pics of swmbo cleaning off the mortar. showing pretty much what the wall will look like. The sugar to retard the mortar setting is a really big deal, we were unable to find any reference to retarding the mortar when slip forming rock walls, the only reference we could find was for coatings applied to forms so that the concrete could be washed away for exposed aggregate. We did the first raise with no sugar retarder, cleaning up was a real bear & took two of us a number of hours. with the sugar we did the clean up easily in an hour, without killing ourselves. The sugar is a real real help. sorry that I do not seem to be able to post pics the slide show will have to do. Tony. |
|
|
|
|
06-02-11, 10:57 AM
|
#5 |
|
Apprentice EcoRenovator
Join Date: Jun 2010
Posts: 206
Thanks: 1
Thanked 18 Times in 17 Posts
|
Well we have finished the rock wall which is the north wall of the greenhouse. We have collected the sliders from patio doors and some other windows - aint Habitat great?.
Right now waiting for a friend to deliver the wood for framing the greenhouse, and will start digging the footings for the three glazing walls. Tony |
|
|
|
|
06-17-11, 12:04 AM
|
#6 |
|
Apprentice EcoRenovator
Join Date: Jun 2010
Posts: 206
Thanks: 1
Thanked 18 Times in 17 Posts
|
Footings poured now and backfilled, made the mud sills today, will bolt them down tomorrow & then we are out of the ground, will put the roof on first, then will fill in the spaces with windows we have been collecting for the glazing walls.
|
|
|
|
|
07-17-11, 01:45 PM
|
#7 |
|
Apprentice EcoRenovator
Join Date: Jun 2010
Posts: 206
Thanks: 1
Thanked 18 Times in 17 Posts
|
Well the greenhouse is functional, cost less than $600. plants seem to thrive, mostly because of SWMBO's green thumb. The greenhouse needs a door handle, a few pcs of outside trim and insulating and planking on the inside where there are no windows. The rock wall is working exactly as hoped for, warms up during the day and warms the gh overnight.
If I was building it again, I would make the rock wall 12' long and the south wall 8' away, this would increase the effect of the rock wall, and make the roof line a bit steeper. greenhouse2 This will be the last post I make on the thread unless some information comes to light that should be shared, or if there are questions. Sorry about the slide show, but for some reason cannot get images into my post. If any one wants to take the time to bring the pictures over, please do. 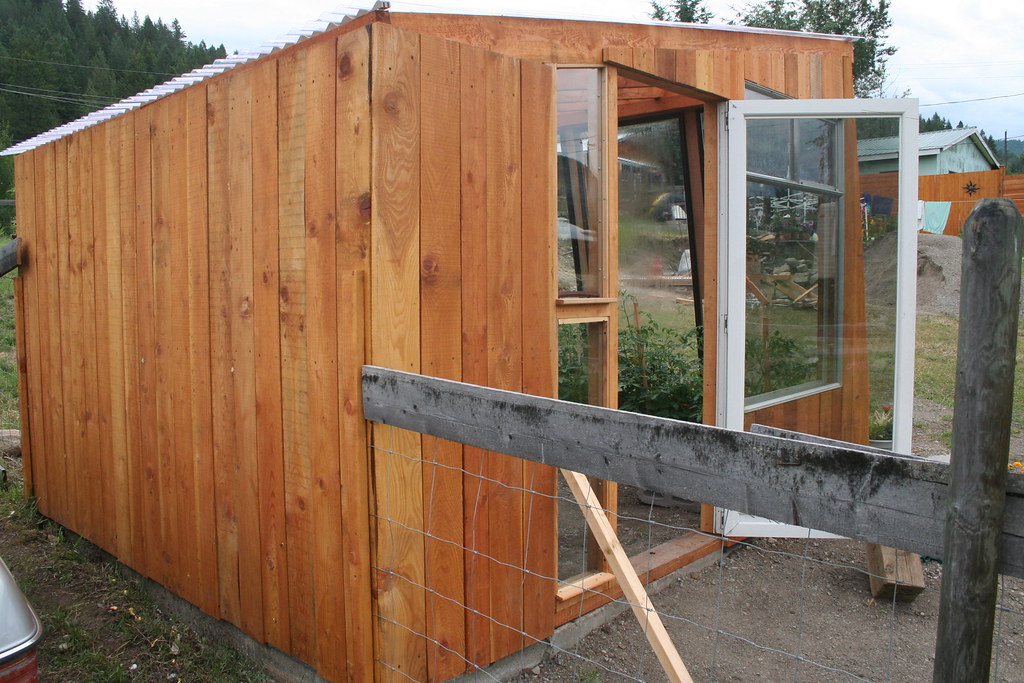 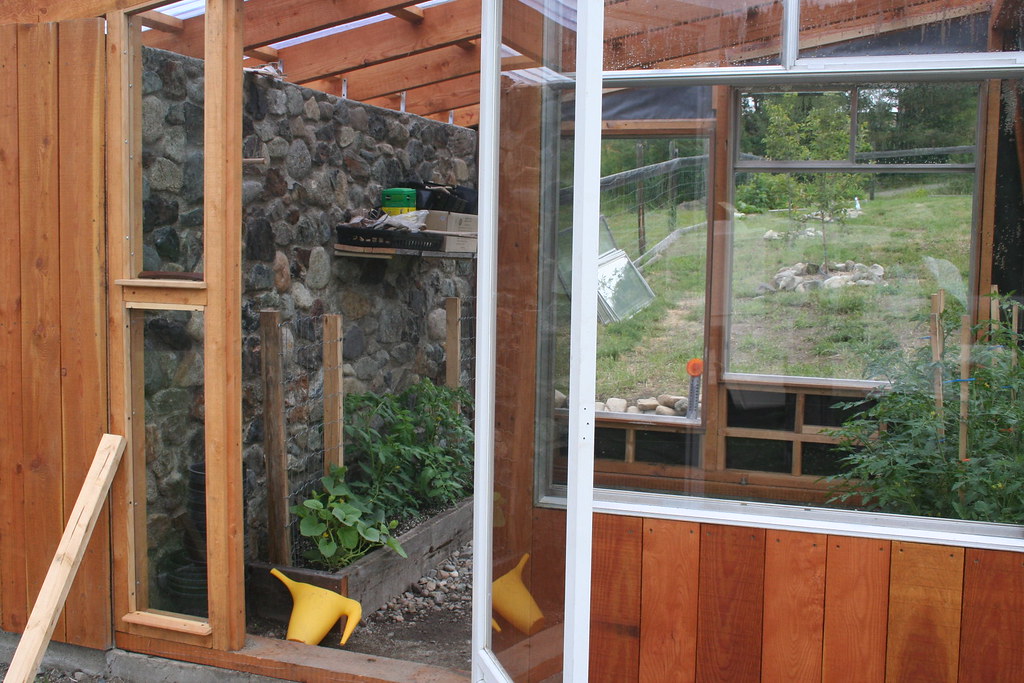 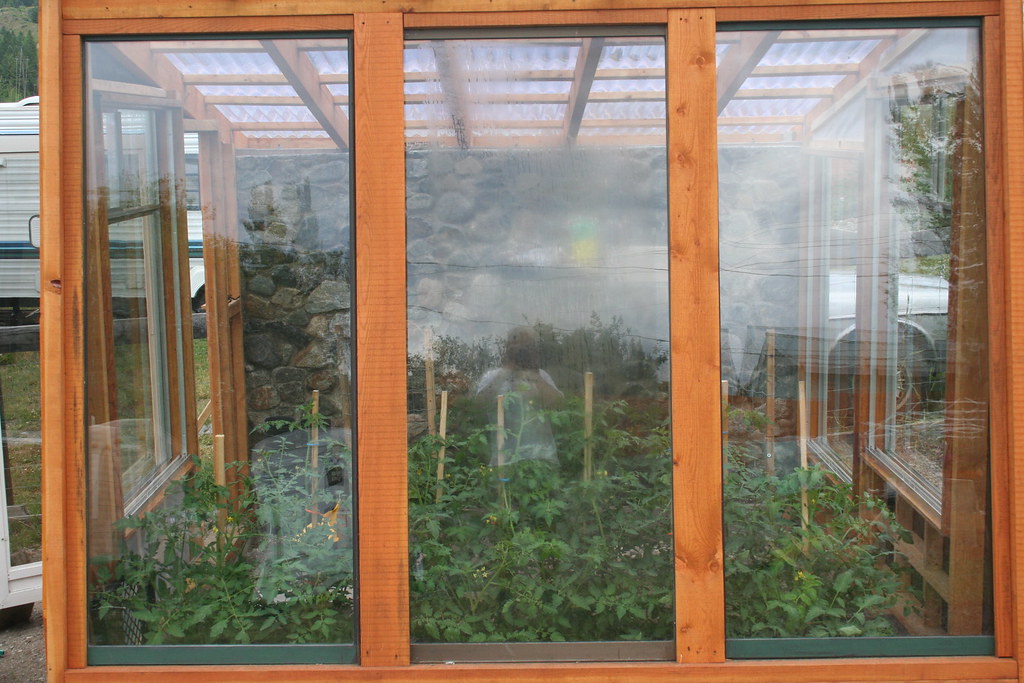 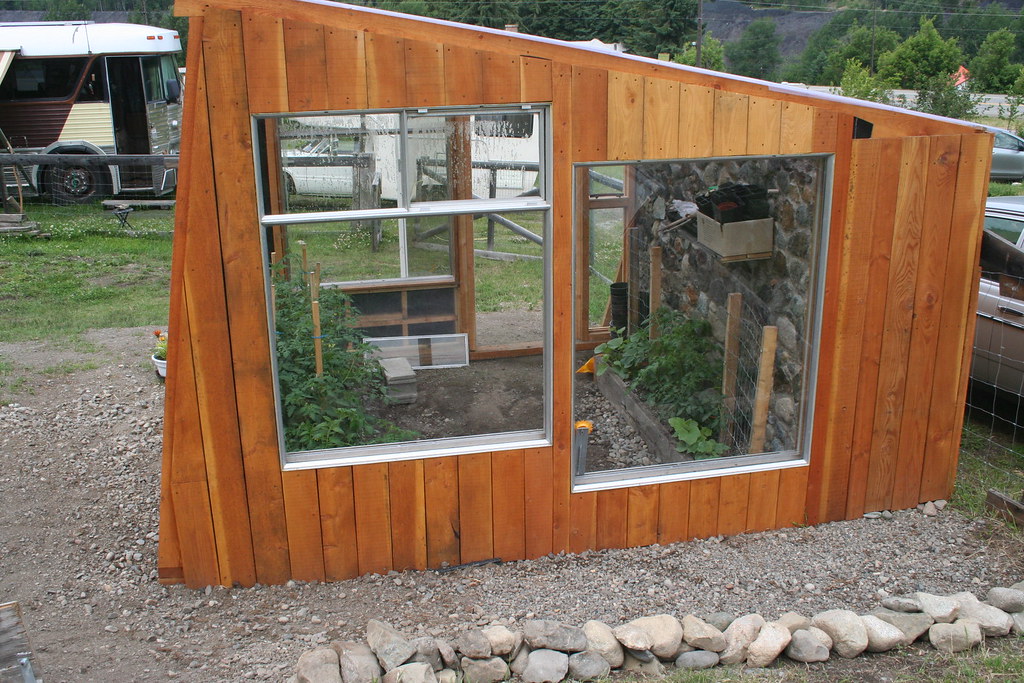 Last edited by Daox; 07-18-11 at 08:07 AM.. |
|
|
|
|
07-18-11, 08:02 AM
|
#8 |
|
Administrator

Join Date: Aug 2008
Location: Germantown, WI
Posts: 5,525
Thanks: 1,162
Thanked 374 Times in 305 Posts
|
Wow, that is beautiful! I some how missed this thread before.
What are you growing? Do you have any venting? The neighbor has a greenhouse next door and he has large openings on each end to keep the temperature down in summer.
__________________
Current project - To view links or images in signatures your post count must be 0 or greater. You currently have 0 posts. To view links or images in signatures your post count must be 0 or greater. You currently have 0 posts. & To view links or images in signatures your post count must be 0 or greater. You currently have 0 posts. |
|
|
|
|
07-18-11, 10:00 AM
|
#9 |
|
Apprentice EcoRenovator
Join Date: Jun 2010
Posts: 206
Thanks: 1
Thanked 18 Times in 17 Posts
|
Thank you!
Mostly tomatoes with a couple of other things, that is swmbo's dept. The two bigger windows have sliders at the top, I put the windows in upside down to get them there. with them open and the door open, we can keep the temp under 90 deg F. & the early morning temps are at least 10 deg F above ambient. Tony. |
|
|
|
| The Following User Says Thank You to nibs For This Useful Post: | Daox  (07-18-11) (07-18-11) |
 |
| Thread Tools | |
| Display Modes | |
|
|


 Linear Mode

