
 |
|
|
#131 |
|
Administrator
Join Date: Aug 2008
Location: Germantown, WI
Posts: 5,525
Thanks: 1,162
Thanked 374 Times in 305 Posts
|
On Friday I was able to get a new tank of gas for the welder, so the rack work continued today.
I started out the day welding up the rectangular rack for the two rear batteries.  I forgot to mention this in my last post, but I notched out the angle iron in the very front so it is easier to get a wrench in to install and remove the main support members. 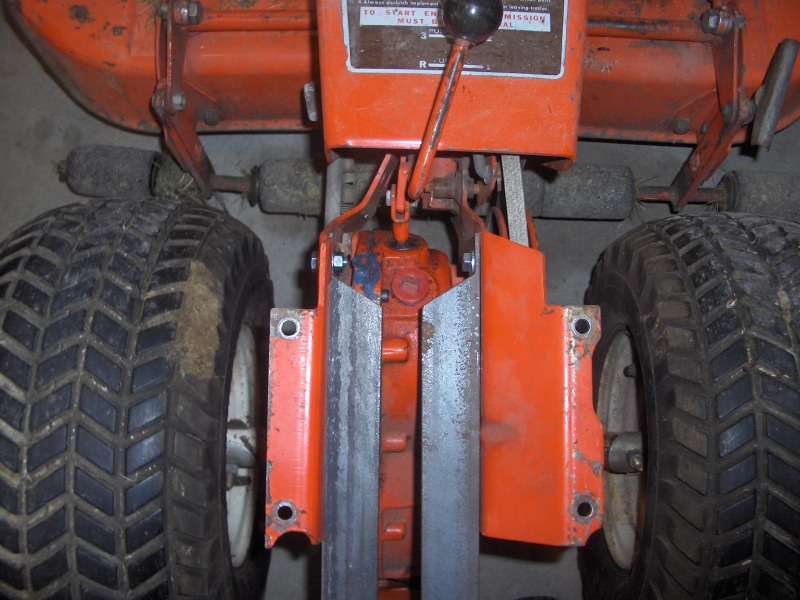 After centering and clamping the rack on the back, I made some brackets to bolt the rack to the main supports. 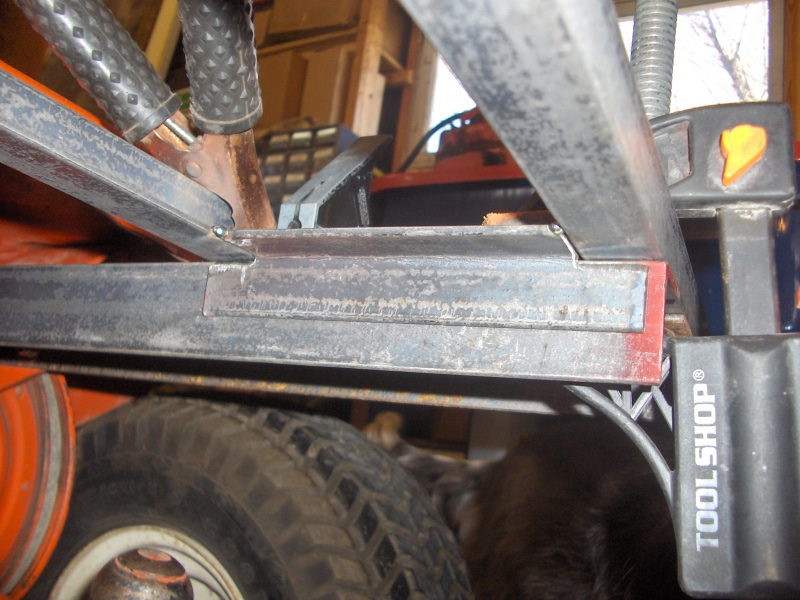 They were welded one on each side of the main supports.  And, then I popped a few holes to bolt them up together.  At this point, I wanted to see how it was all going to hold. It snugged up all the bolts and it actually seemed okay just with this. However, I didn't feel right hanging that much weight that far back off of the larger angle iron. I also didn't like the batteries hanging that far to each side of the main support. Mowing around the yard creates a lot of vibration and shock loading, so this thing has to be solid. 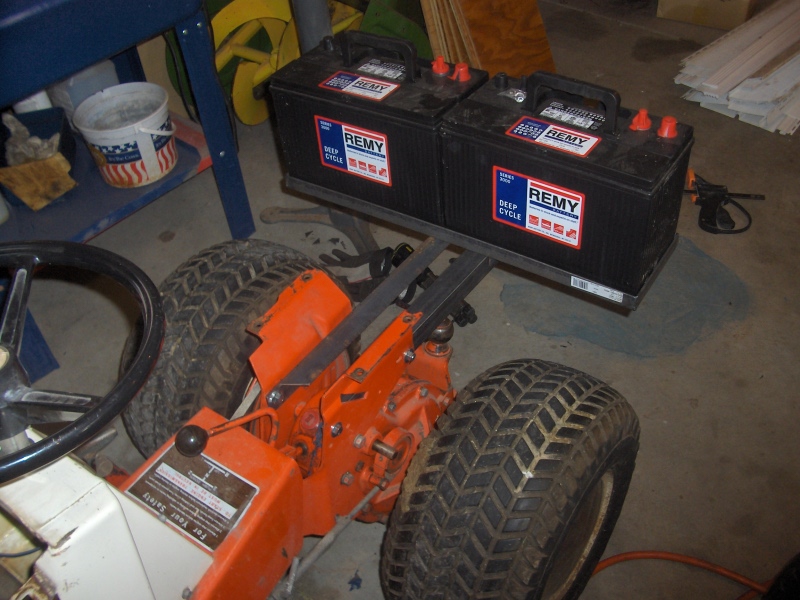 So, I made this bracket to brace the sides and help hold up the back.  Since there was no room to have a bolt head inside the battery rack, I ended up shaving down the head of a bolt and welding it into the rack to create a stud. 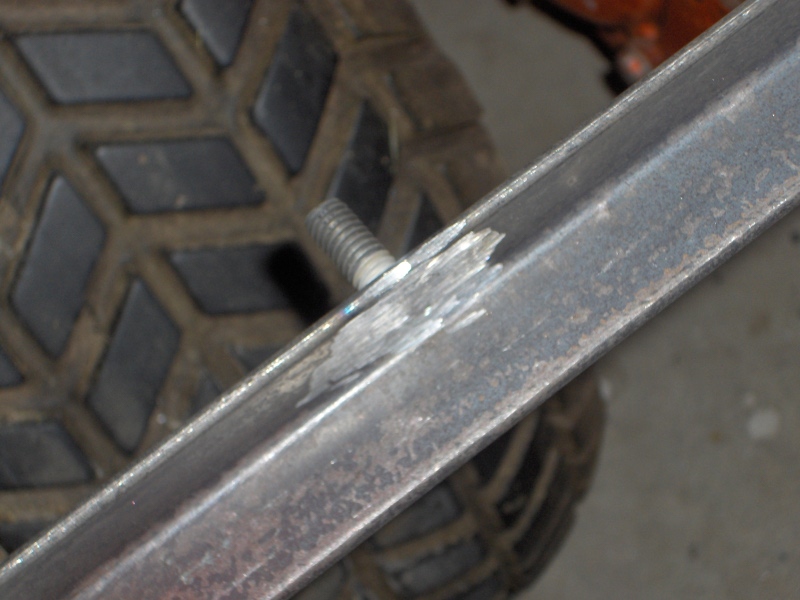 And, here is how it looks once it is all bolted up. The added brace really solidifies things. I will be adding another one to the other side. 
__________________
Current project - To view links or images in signatures your post count must be 0 or greater. You currently have 0 posts. To view links or images in signatures your post count must be 0 or greater. You currently have 0 posts. & To view links or images in signatures your post count must be 0 or greater. You currently have 0 posts. |
|
|

|
|
|
#132 |
|
Apprentice EcoRenovator
Join Date: Aug 2009
Posts: 123
Thanks: 14
Thanked 1 Time in 1 Post
|
Very nice work. In other news, I just found out I can literally flip my Father's gas tractor backwards over itself without really trying. Good thing the hitch it back there, else I'd have landed on my head at 6.8 MPH.
|
|
|

|
|
|
#133 |
|
Infrequent noob
Join Date: Aug 2008
Location: 1000 Islands region, Ontario, Canada
Posts: 402
Thanks: 37
Thanked 20 Times in 19 Posts
|
Lookin' good.
__________________
.
|
|
|

|
|
|
#134 |
|
Administrator
Join Date: Aug 2008
Location: Germantown, WI
Posts: 5,525
Thanks: 1,162
Thanked 374 Times in 305 Posts
|
The back rack is all finished up. The side supports really stiffened up the whole thing.
Second brace is all finished up and bolted on.  It holds the batteries very solid now.  I made sure to design it so I retained usage of the trailor hitches. It isn't real clear, but both are still very accessible.  And, here is how it looks with the fenders and seat back on. Not too bad, and easy access for checking the water level since they are flooded batteries. 
__________________
Current project - To view links or images in signatures your post count must be 0 or greater. You currently have 0 posts. To view links or images in signatures your post count must be 0 or greater. You currently have 0 posts. & To view links or images in signatures your post count must be 0 or greater. You currently have 0 posts. |
|
|

|
|
|
#135 |
|
Administrator
Join Date: Aug 2008
Location: Germantown, WI
Posts: 5,525
Thanks: 1,162
Thanked 374 Times in 305 Posts
|
By the way, does anyone have any tips for cleaning up angle iron for painting? I have a small sand blasting booth (table top) that I can use for the side supports, but the other pieces are too long to fit in it. Right angle die grinder and some abrasive pads?
__________________
Current project - To view links or images in signatures your post count must be 0 or greater. You currently have 0 posts. To view links or images in signatures your post count must be 0 or greater. You currently have 0 posts. & To view links or images in signatures your post count must be 0 or greater. You currently have 0 posts. |
|
|

|
|
|
#136 | |
|
Apprentice EcoRenovator
Join Date: Aug 2009
Posts: 123
Thanks: 14
Thanked 1 Time in 1 Post
|
Quote:
Reason being, even if I don't have whatever it goes to, someone does, and they'll need it eventually, or I can use/modify it to work on something I do have. I've yet to lose anything by doing this, but you get really good at it over the years I've been doing it, to the extent that I can usually sell things for far more than I pay for them, making it worthwhile to hold onto them for awhile. It does tend to piss off neighbors, though... they don't like the "junk" laying around. Good thing I don't really care, and they don't live *right* next door. |
|
|
|

|
|
|
#137 |
|
Apprentice EcoRenovator
Join Date: Aug 2009
Posts: 123
Thanks: 14
Thanked 1 Time in 1 Post
|
Greenies. The green scotch brites or steel wool and an angle grinder. If you can sew, sew some steel wool onto a buffing pad so it's "fluffy" and that will let you get into the corners better.
|
|
|

|
|
|
#138 |
|
Administrator
Join Date: Aug 2008
Location: Germantown, WI
Posts: 5,525
Thanks: 1,162
Thanked 374 Times in 305 Posts
|
More rack making finally. This time it was a rack up front for one battery right in front of the motor.
So, I started out again making a rectangular box to seat the battery on.  I wasn't too keen on welding to the mower frame, so I made some pieces so I could bolt it together. This just makes it easier for upgrades/changes later if I decide to do anything. 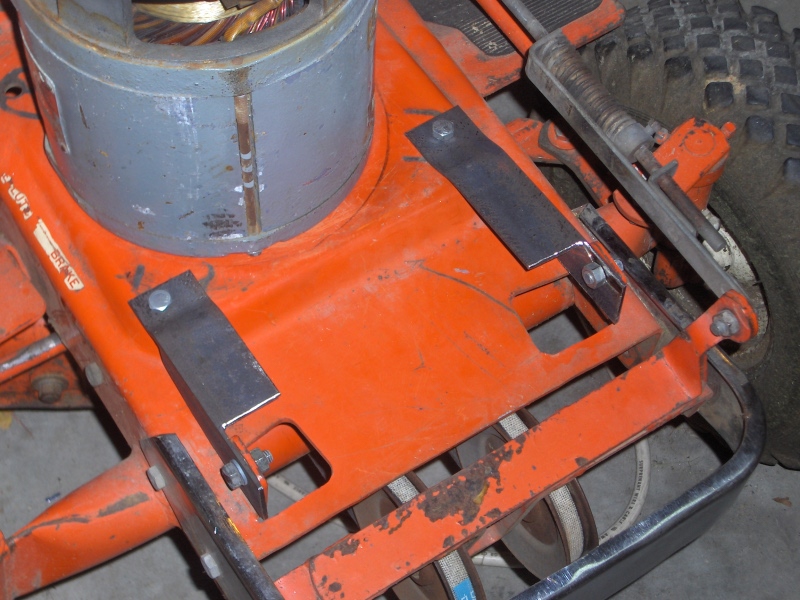 I welded raiser legs on the box and positioned and leveled it over the mounting brackets. 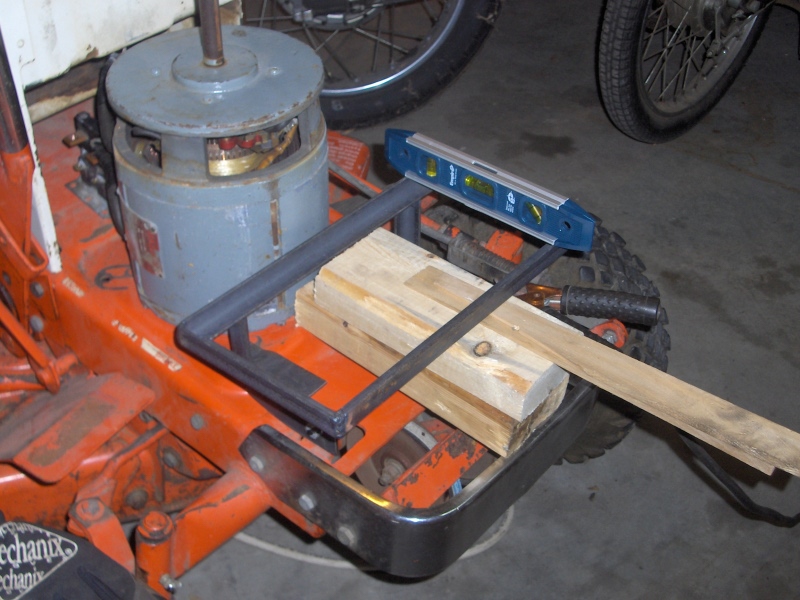 Here is the after welding shot.  At this point, the battery rack was strong enough to hold the battery up. 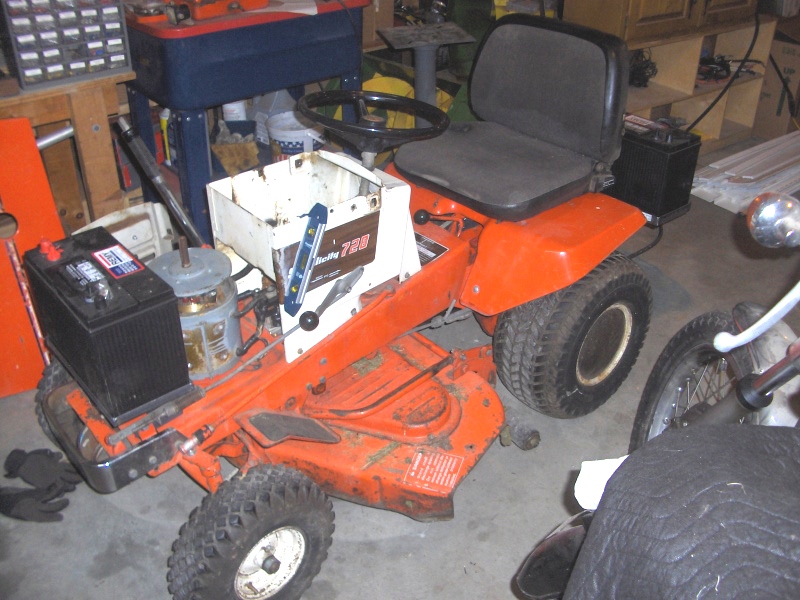 But, as usual I went ahead and put an extra support on the front to really solidify things.  Now, the battery racks are mostly done. I still need to think of how I'm going to tie the batteries down. The cover to get at watering the batteries runs the full length of the battery, so its going to make things a bit more difficult there. Other than that, I just need to wire it all up, mount a few things (contactor, voltmeter, etc.) and I'll be up and running!
__________________
Current project - To view links or images in signatures your post count must be 0 or greater. You currently have 0 posts. To view links or images in signatures your post count must be 0 or greater. You currently have 0 posts. & To view links or images in signatures your post count must be 0 or greater. You currently have 0 posts. |
|
|

|
|
|
#139 |
|
Infrequent noob
Join Date: Aug 2008
Location: 1000 Islands region, Ontario, Canada
Posts: 402
Thanks: 37
Thanked 20 Times in 19 Posts
|
Glad to see another update. Is there one last grass-cutting left to do this season? It's going to snow soon, you know.

__________________
.
|
|
|

|
|
|
#140 |
|
Administrator
Join Date: Aug 2008
Location: Germantown, WI
Posts: 5,525
Thanks: 1,162
Thanked 374 Times in 305 Posts
|
Yeah, I was hoping to have it wired and cutting this weekend yet. However, I didn't have time. I'm going to try and rush to get it done early this week and then just take advantage of the first chance to cut. However, it is supposed to snow Wednesday!
__________________
Current project - To view links or images in signatures your post count must be 0 or greater. You currently have 0 posts. To view links or images in signatures your post count must be 0 or greater. You currently have 0 posts. & To view links or images in signatures your post count must be 0 or greater. You currently have 0 posts. |
|
|

|
 |
| Tags |
| conversion, electric, lawn mower, tractor |
| Thread Tools | |
| Display Modes | |
|
|