
 |
|
|
#51 |
|
Home-Wrecker
Join Date: Sep 2008
Location: SE Wisconsin
Posts: 546
Thanks: 3
Thanked 165 Times in 96 Posts
|
Another exciting time lapse video for you. Why time lapse? Because I can just set the camera on a tripod and let it go so I can actually get some work done. Pretty tough to film and work construction at the same time otherwise.
__________________
To view links or images in signatures your post count must be 0 or greater. You currently have 0 posts. To view links or images in signatures your post count must be 0 or greater. You currently have 0 posts. |
|
|

|
|
|
#52 |
|
Home-Wrecker
Join Date: Sep 2008
Location: SE Wisconsin
Posts: 546
Thanks: 3
Thanked 165 Times in 96 Posts
|
This past Saturday, we got the Trusses up. I was a little concerned about this. Each truss weighs over 200 pounds and is 31 feet long. We would need more than just my brother, my Dad, and I to do the job of lifting the trusses onto the roof, setting them in the proper place, plumb them, and make sure they stay there. My work schedule has been crazy too. So, I was trying to dig up some spare bodies for the very next day while driving to and from work at night after having worked on the garage all day. I put out a plea on Facebook and through as many phone calls and voice mails as bad cell connections in a car would allow. The next morning, I wasn't dissappointed. A flash-mob of friends were standing in my driveway in warm clothes and work gloves, ready to lift. Starting the day was slow, as we had to figure how to set the very first end truss, including NOT letting it fall over the side of the building. We built some 16 foot long posts of two-by material and nailed those to the west wall. Those would keep us from lifting the first truss PAST vertical. I had already assembled some scaffolding in the middle of the garage, spanned by an aluminum plank. We had plenty of ladders, although a motley mix of step-ladders, extension, and "gorilla". Several of us would pick up the truss, flip it over (unfortunately the way the material was stacked didn't suit the direction we were putting it up,) walk one end through the garage door opening, over the scaffold, to a guy on a ladder, to set on the north wall. Back on the south wall, we had to lift that end, slide the truss back to get it ON the wall, and then start sliding the whole thing west. One guy held the top point of the truss while walking across the plank. Once the truss was in proper position, we tipped it up, and temporarily nailed it. Whew! Lots of work! We would only have to do that 15 more times! The next several trusses were also a little odd. Just in from the west wall is where the pull-down stairs to get to the the upper level will go. So, that needed extra-wide spacing, and the trusses to be doubled up on either side of the opening. In the photo with all the trusses in place, you can see the extra-wide spacing on the left side. After that, we were able to set the trusses on regular two-foot-centers. At this point, having lots of extra guys really helped. We were able to get into a slow but steady rhythm of placing trusses. Once we made it to the middle of the garage, we had to change plans a bit. We needed SPACE above the garage to get the trusses in position. If we continued to place trusses, we wouldn't have the room to get them up there. So, we started lifting them onto the walls, but stacking them all next to each other right in the middle. After that, we could start sliding them out, one at a time, into their proper positions. Of course, we were also trying to keep these things straight and plumb as we went. We marked out measurements on the top of the wall, and measured between the points of the trusses before nailing temporary support boards to lock them in place. We also added temporary cross-bracing and some wood planks to walk on as we went. By about 3 PM, we had all the trusses up and in place. We put away the tools and cleaned up, and then I had to head right out to work. A big thank you to Shannon, Jack, Josh, Wil, Rich, Steve, Wayne, Jim, and everyone who showed up! 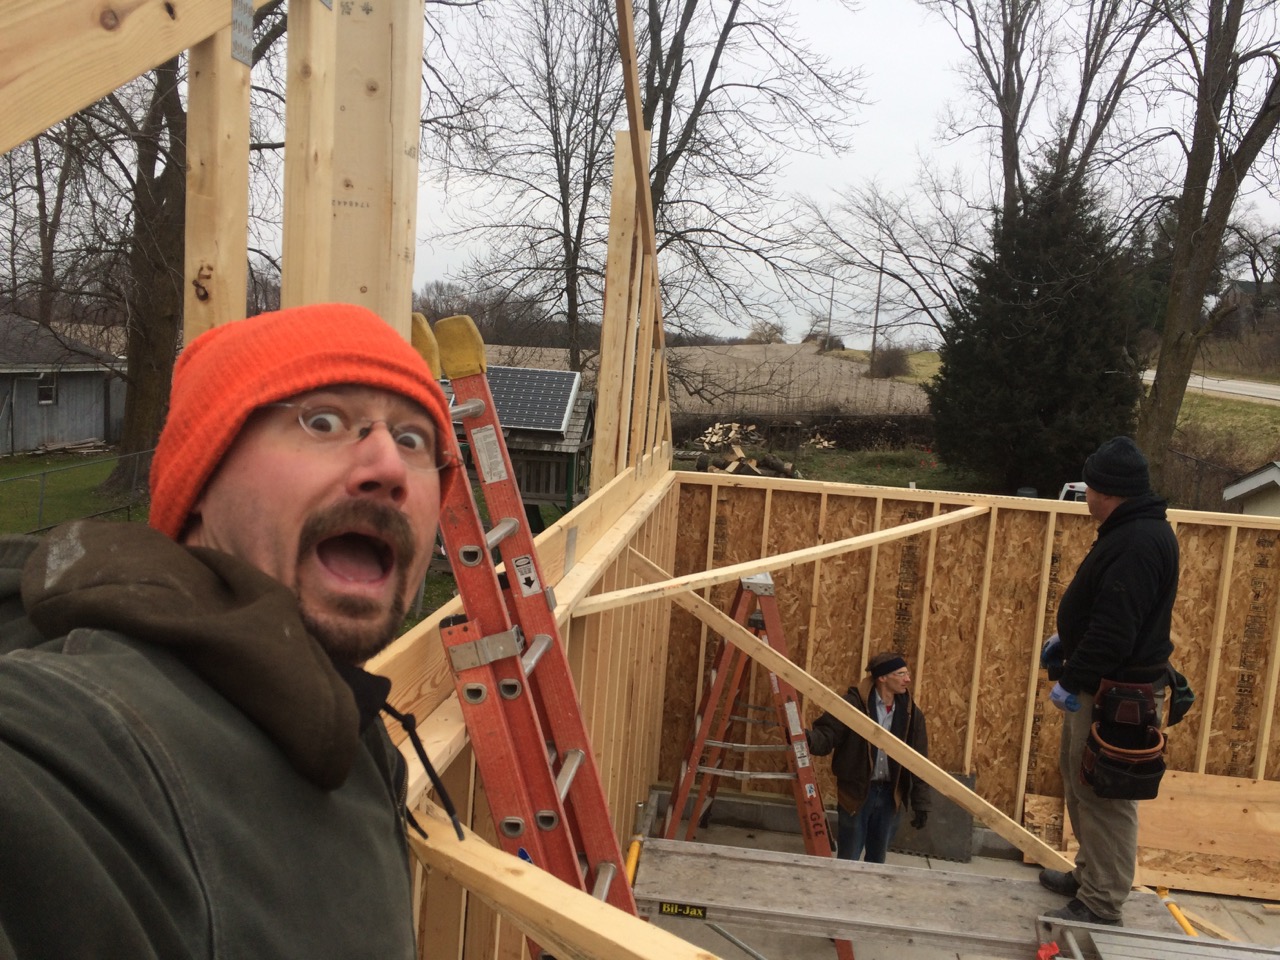 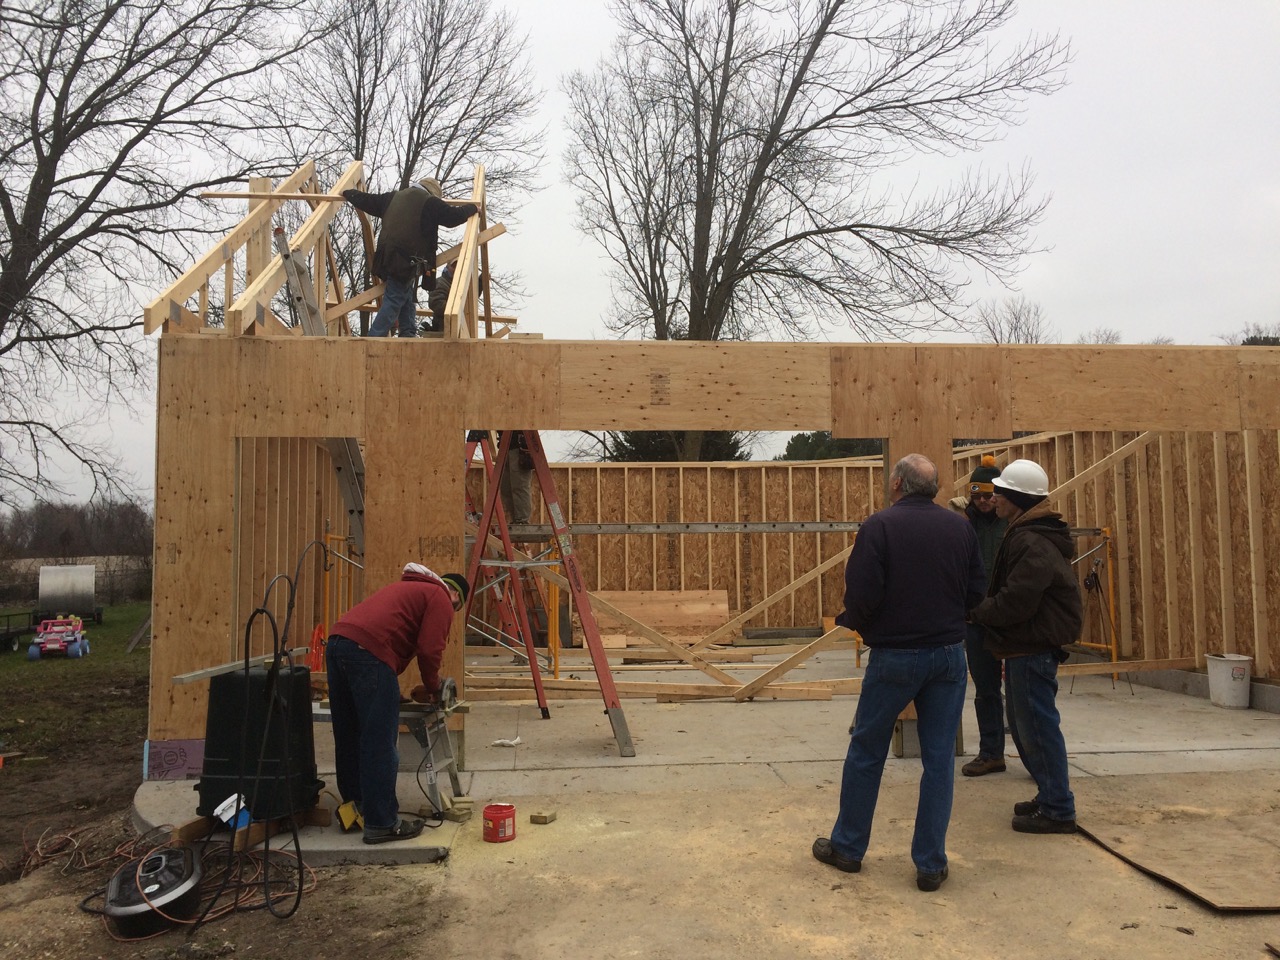 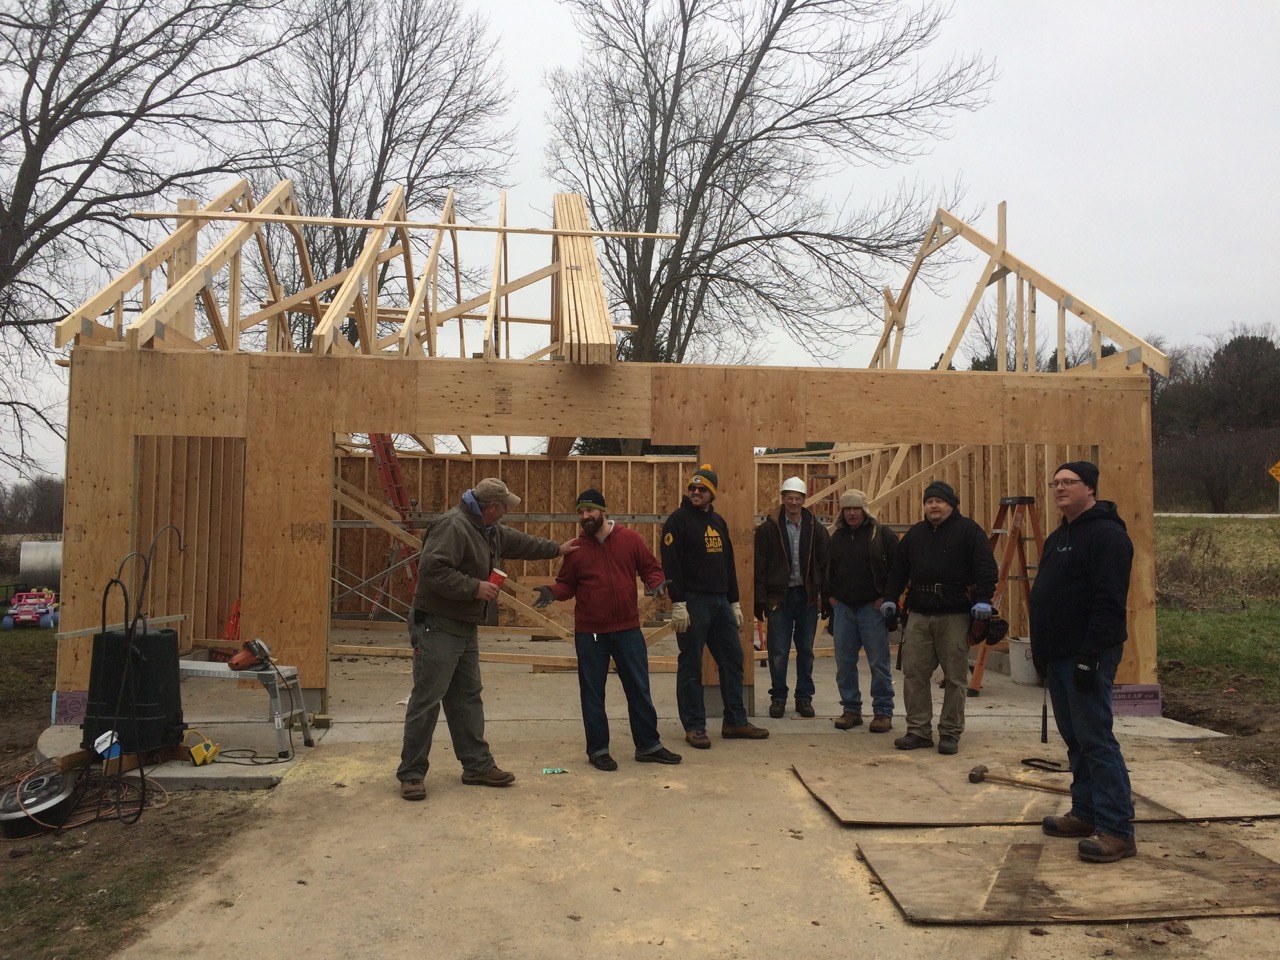 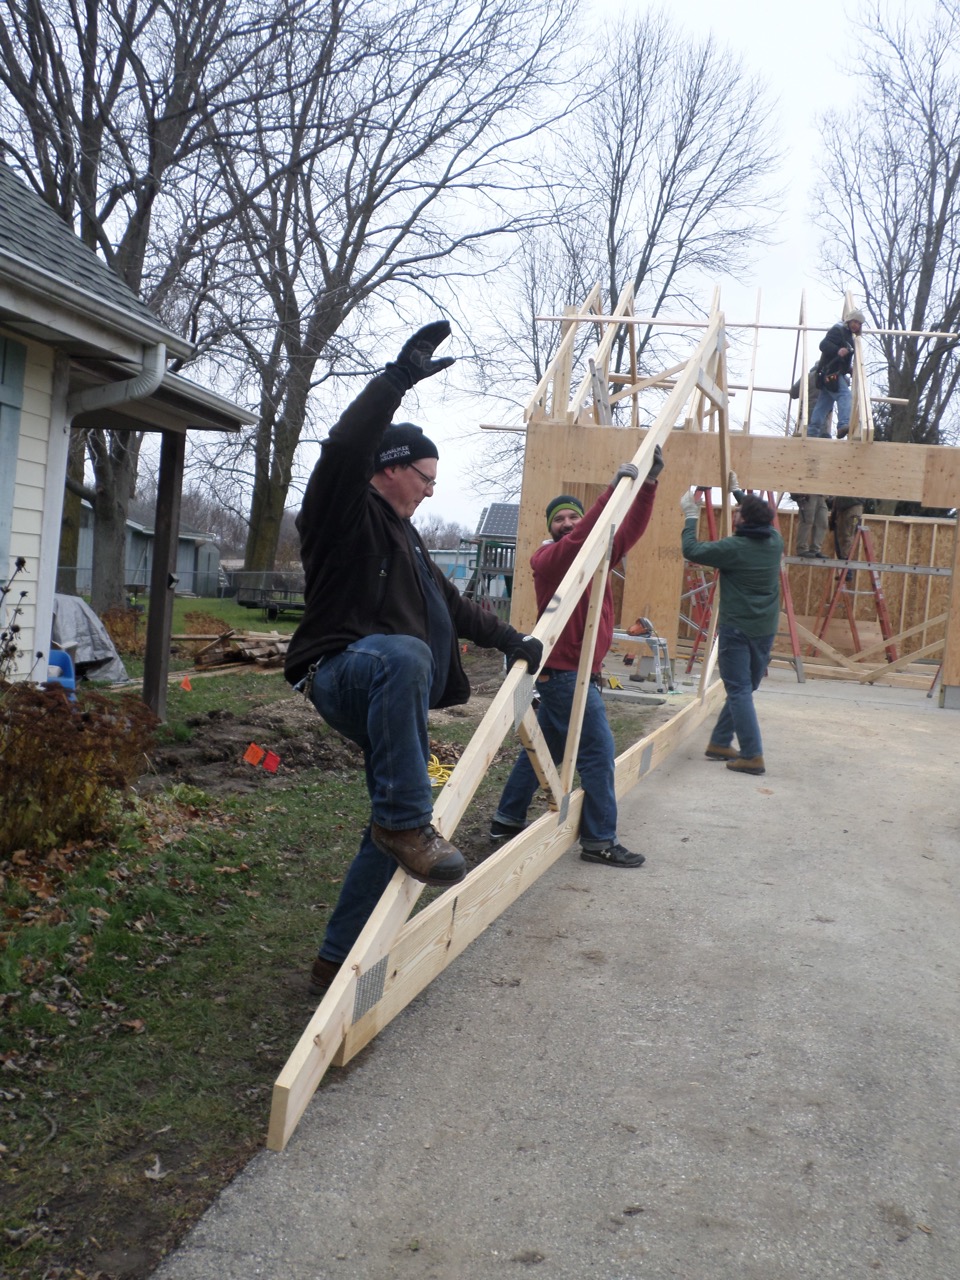 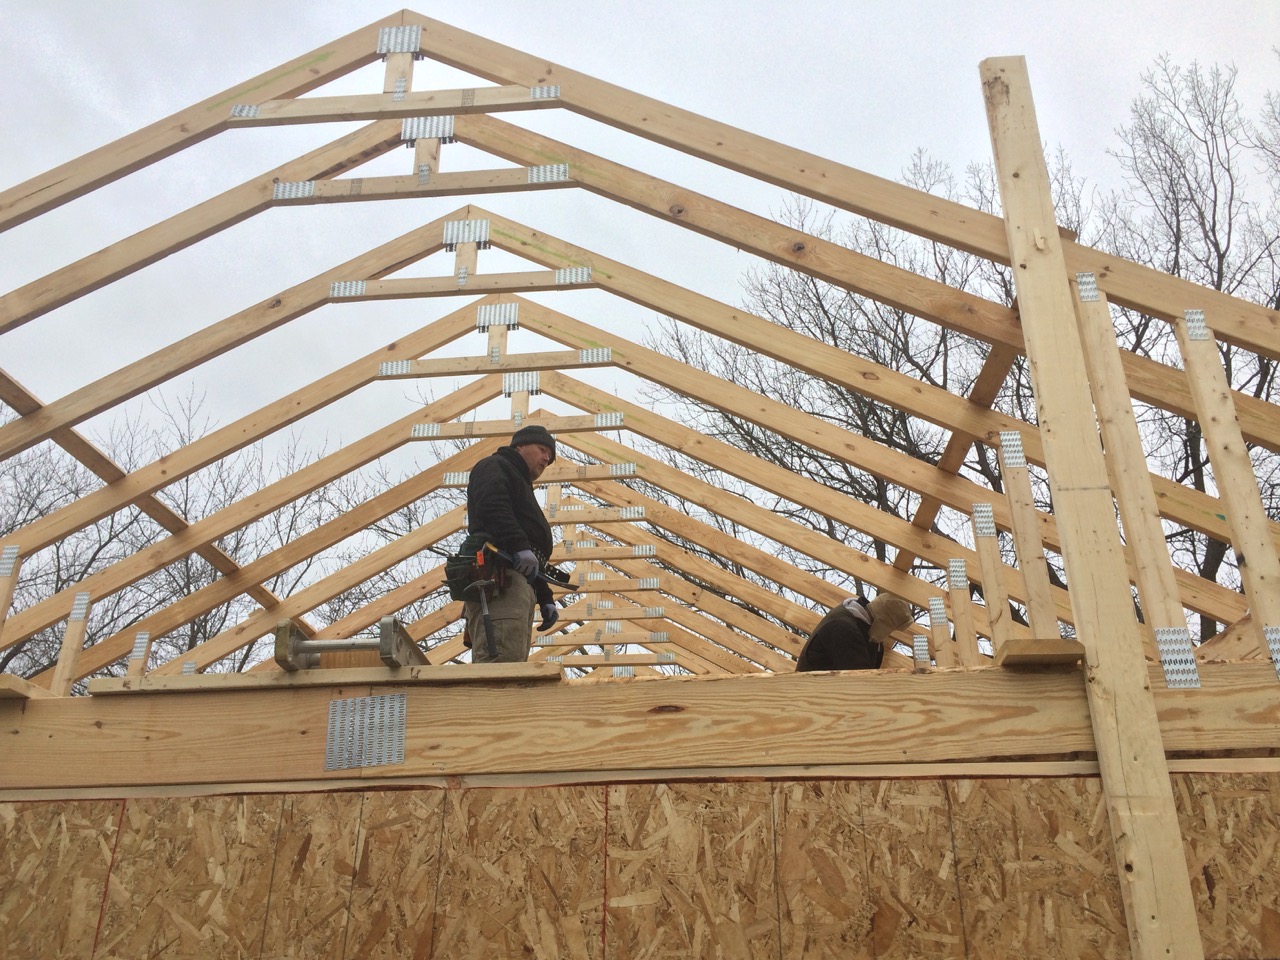 And then it snowed. 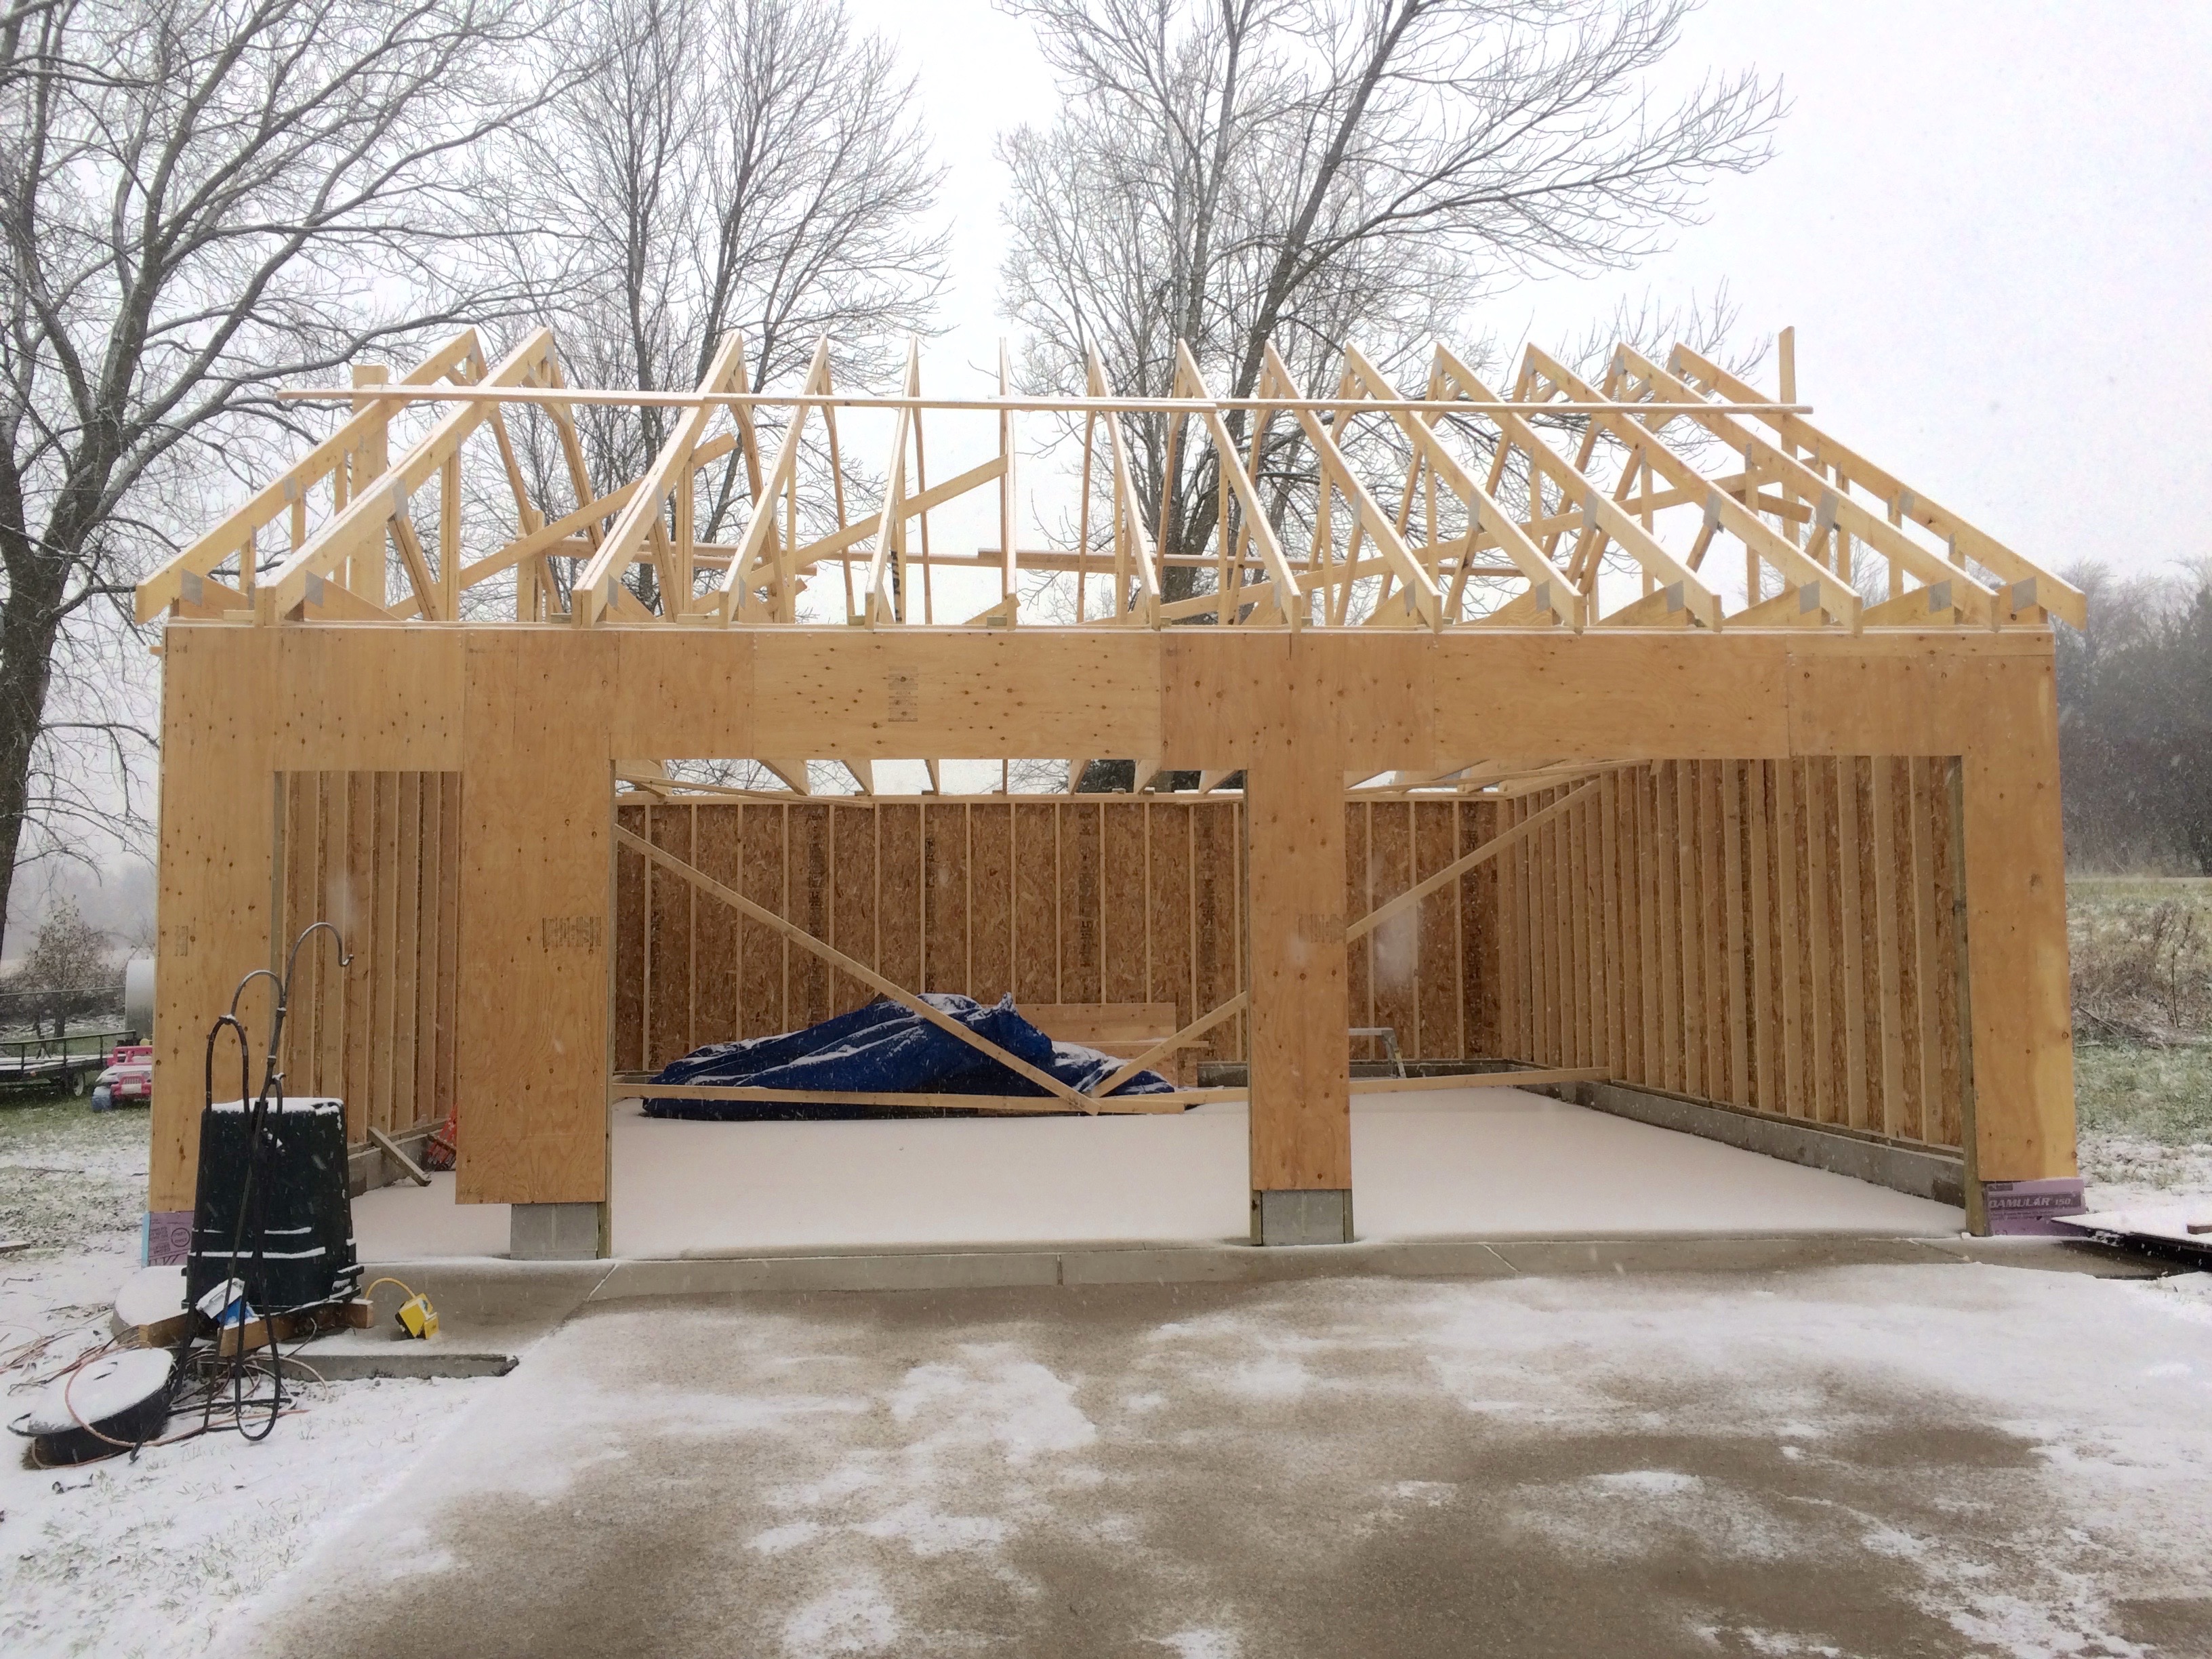
__________________
To view links or images in signatures your post count must be 0 or greater. You currently have 0 posts. To view links or images in signatures your post count must be 0 or greater. You currently have 0 posts. |
|
|

|
|
|
#53 |
|
Steve Hull
Join Date: Dec 2012
Location: hilly, tree covered Arcadia, OK USA
Posts: 826
Thanks: 241
Thanked 165 Times in 123 Posts
|
VERY impressive and I also like that you were able to "hold off" the snow! Kudos to all your helpers - but you know what future THAT obligates you to . . . .
Steve
__________________
consulting on geothermal heating/cooling & rational energy use since 1990 |
|
|

|
|
|
#54 |
|
Home-Wrecker
Join Date: Sep 2008
Location: SE Wisconsin
Posts: 546
Thanks: 3
Thanked 165 Times in 96 Posts
|
Yep! I have to build a garage for each and everyone of THEM!
__________________
To view links or images in signatures your post count must be 0 or greater. You currently have 0 posts. To view links or images in signatures your post count must be 0 or greater. You currently have 0 posts. |
|
|

|
|
|
#55 |
|
Super Moderator
Join Date: Jun 2013
Location: SC
Posts: 2,930
Thanks: 172
Thanked 564 Times in 463 Posts
|
Good progress.
Why are two of the trusses dubbed up?
__________________
Current project Aquaponics system , Passive Solar Greenhouse build To view links or images in signatures your post count must be 0 or greater. You currently have 0 posts. Solar Install 12.5 Kwh- To view links or images in signatures your post count must be 0 or greater. You currently have 0 posts. Mini Split installs - To view links or images in signatures your post count must be 0 or greater. You currently have 0 posts. EV Chevy Volt - To view links or images in signatures your post count must be 0 or greater. You currently have 0 posts. |
|
|

|
|
|
#56 |
|
Home-Wrecker
Join Date: Sep 2008
Location: SE Wisconsin
Posts: 546
Thanks: 3
Thanked 165 Times in 96 Posts
|
That's where the fold-down stairs goes. We just finished boxing that out this morning, and then hand-built a truss to fill in there.
__________________
To view links or images in signatures your post count must be 0 or greater. You currently have 0 posts. To view links or images in signatures your post count must be 0 or greater. You currently have 0 posts. |
|
|

|
|
|
#57 |
|
Home-Wrecker
Join Date: Sep 2008
Location: SE Wisconsin
Posts: 546
Thanks: 3
Thanked 165 Times in 96 Posts
|
Today, we got the floor in of the second story. The upstairs is technically a "storage space", although there's nothing stopping me from making it nice and using it as a club-house, home-office, etc. It's not zoned for occupancy, so I guess I shouldn't keep a sofa-sleeper up there.
The floor of the upstairs is about 14' x 27', although the flat part of the ceiling is only about 4' wide. That makes a very wide room with a nice full height walking area down the middle, and room on the side of desks, storage, shelves, etc. The flooring is 3/4" tongue and groove OSB, and the trusses are 24" centers. The OSB is also a fancy grade with a sealant on it, so if we get snow before we get the roof on, the wood won't suck up the water. 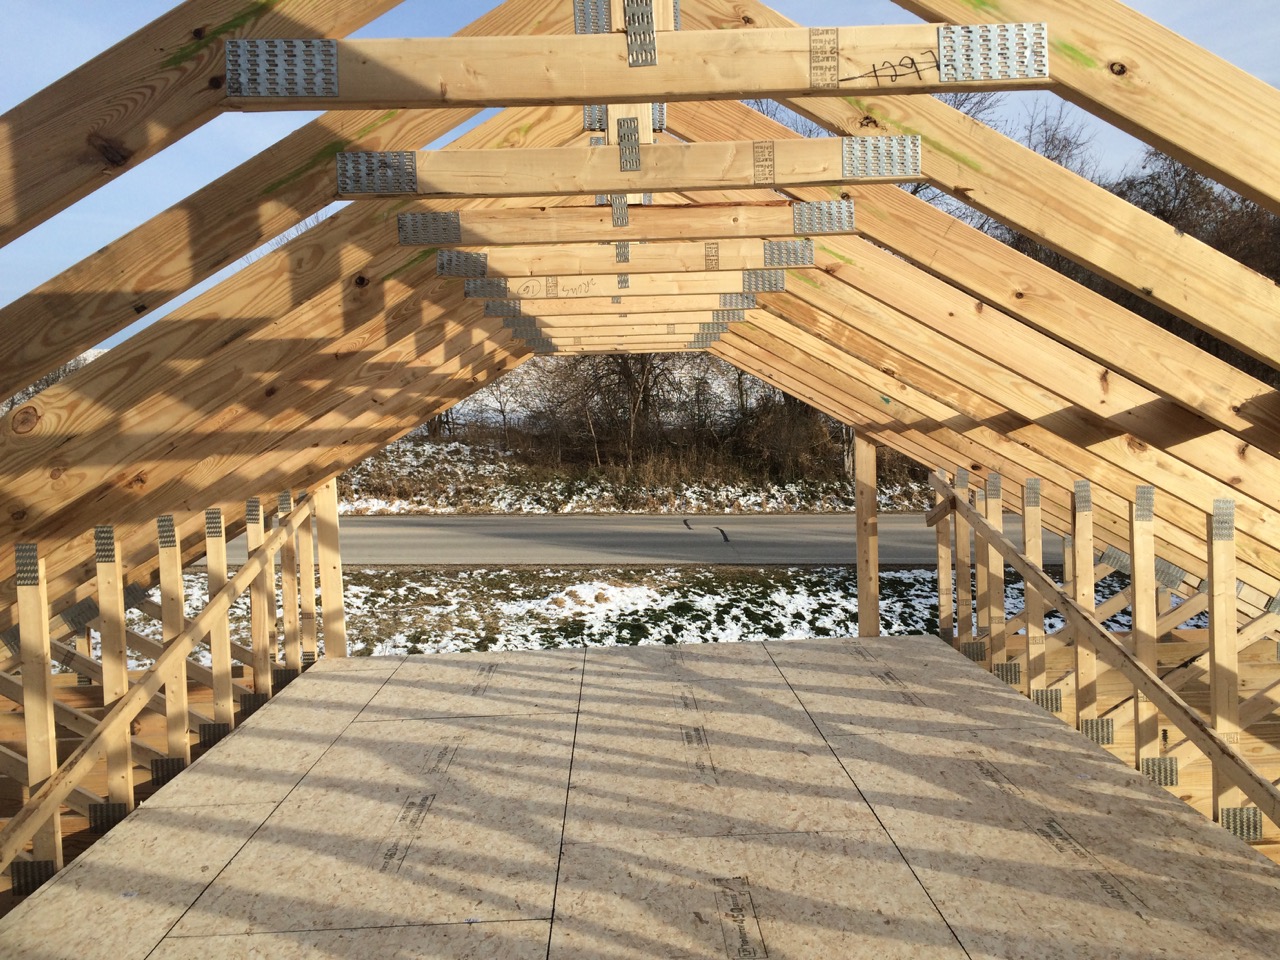 The reason why there were doubled-up trusses and a gap on the the left side of the building is because that's where the pull-down staircase will go. We boxed out a rough opening for the staircase. After that, we filled in around it with built joists and rafters to match the other trusses. 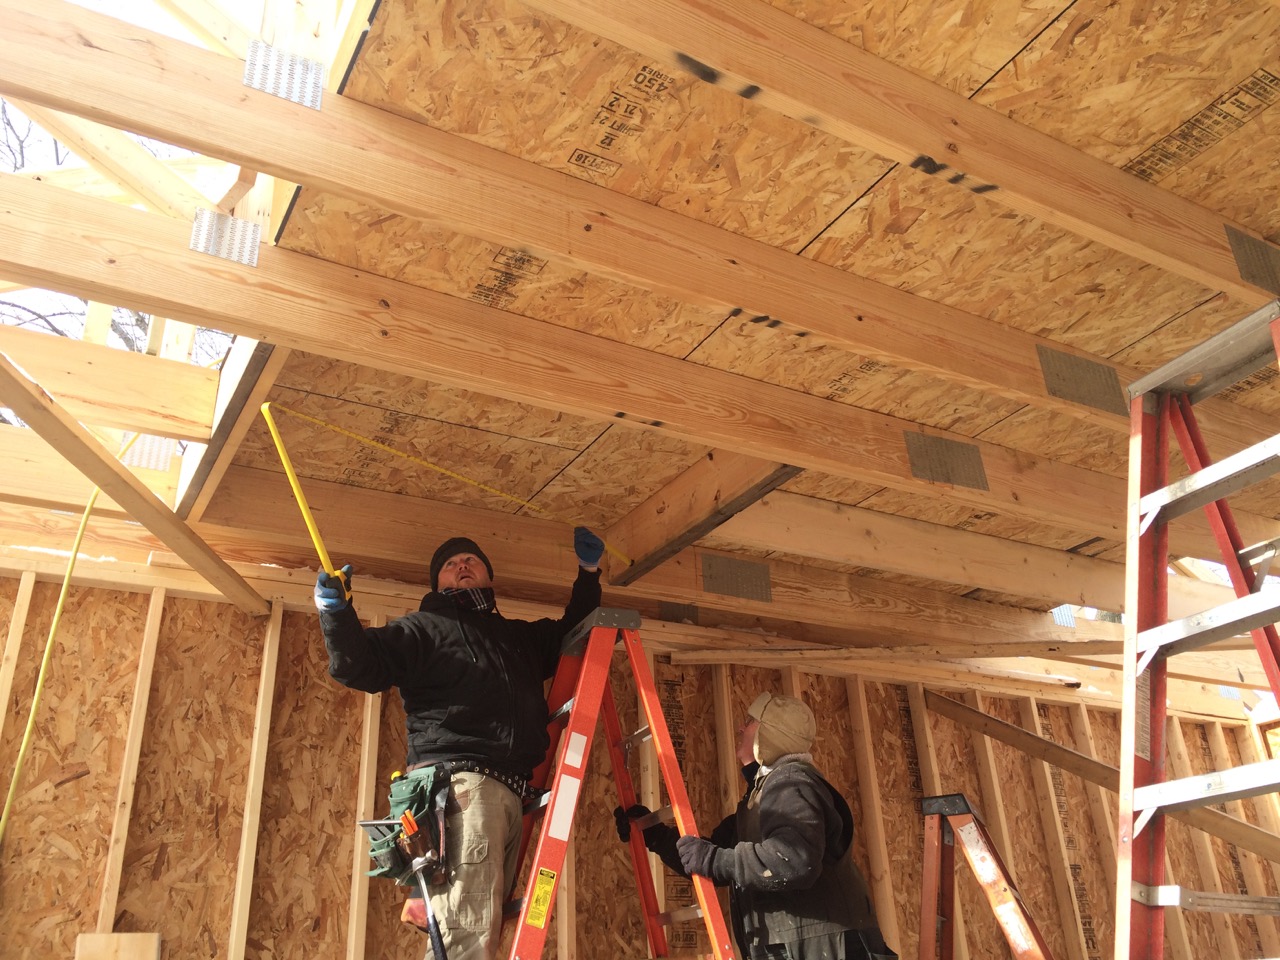 Since part of the downstairs was now covered from above, I temporarily mounted up one of the LED shop lights that I purchased on 50% discount during a Black Friday Sale. (I actually bought them on that Saturday afternoon. Wish I had gone sooner, so I could have bought more!) After it was dark, I turned the light on. Looks pretty good. Casts a lot of light. I think I'll be pretty happy with 12 of these in the garage. I mounted it as tight to the ceiling as I could. Even with it flat on the ceiling, I should be able to still just reach the pull-chain power switch. That way, if I feel that I have TOO much light, I can always leave a few off. The internals of the shop light is basically and LED strip mounted directly to an aluminum extrusion that forms the back of the light. I'd like to screw the lights straight to the ceiling, but think that might be a problem long term, as it might let the LEDs get too warm. What I might do is screw some sort of a spacer to the ceiling, and then screw the light to that. That way, the light is solid and secure, but still allows for a little air-flow. 
__________________
To view links or images in signatures your post count must be 0 or greater. You currently have 0 posts. To view links or images in signatures your post count must be 0 or greater. You currently have 0 posts. |
|
|

|
| The Following User Says Thank You to bennelson For This Useful Post: | celblazer (12-08-16) |
|
|
#58 |
|
Home-Wrecker
Join Date: Sep 2008
Location: SE Wisconsin
Posts: 546
Thanks: 3
Thanked 165 Times in 96 Posts
|
Yesterday, we got the roof on. It was good timing, because the first REAL snow-storm of the season was predicted to start in the evening. We had a pile of 5/8 plywood to deck the roof. It was relatively straight-forward, other than having to build some scaffolding in the first place, just to have somewhere to work from. We were able to get all the plywood on as well as the roofing felt. For the felt, we worked from the top to bottom, which is backwards from how you would normally do it. However, by doing it that way, we didn't have to walk on the felt, which is slippery. We just had to leave the very bottom edge of each roll loose, and tuck the next under it as we went. We were all finished before dark, and as I was sweeping up, the first couple of snowflakes started falling. Benís Garage: Raise the Roof!
__________________
To view links or images in signatures your post count must be 0 or greater. You currently have 0 posts. To view links or images in signatures your post count must be 0 or greater. You currently have 0 posts. |
|
|

|
| The Following User Says Thank You to bennelson For This Useful Post: | Daox  (12-12-16) (12-12-16) |
|
|
#59 |
|
Administrator
Join Date: Aug 2008
Location: Germantown, WI
Posts: 5,525
Thanks: 1,162
Thanked 374 Times in 305 Posts
|
Great timing Ben. Its really coming along and looking great!
__________________
Current project - To view links or images in signatures your post count must be 0 or greater. You currently have 0 posts. To view links or images in signatures your post count must be 0 or greater. You currently have 0 posts. & To view links or images in signatures your post count must be 0 or greater. You currently have 0 posts. |
|
|

|
|
|
#60 |
|
Steve Hull
Join Date: Dec 2012
Location: hilly, tree covered Arcadia, OK USA
Posts: 826
Thanks: 241
Thanked 165 Times in 123 Posts
|
"The upstairs is technically a "storage space", although there's nothing stopping me from making it nice and using it as a club-house, home-office, etc. It's not zoned for occupancy, so I guess I shouldn't keep a sofa-sleeper up there."
Now wait a moment - you need, you REALLY need a place to store that sleeper sofa. I think the upstairs is a very logical and appropriate place for its storage. It needs to be checked every now and then to make sure it works and that the stuffing in the seats is properly maintained. Enjoy! Steve
__________________
consulting on geothermal heating/cooling & rational energy use since 1990 |
|
|

|
 |
| Tags |
| diy, garage, heated slab, pex, solar |
|
|