
|
 12-31-11, 08:46 PM
|
#461 |
|
Lurking Renovator
Join Date: Dec 2011
Location: belgium
Posts: 7
Thanks: 0
Thanked 2 Times in 2 Posts
|
cant send pm have to have 15 post or somth :s
|

|

|
|
01-01-12, 09:13 AM
|
#462 |
|
Apprentice EcoRenovator

Join Date: Dec 2010
Location: Arizona
Posts: 145
Thanks: 0
Thanked 2 Times in 2 Posts
|
You guy's make my new years day
 thanks. Really great stuff. My install was bid at $7,700, right! Two ton in garage shop 400 square ft. I'm running 90 feet of electric conduit now, started yeaterday. Long time looker short time builder. thanks. Really great stuff. My install was bid at $7,700, right! Two ton in garage shop 400 square ft. I'm running 90 feet of electric conduit now, started yeaterday. Long time looker short time builder.Sanyo install Vern.
__________________
Vern To view links or images in signatures your post count must be 0 or greater. You currently have 0 posts. To view links or images in signatures your post count must be 0 or greater. You currently have 0 posts. |
|
|
|
|
01-01-12, 11:07 AM
|
#463 |
|
Lex Parsimoniae

Join Date: Feb 2009
Location: Woburn, MA
Posts: 4,918
Thanks: 114
Thanked 250 Times in 230 Posts
|
Well, $7,700 isn't real bad for a 24,000 BTU install. IRRC, most quotes are considerably higher.
Maybe after you get the power line and pad in place, you can get a new quote? Since a basic install on a fully prepared site, might only involve about 2 to 3 hours of actual labor, my guess is, much of the extra labor cost is from line-set testing & vac. It takes 'time' to do that part. A lot of that time is just sitting around watching pressure gauges. Instead of having a licensed Expert do that part, a DIYer can call him in, after the pressure testing and vacuuming is mostly done. All my HVAC buddy had to do was look at the gauges, take a slip of beer and turn the hex key. It's good to be able to put his name on the warranty registration. The line set 'Testing' phase can go on for a long time, depending on the installer. Depending on how good the vacuum pump oil is, & etc. It's not real hard to do, if you have a good chair to sit in..
__________________
My hobby is installing & trying to repair mini-splits EPA 608 Type 1 Technician Certification ~ 5 lbs or less.. |
|
|
|
|
01-01-12, 03:02 PM
|
#464 | |
|
Lurking Renovator
Join Date: Dec 2011
Location: belgium
Posts: 7
Thanks: 0
Thanked 2 Times in 2 Posts
|
Quote:
try repairing one.. you wont need that chair anymore  okeey depends on whats wrong You need some basics otherwise your lost Fred |
|
|
|
|
|
01-01-12, 03:13 PM
|
#465 |
|
Lex Parsimoniae
Join Date: Feb 2009
Location: Woburn, MA
Posts: 4,918
Thanks: 114
Thanked 250 Times in 230 Posts
|
I needed some place to sit down for a little break..
 And, the repair job is still holding.. (Fingers Crossed)! http://ecorenovator.org/forum/geothe...r-project.html
__________________
My hobby is installing & trying to repair mini-splits EPA 608 Type 1 Technician Certification ~ 5 lbs or less.. |
|
|
|
|
01-01-12, 08:12 PM
|
#466 |
|
Apprentice EcoRenovator
Join Date: Dec 2010
Location: Arizona
Posts: 145
Thanks: 0
Thanked 2 Times in 2 Posts
|
This may be hard to take for some. You guy's are my Hero's!
 I had a stroke 2004, one good arm and hobble about, nothing stops me. About 25 months ago I started buying lots tools, I do everything. This link is where it all started. How to live for 44 years without a mortgage The annoying ad below is not the way to go. You need the touch screen back lite thermostat from Home Depot. The cargo trailer: Take a look at the frame. Don't buy this one. If you advertise in my space and I don't recommend it I'll comment on it. Looks like I'm going be banned from another good site. See you'll later...
__________________
Vern To view links or images in signatures your post count must be 0 or greater. You currently have 0 posts. To view links or images in signatures your post count must be 0 or greater. You currently have 0 posts. Last edited by Vern2; 01-01-12 at 08:27 PM.. |
|
|
|
|
03-10-12, 10:30 PM
|
#467 |
|
Lurking Renovator
Join Date: Mar 2012
Location: CA
Posts: 1
Thanks: 0
Thanked 0 Times in 0 Posts
|
Hello,
First off, amazing mini split installation thread! Your posts have been extremely helpful to me. That said, I am just about ready it complete my first mini split install. There is just one thing I am unsure of: After the your final evacuation, when the micron gauge has stabilized and you are ready to release the refrigerant, what is the process? Disconnect pump from service port, then unscrew the allen? Or... Any input would be greatly appreciated!! Thanks |
|
|
|
|
03-10-12, 11:35 PM
|
#468 |
|
Lex Parsimoniae
Join Date: Feb 2009
Location: Woburn, MA
Posts: 4,918
Thanks: 114
Thanked 250 Times in 230 Posts
|
The last step is for your HVAC guy (R410A certified) to perform..
Be sure to get him to sign your warranty card, where it says installer. I think the best way to do it, is to have a good cut-off valve on your hose at the service port, 1. shut it off, (the cut-off) 2. then turn off the pump. 3. then release the R410A with the hex key. (Both valves). 4. Remove (quickly) the service adapter (using gloves). 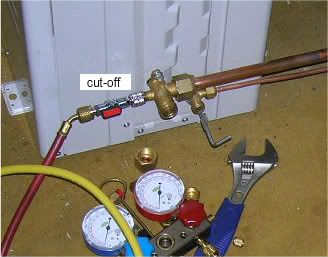 If your valves leak a little when turned(like mine), you might want to shut off a valve on your micron meter(isolating it), while leaving the pump running (holding a hard vac). And then start cracking the service valve (liquid line as in the pic), and then quickly shut off the cut-off valve on the port, when the first whiff of R410A hisses into the line set. You will hear a sudden change in the sound of the pump motor. Once the cut-off is shut, kill the pump and then open both service valves. Since your hose has a push pin, there will be pressure inside the service adapter. Use gloves when you (quickly) unscrew the adapter. If you do it real slow, there will be a loss of R410A. Not good. You also might want to do another soap bubble test at this point.. If you did a good pressure test before, doing it again under R410A pressures is not likely to show up any leaks. In my manual, they said to open the valve for 10 seconds and the shut it, (releasing pressure into the line set and then locking that pressure in). so, a second bubble check to be performed. What model did you get??
__________________
My hobby is installing & trying to repair mini-splits EPA 608 Type 1 Technician Certification ~ 5 lbs or less.. |
|
|
|
| The Following User Says Thank You to Xringer For This Useful Post: | pinballlooking  (10-09-13) (10-09-13) |
|
03-13-12, 09:05 AM
|
#469 |
|
Lurking Renovator
Join Date: Sep 2011
Location: NJ
Posts: 27
Thanks: 0
Thanked 1 Time in 1 Post
|
Sorry, forgot to respond over the weekend when I saw the post. Xringer said it perfectly. I chose to disconnect my vacuum pump and micron gauge prior to releasing the charge. The issue with this (even though that's how most instructions might advocate) is that there is a loss of vacuum (what's the right word there?) as you fiddle with shut off valves and disconnects. I tried it a few different ways and always lost a bit of the vacuum.
Using Xringer's advice you're continuing to run the vac pump while you're closing off the valves and allowing a small amount of charge out creating pressure in the system before you mess with the disconnects. Once you have a small amount of pressure, air isn't going to get in and you're all set. Then just let enough refrigerant loose to triple check for pressure leaks and finally open the king valves all the way to let all the refrigerant out just as Xringer stated. Then have a beer, your work is done! |
|
|
|
|
03-20-12, 07:13 PM
|
#470 |
|
Lex Parsimoniae
Join Date: Feb 2009
Location: Woburn, MA
Posts: 4,918
Thanks: 114
Thanked 250 Times in 230 Posts
|
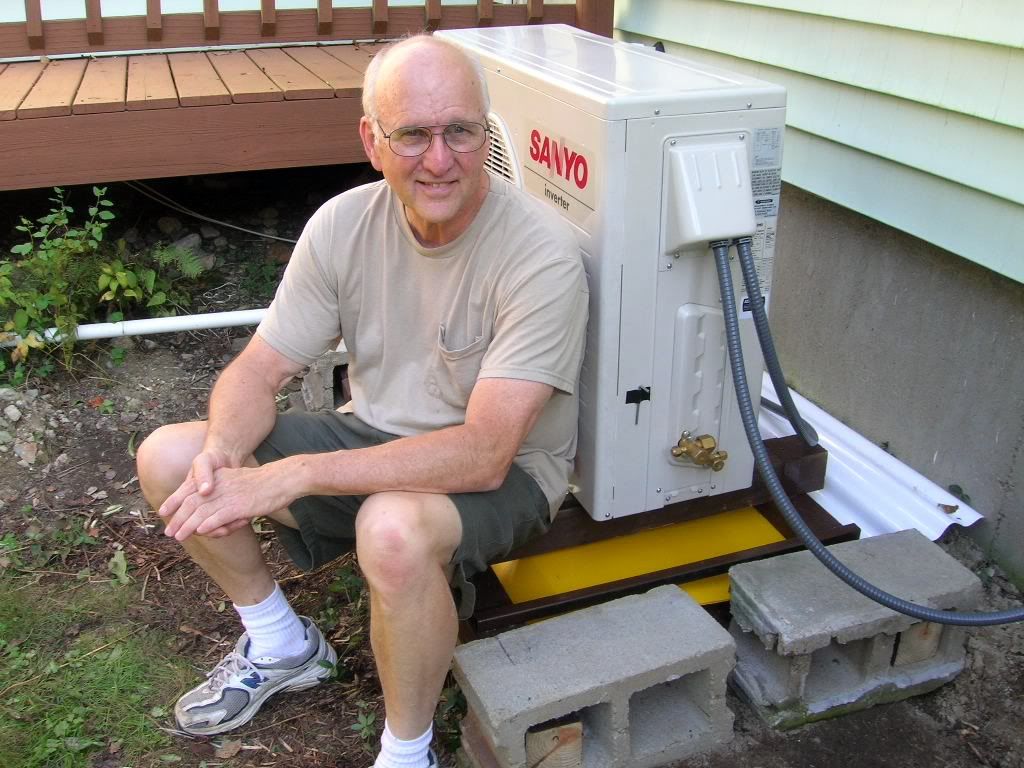
When installing a Sanyo ODU weighting over 140 pounds, do not place it on a couple of patio bricks.
They will sink into the ground, and you will have a Leaning Tower of Sanyo!  This bad Sanyo install was done at the Dunkin Donuts in Lexington MA. It's one of the larger double-decker (dual fan) models. Note my tisk-tisk look of disapproval.. ") I was able to make that face, charge up my Eco-Drive (solar) watch, take my own picture, and watch our bikes (while waiting for our order)!  And, we did 12 miles! 
__________________
My hobby is installing & trying to repair mini-splits EPA 608 Type 1 Technician Certification ~ 5 lbs or less.. |
|
|
|
 |
| Tags |
| air conditioner, diy, heat pump |
|
|


 Linear Mode

