
 |
|
|
#11 |
|
Master EcoRenovator
Join Date: Mar 2009
Location: Western Wisconsin.
Posts: 913
Thanks: 127
Thanked 82 Times in 71 Posts
|
Having a stairway to the outside is going to make this whole project easier.
I suspect that what is happening at the bottom of the stairway is that water is fallowing the underside of the steps down, that the soil under the steps has settled and formed channels that are leading to the underside of your floor. An easy way to figure out of this is the case is to expand the cover that covers that stairway, go out 4 feet or more around the outside of it and see if that helps next time we get rain. Your platform that you are removing is also right next to one of your problem areas, so pulling out that section of floor could be done at the same time, cut in a trench and add drainage, that should be done at the bottom of a stairway like that anyway, with a small floor drain that leads to the sump pit to take care of water from the stairway. I agree to a point about the stone foundation walls, on the other hand stone walls were often put up with a dirt floor and your current concrete floor could vary well be much newer then the rest of your house, still it would be a god idea to at least score a line with a masonry saw along the wall so you end up leaving the cement that is bonded to the wall. |
|
|

|
|
|
#12 |
|
Lurking Renovator
Join Date: May 2011
Location: Illinois
Posts: 9
Thanks: 0
Thanked 0 Times in 0 Posts
|
Do you have efflorescence on any of your walls? What is the texture of your soils? (i.e. clay or sand) If your soils are clay I suspect that you have a seasonally high water table which is pretty commonplace in Spring in the Midwest. There also may be a drainage issue around the outside access, but that is probably only a secondary issue.
|
|
|

|
|
|
#13 |
|
Master EcoRenovator
Join Date: Mar 2009
Location: Western Wisconsin.
Posts: 913
Thanks: 127
Thanked 82 Times in 71 Posts
|
The stairway that comes down from inside the house has a landing at the bottom, can you see under that landing? I've seen a lot of basements (used to clean chimneys and have been in a lot of old houses) that have dirt under the landing because when the floor was poured it would have been even more work to pour the floor under the landing.
|
|
|

|
|
|
#14 |
|
Administrator
Join Date: Aug 2008
Location: Germantown, WI
Posts: 5,525
Thanks: 1,162
Thanked 374 Times in 305 Posts
|
The landing is actually concrete. The wooden stairs just go down to it.
There is some efflorescence on the top of the wall in one spot or two, but really not much anywhere else that I have noticed. I'm not really sure of the texture of the soil.
__________________
Current project - To view links or images in signatures your post count must be 0 or greater. You currently have 0 posts. To view links or images in signatures your post count must be 0 or greater. You currently have 0 posts. & To view links or images in signatures your post count must be 0 or greater. You currently have 0 posts. |
|
|

|
|
|
#15 |
|
Administrator
Join Date: Aug 2008
Location: Germantown, WI
Posts: 5,525
Thanks: 1,162
Thanked 374 Times in 305 Posts
|
Heres an update on the project. I started last weekend actually busting up the platform. I didn't get too far working on my own.
When we started today this is just about what we had. We started by cutting the concrete platform and cutting a trough where we will run the drain tiles. 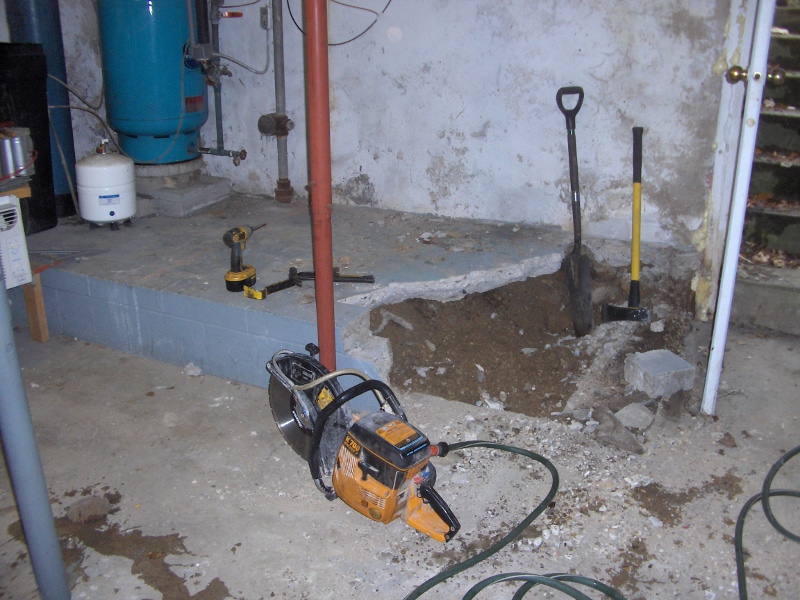  We went and rented an electric hammer to break up the concrete.  We only had it for four hours, but we were also able to make a hole in the wall for the solar piping. 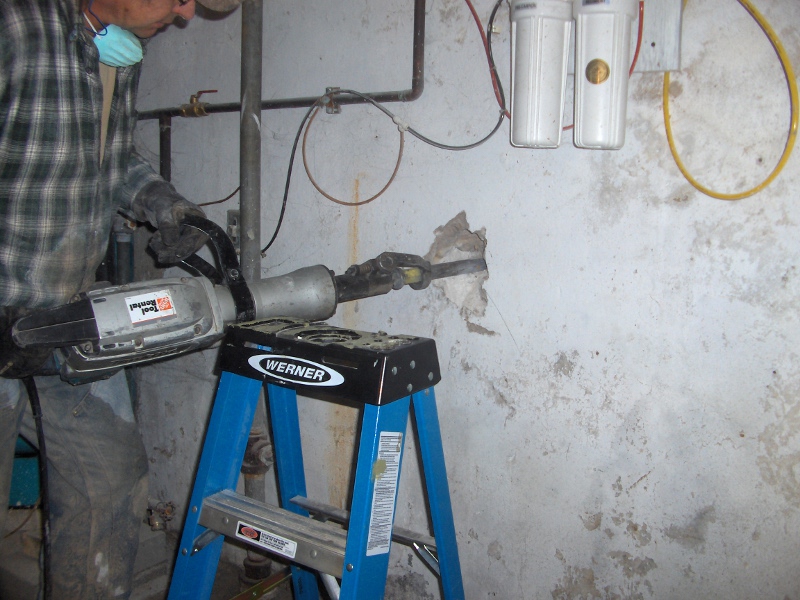 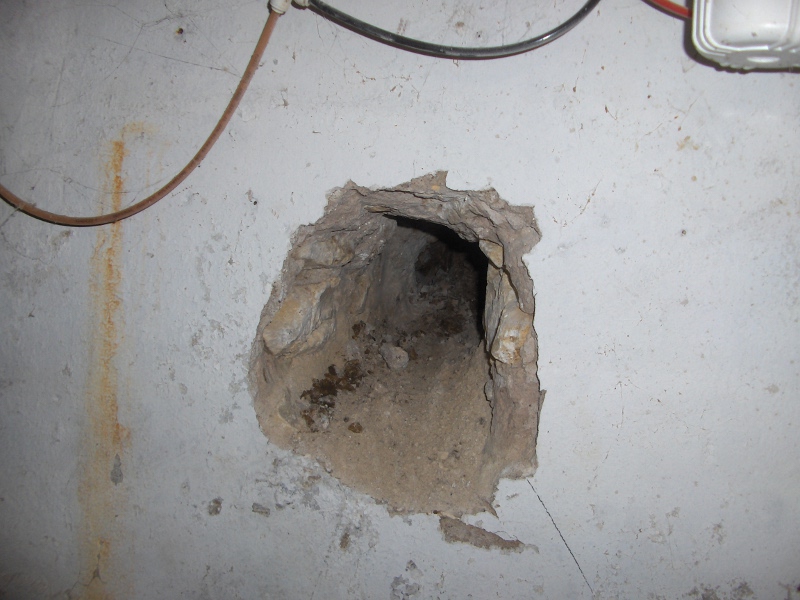 Next up was digging out the trenches. This was tons of fun because it was mostly clay. 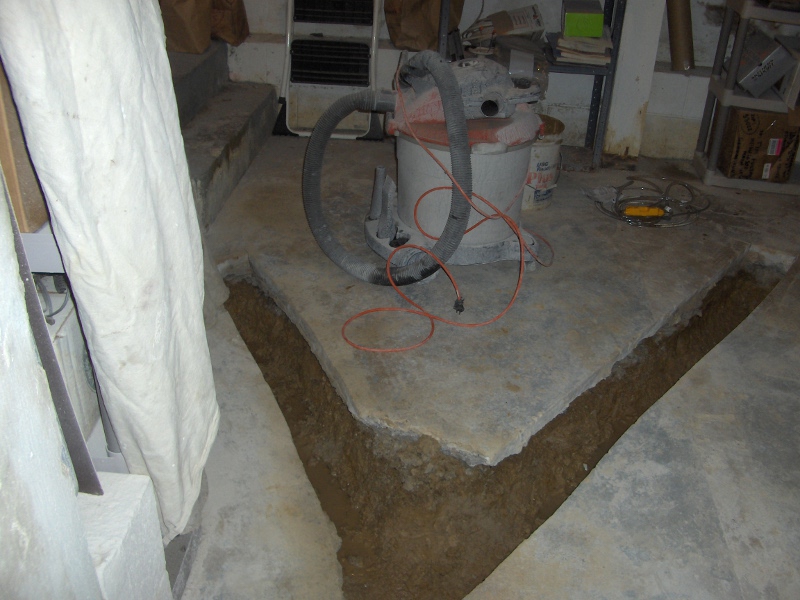 Now it was finally time to lay down some rock and the drain tile.  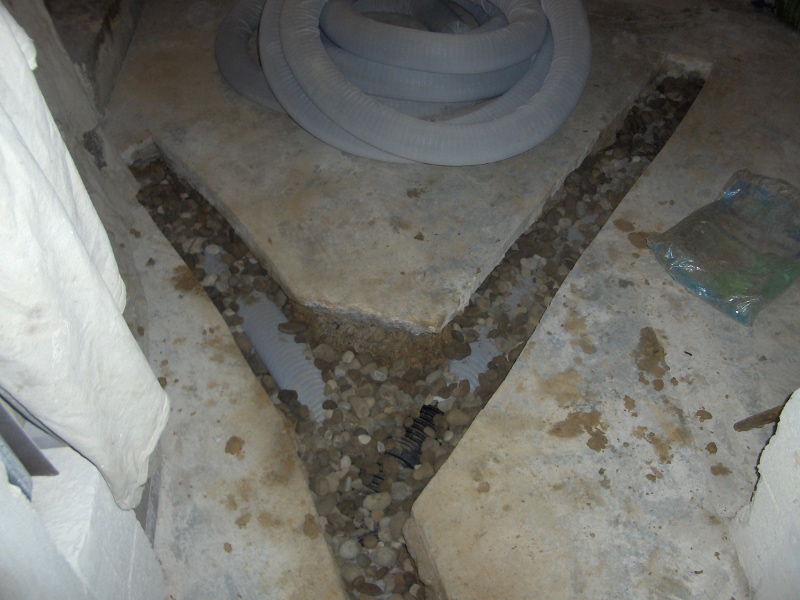 Of course we ran into a wonderful snag. This is the floor drain plumbing. We're plumbing the drain tile into it. We were puzzled why it had a trap in it... It was completely plugged up full of gravel, so out it came. We ended up having to cut into the clay pipe it was attached to and we'll put in a new PVC floor drain and also run the drain tile to it. 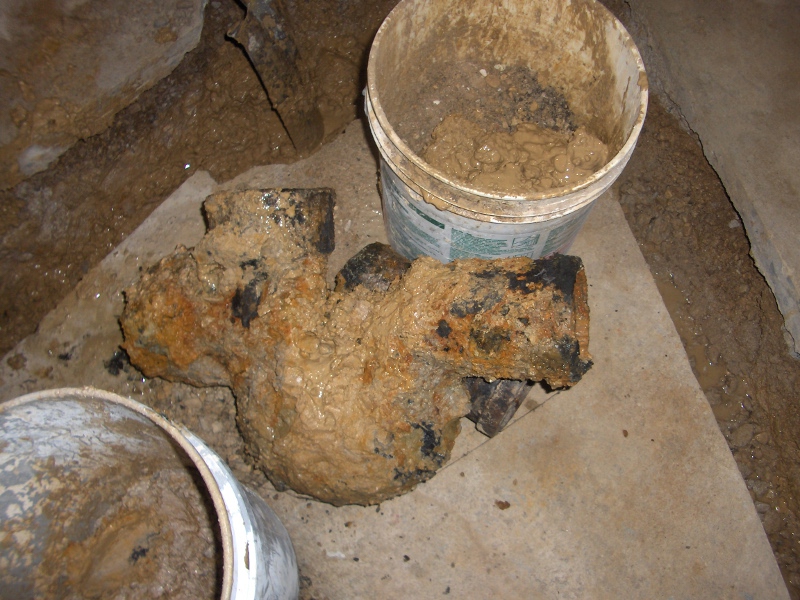 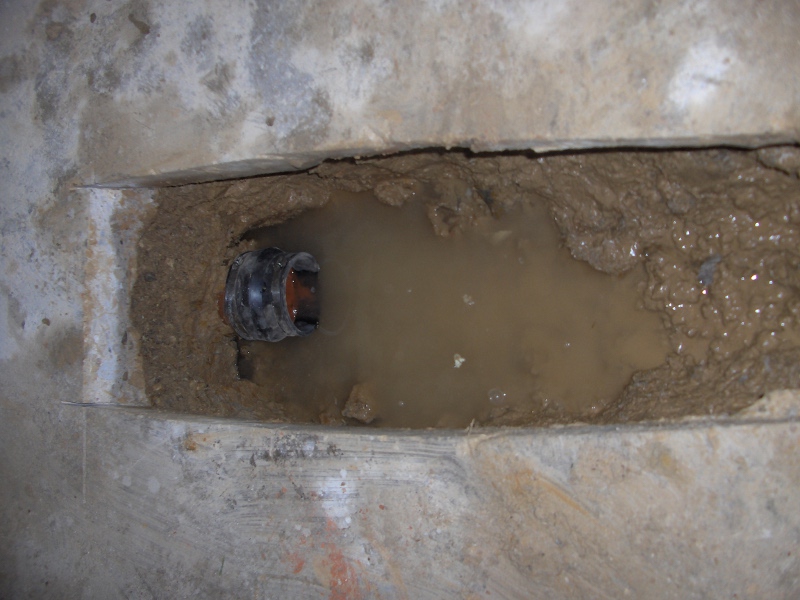 So, this is the setup now. As you can see, we decided just to put the drain tile in the problem areas. This made things a TON easier, and it was still a lot of work. 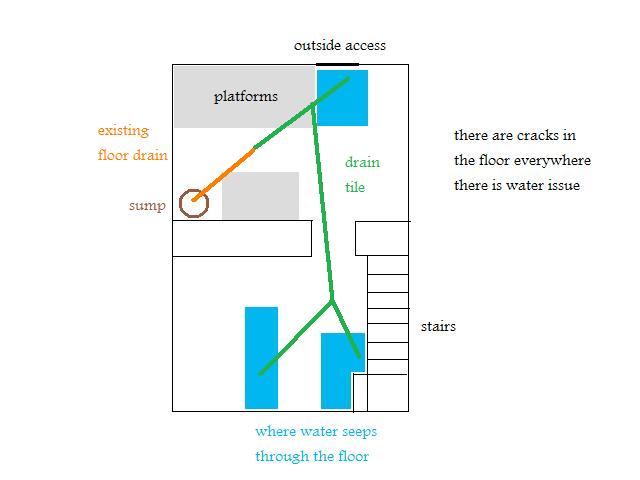
__________________
Current project - To view links or images in signatures your post count must be 0 or greater. You currently have 0 posts. To view links or images in signatures your post count must be 0 or greater. You currently have 0 posts. & To view links or images in signatures your post count must be 0 or greater. You currently have 0 posts. |
|
|

|
| The Following User Says Thank You to Daox For This Useful Post: | edglazer (11-08-11) |
|
|
#16 |
|
Master EcoRenovator
Join Date: Mar 2009
Location: Western Wisconsin.
Posts: 913
Thanks: 127
Thanked 82 Times in 71 Posts
|
If you have not poured the new concrete yet, one thing that I found helps alot with bonding new concrete to old is to hammer drill some holes in to the old concrete and screw in some concrete screws (blue tapcons is what I have used) screwing these in half way gives the new cement something to bond to, you can also get adhesives that you mix with the wet cement and brush on the dry concrete to create a chemical bond as well.
|
|
|

|
|
|
#17 |
|
You Ain't Me
Join Date: Nov 2009
Location: Northampton MA
Posts: 662
Thanks: 6
Thanked 71 Times in 58 Posts
|
Daox that's pretty heavy duty right there. How long did it all take you?
|
|
|

|
|
|
#18 |
|
Administrator
Join Date: Aug 2008
Location: Germantown, WI
Posts: 5,525
Thanks: 1,162
Thanked 374 Times in 305 Posts
|
That last post was a days worth of work.
Today we poured the concrete for the drain tile, fixed some sump pump problems and also poured the new pad where the solar tank will be sitting along with some other miscellaneous things. I'll post pictures up later tonight.
__________________
Current project - To view links or images in signatures your post count must be 0 or greater. You currently have 0 posts. To view links or images in signatures your post count must be 0 or greater. You currently have 0 posts. & To view links or images in signatures your post count must be 0 or greater. You currently have 0 posts. |
|
|

|
|
|
#19 |
|
Administrator
Join Date: Aug 2008
Location: Germantown, WI
Posts: 5,525
Thanks: 1,162
Thanked 374 Times in 305 Posts
|
Here are the pictures previously mentioned.
We got the new floor drain all situated and added the drain tile.  Everything is prepped for concrete. 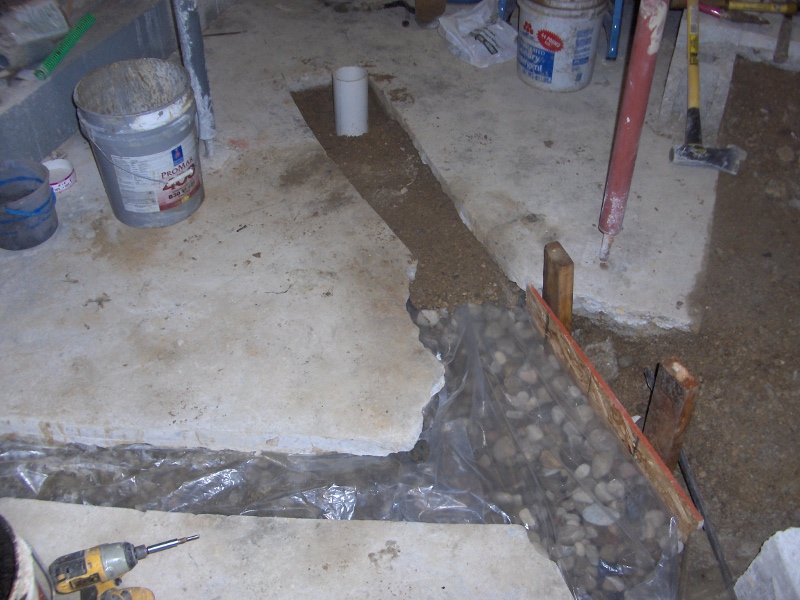 Now for the concrete.  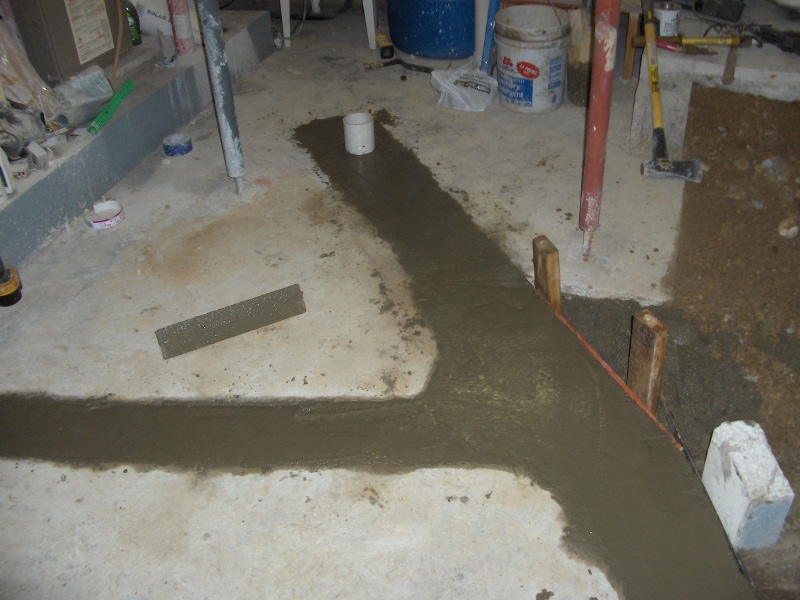 And then we did the larger pad area last. 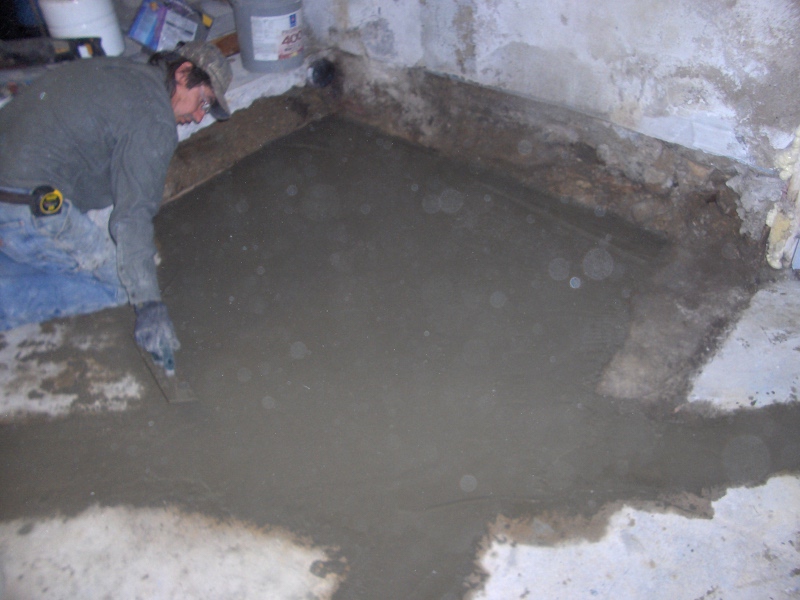
__________________
Current project - To view links or images in signatures your post count must be 0 or greater. You currently have 0 posts. To view links or images in signatures your post count must be 0 or greater. You currently have 0 posts. & To view links or images in signatures your post count must be 0 or greater. You currently have 0 posts. Last edited by Daox; 10-22-11 at 10:00 PM.. |
|
|

|
| The Following User Says Thank You to Daox For This Useful Post: | edglazer (11-08-11) |
|
|
#20 |
|
Administrator
Join Date: Aug 2008
Location: Germantown, WI
Posts: 5,525
Thanks: 1,162
Thanked 374 Times in 305 Posts
|
Well, this project was a bid success IMO. I hooked up my dehumidifer downstairs again the other day and turned it on to see how humid it was, and it read 60%. This is what I had it set to all summer long. Its also been quite wet lately (no huge downpours, just lots of light sprinkles keeping everything wet) so I know this is a worse than normal situation. Previously, without the dehumidifier it would pretty quickly get up to 80% humidity down there making it smell very musty and damp. The only big test left will be once spring rolls around. I think this will save me at least 1kWh/day in summer, plus not having to worry about cleaning up water downstairs.
__________________
Current project - To view links or images in signatures your post count must be 0 or greater. You currently have 0 posts. To view links or images in signatures your post count must be 0 or greater. You currently have 0 posts. & To view links or images in signatures your post count must be 0 or greater. You currently have 0 posts. |
|
|

|
 |
| Tags |
| basement, drain tile, humidity, water |
|
|