
 |
|
|
#101 |
|
Home-Wrecker
Join Date: Sep 2008
Location: SE Wisconsin
Posts: 546
Thanks: 3
Thanked 165 Times in 96 Posts
|
Hi Creeky,
Yes, pretty much all of my videos are embeddable. You can post it on your site. Just make a reference back to my YouTube channel or 300MPG.org. Thanks!
__________________
To view links or images in signatures your post count must be 0 or greater. You currently have 0 posts. To view links or images in signatures your post count must be 0 or greater. You currently have 0 posts. |
|
|

|
|
|
#102 |
|
Home-Wrecker
Join Date: Sep 2008
Location: SE Wisconsin
Posts: 546
Thanks: 3
Thanked 165 Times in 96 Posts
|
I scheduled the insulation company to come on out and fiberglass the garage. Because of their economy of scale, and having a nice box truck, the insulation company can insulate my garage for not a whole lot more than if I went to the big box home improvement store and bought insulation and make the multiple trips to go get it.
Because the "Loft" upstairs of the garage is basically the attic, I'm limited in how much space I have for insulation up there. However, in the FLOOR of the loft, the bottom cord of the truss is a 2x10. I'll be able to put in almost 10 inches of blown insulation in there to keep the heat in the downstairs. I also stopped by the garage door installation company - Hartland Overhead Door. It's one that my father's construction business always used, and it happens that I know the two sons who run that family business from High School. I got a quote for two doors of the 2" thick urethane-foam filled variety. The price was identical to a 2" foam door at the big box store, except that with the full-service garage door company, it includes installation! Before I left, one of the owners, Joe, stopped back in, so I got to say Hi to him. I explained what I'm trying to do with the solar panels and how I'd like to integrate some sort of "sunny winter day" glazing into the garage. (Something like this (BuiltItSolar Link) On the demo in their shop, Joe showed me a pull-down screen door for garages. It was a very simple design with one vertical piece of track, one horizontal, and a rigid aluminum frame that holds the screen. I pondered the possibility of getting something like that, only without the screen, and installing twin-wall polycarbonate instead. I believe that THIS (Garage Door Screens: Lifestyle Screens® Garage Screen Door System) Is the screen that I saw. I didn't ask about price while I was at Hartland Overhead Door. Later, I tried finding an online retailer to check pricing. It was nearly $1,000 for the screen door, no matter which size! Yipes! The design did look simple, so maybe I can make my own from scratch? Lastly, a friend of mine is sending me a couple of USED micro-inverters. He found them at an electronics salvage yard. We have no idea if they even work or not, but they were CHEAP! 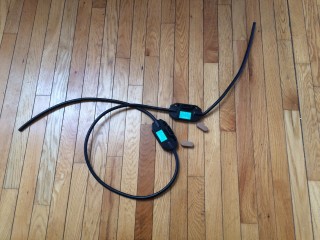 I purchased a "two-drop" section of Enphase Engage cable. This is the special cable that Enphase's micro-inverters plug right in to. I bought this short piece so that I could test the used inverters, check the cable against what other components I might need to use with it, and in the end, have it for demo's, presentations, and as a teaching sample. After I picked up the cable, I also stopped at the Home Improvement store to check out the electric department to find the right connector and outdoor rated boxes. I located a 1/2" watertight cord connector and tested the Engage cable with it. Sure enough, I could just squeeze the cable through the inside of the connector. 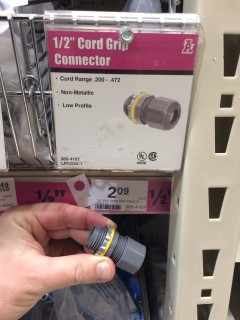 Next, I tried finding an appropriate weatherproof box for that connector to screw in to. I couldn't find the right type of box at all, until I finally located an employee, and he showed me that what I was looking for was actually the next aisle over. (I THOUGHT I was in the last aisle of the department...) Over there, I found both metal and plastic NEMA3R rated boxes. They are sorted by "Number of Gangs" and number of holes. There is also standard depth and extra deep boxes. I found it interesting that a one-gang box was cheaper than a 2-gang, but that the COVER for the one-gang cost more! Go figure. I ended up buying a one-gang, 3-hole, standard box (in plastic) with the matching lid. 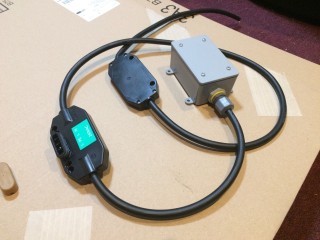 Back at home, I wired up the cable through the watertight connector, into the box, and connected the lid. It all looks nice and solid. From this, I'll be able to run some 12 ga. wires to this junction box to build a test-rig for the micro-inverters. It's sunny today (but COLD) so it would be an ideal time for testing inverters. Too bad I don't have them yet! I'll be spending the rest of the day dragging ladders and materials out of the garage and stacking them outside. I also need to do anything else that I can think of that needs to be done BEFORE the insulators are here. For example, I might want to fully document where all the wiring is while I can still see it! I'll be very busy this next week too, but getting the insulation in will feel like a big step forward! PS: I think I forgot to mention the "Man Door". We got that in last weekend. It's a vinyl door filled with urethane foam. I installed just a plain inexpensive lock-set on it. I might eventually be adding a "smart-lock" or a push-button deadbolt so that I can keep the garage locked all the time, but still easily go in and out, without having to dig through my whole keychain every time. 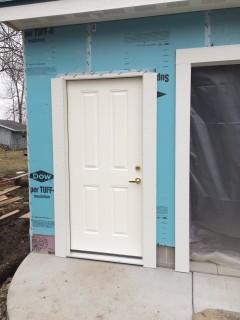
__________________
To view links or images in signatures your post count must be 0 or greater. You currently have 0 posts. To view links or images in signatures your post count must be 0 or greater. You currently have 0 posts. |
|
|

|
| The Following User Says Thank You to bennelson For This Useful Post: | Daox  (03-13-17) (03-13-17) |
|
|
#103 |
|
Home-Wrecker
Join Date: Sep 2008
Location: SE Wisconsin
Posts: 546
Thanks: 3
Thanked 165 Times in 96 Posts
|
__________________
To view links or images in signatures your post count must be 0 or greater. You currently have 0 posts. To view links or images in signatures your post count must be 0 or greater. You currently have 0 posts. |
|
|

|
|
|
#104 |
|
Home-Wrecker
Join Date: Sep 2008
Location: SE Wisconsin
Posts: 546
Thanks: 3
Thanked 165 Times in 96 Posts
|
I got a chance to do just a little tiny bit of solar experimenting.
I got a couple of used Enphase m215 micro-inverters that a friend dug up in an electronics junkyard. I tried hooking one up to test it. I WAS able to get the inverter to power on, but NOT produce power. The LED on the unit blinks to indicate that it is connected to grid power, but NOT communicating with the Envoy Communications Gateway. Of course it isn't! I don't have one of those yet! I tried to find some information on whether or not the Envoy is REQUIRED to set up these micro-inverters. As best I can tell, IT DEPENDS. It's also completely possible that these inverters were set up for some voltage range a little different than what I have at my house, and need to be re-programmed before they can be used. The other thing I realized (after the fact) is that all three of these inverters aren't the same. Two of them have H4 connectors on them, and one has MC4 Connectors. The solar panels have MC4 connectors. These two different styles of connectors ARE compatible, but they use different DISCONNECT TOOLS. Solar equipment nowadays is required to have locking connectors on it. With micro-inverters, the DC voltage is only as high as the individual solar panel - about 30VDC nominal. However, a series-string of panels COULD be several hundred volts DC. So, a locking connector makes sense for safety. But this also means that I can't just unhook the inverter from the solar panel! I already had a removal tool for MC4, but NOT for H4! I took two photos to show the difference between these two connectors. Notice at the red arrows that the MC4 connector is open, but the H4 connector has tabs across the same area. Also, although they look the same, the connectors are two different widths at that point. 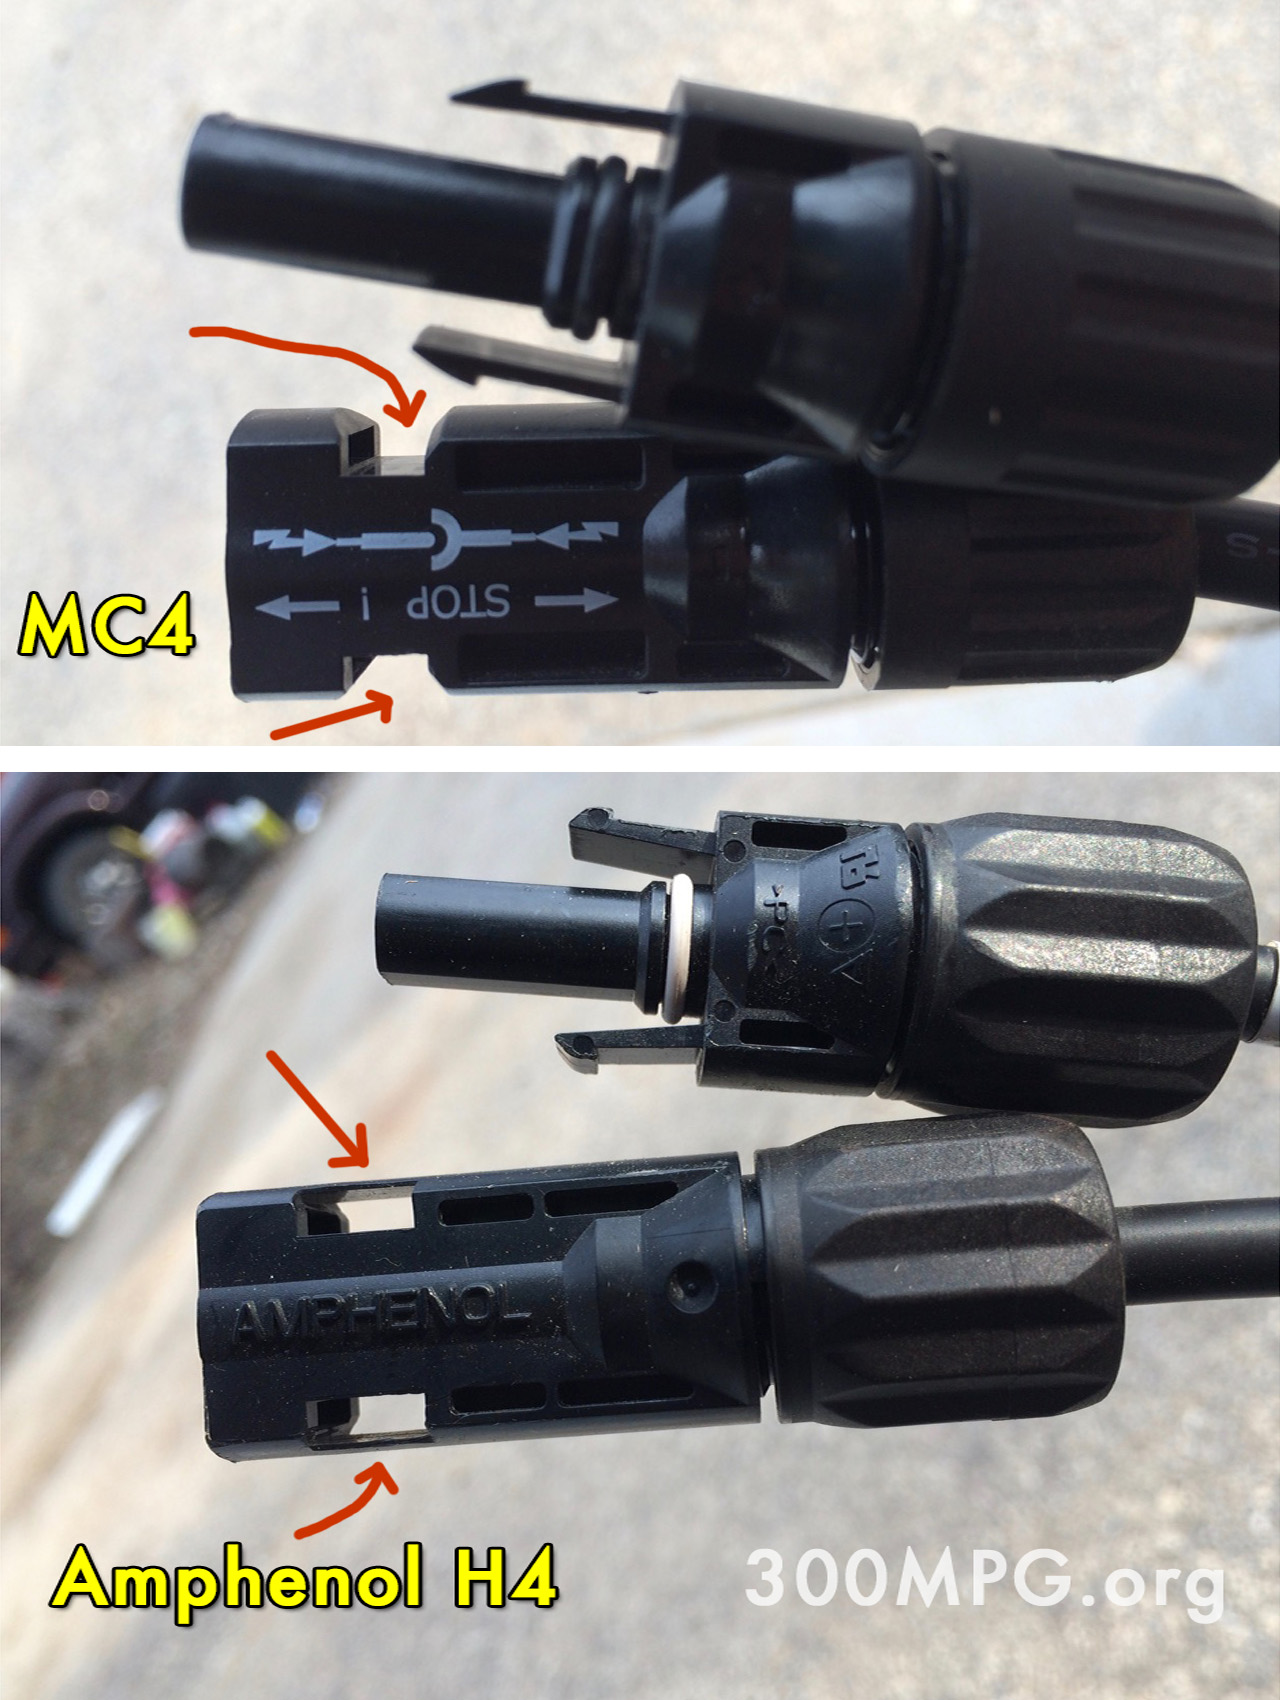 Because I am planning on using Enphase micro-inverters anyways, I figure I'll just order the Envoy communications gateway. That way, I can experiment more with these used units, and I'll be ready when I buy my real inverters. I also have an H4 Removal tool coming as well. The last few days, I've been under the weather AND working some really weird hours (3AM on a Sunday!) However, my Dad and my Brother stopped over while I was out to get started on plywooding the interior of the garage. They were using a drywall lift for pushing the wood up to the ceiling and hold it in place while it was screwed to the ceiling. We got a little less than half the garage interior done. Part of the reason for stopping is to leave things open enough for the blow-in insulation to go in still. Once the plywood interior is done, we can do the garage doors. I've already ordered those. Those are 2" thick urethane foam-filled double-wall steel doors. 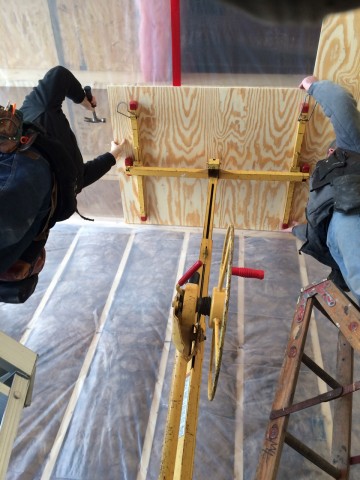 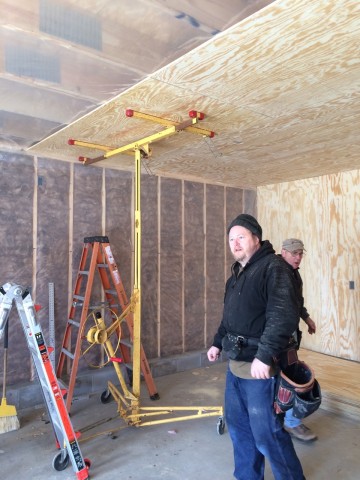 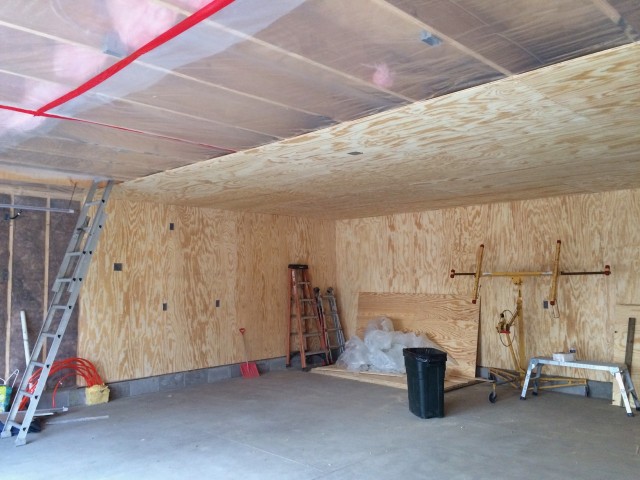 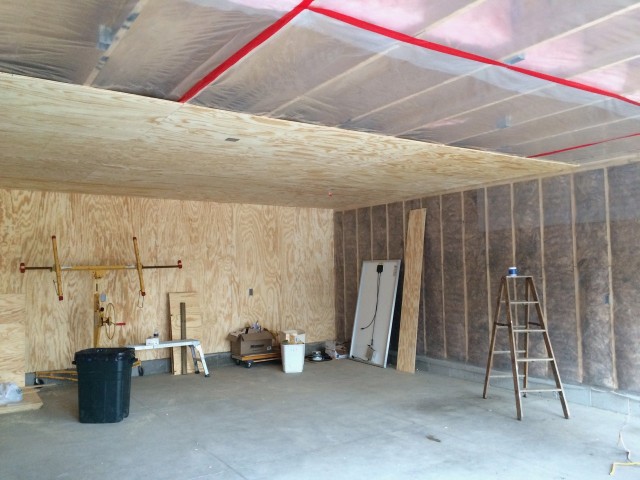 So, next up - Blow-In Insulation. After that, more plywood, then garage doors.
__________________
To view links or images in signatures your post count must be 0 or greater. You currently have 0 posts. To view links or images in signatures your post count must be 0 or greater. You currently have 0 posts. |
|
|

|
| The Following User Says Thank You to bennelson For This Useful Post: | Daox  (03-21-17) (03-21-17) |
|
|
#105 |
|
Administrator
Join Date: Aug 2008
Location: Germantown, WI
Posts: 5,525
Thanks: 1,162
Thanked 374 Times in 305 Posts
|
The progress looks great Ben!
__________________
Current project - To view links or images in signatures your post count must be 0 or greater. You currently have 0 posts. To view links or images in signatures your post count must be 0 or greater. You currently have 0 posts. & To view links or images in signatures your post count must be 0 or greater. You currently have 0 posts. |
|
|

|
|
|
#106 |
|
Less usage=Cheaper bills
Join Date: Nov 2010
Location: Minneapolis, MN
Posts: 940
Thanks: 41
Thanked 117 Times in 91 Posts
|
Plywood? Why not drywall?
|
|
|

|
|
|
#107 |
|
Home-Wrecker
Join Date: Sep 2008
Location: SE Wisconsin
Posts: 546
Thanks: 3
Thanked 165 Times in 96 Posts
|
Plywood, not drywall, for moisture resistance and durability.
We tend to have humid summers and pretty large seasonal temperature swings. It's been my experience that drywall doesn't like that. Damp drywall is bad, and large temperature swings lead to cracks in drywall mud. Plywood is also much more resistant to taking a beating. This is a garage. I'll be working on projects and moving heavy equipment around. Drywall is sure to get pretty banged-up.
__________________
To view links or images in signatures your post count must be 0 or greater. You currently have 0 posts. To view links or images in signatures your post count must be 0 or greater. You currently have 0 posts. |
|
|

|
|
|
#108 |
|
Journeyman EcoRenovator
Join Date: Jun 2011
Location: a field somewhere
Posts: 304
Thanks: 64
Thanked 44 Times in 31 Posts
|
I like plywood in a shop too. You can pound in nails and hang stuff.
If you're going that route: I would paint while the shop is clear. Pretty easy to hit everything with a spray gun right now. semi transparent? keep that nice grain. Nice build. Can't wait to see the meter turning.
__________________
Current projects Chevy Volt battery pack conversion To view links or images in signatures your post count must be 0 or greater. You currently have 0 posts. Blog that is down right now but will return To view links or images in signatures your post count must be 0 or greater. You currently have 0 posts. To view links or images in signatures your post count must be 0 or greater. You currently have 0 posts. Business where I sell solar stuff [url]https://www.bobolinksolar.com |
|
|

|
|
|
#109 |
|
Home-Wrecker
Join Date: Sep 2008
Location: SE Wisconsin
Posts: 546
Thanks: 3
Thanked 165 Times in 96 Posts
|
I was thinking about sloshing it with a coat of white paint.
I think my brother-in-law still has an electric paint sprayer. Otherwise I can do the old paint roller on a mop handle. All LED Shop Lights and white walls should be just about ideal for a nice bright work-space.
__________________
To view links or images in signatures your post count must be 0 or greater. You currently have 0 posts. To view links or images in signatures your post count must be 0 or greater. You currently have 0 posts. |
|
|

|
|
|
#110 |
|
Steve Hull
Join Date: Dec 2012
Location: hilly, tree covered Arcadia, OK USA
Posts: 826
Thanks: 241
Thanked 165 Times in 123 Posts
|
Here is the problem with white paint on a plywood garage wall - fly poop. If you use a transparent stain/sealer, you don't see every single bit of fly "debris".
White paint looks GREAT at first . . . . . Steve
__________________
consulting on geothermal heating/cooling & rational energy use since 1990 |
|
|

|
 |
| Tags |
| diy, garage, heated slab, pex, solar |
|
|