 |
|
|
#21 |
|
Administrator
Join Date: Aug 2008
Location: Germantown, WI
Posts: 5,525
Thanks: 1,162
Thanked 374 Times in 305 Posts
|
That is exactly where I got the idea from. It is an amazing concept and should be MUCH wider used IMO. The additional cost of the setup is so small when considering the life of a house.
While pondering it, I think I can get the walls to R40, but thats about as far as I can go. We did have someone start a thread with passive house info in it. http://ecorenovator.org/forum/ecoren...ve-houses.html
__________________
Current project - To view links or images in signatures your post count must be 0 or greater. You currently have 0 posts. To view links or images in signatures your post count must be 0 or greater. You currently have 0 posts. & To view links or images in signatures your post count must be 0 or greater. You currently have 0 posts. |
|
|

|
|
|
#22 | |
|
Supreme EcoRenovator
Join Date: Mar 2009
Location: Portland, OR
Posts: 4,004
Thanks: 303
Thanked 724 Times in 534 Posts
|
I think the most interesting thing about Passivhaus is that it is defined by the allowable heat loss (or gain) per square meter:
Quote:
Regards, -AC_Hacker Last edited by AC_Hacker; 09-29-09 at 01:03 PM.. |
|
|
|

|
|
|
#23 |
|
Administrator
Join Date: Aug 2008
Location: Germantown, WI
Posts: 5,525
Thanks: 1,162
Thanked 374 Times in 305 Posts
|
If you follow the blog, you know I did some leak testing (DIY Home Pressure Test Results | EcoRenovator.org) and found some disturbing things. The first thing is there are HUGE gaps around my window trim upstairs. Combine that with the hollow walls and we're talking pretty crazy air infiltration. I don't know how I didn't catch this sooner.
Anyway, I've started sealing them all up and then some. I'm also adding additional stick on weather stripping to the bottom of the windows. A few of them are not perfectly square and don't seal well against the sill at all.
__________________
Current project - To view links or images in signatures your post count must be 0 or greater. You currently have 0 posts. To view links or images in signatures your post count must be 0 or greater. You currently have 0 posts. & To view links or images in signatures your post count must be 0 or greater. You currently have 0 posts. |
|
|

|
|
|
#24 |
|
Apprentice EcoRenovator
Join Date: Aug 2009
Posts: 123
Thanks: 14
Thanked 1 Time in 1 Post
|
Tim, I wonder if you shouldn't maybe pull those window trim panels down and re-seal behind them before tacking them back up?
Seems to me that caulking the gaps is more like putting a band-aid over a bullet hole? |
|
|

|
|
|
#25 |
|
Administrator
Join Date: Aug 2008
Location: Germantown, WI
Posts: 5,525
Thanks: 1,162
Thanked 374 Times in 305 Posts
|
It really is like putting a band-aid over a bullet hole lol.
I did pull off one of the trim panels to take a look at what there is behind it. This is what was there. I think I'll just be bumping up the priority of gutting the upstairs to get insulation into the walls. At that point, I'll take care of the windows and the walls.
__________________
Current project - To view links or images in signatures your post count must be 0 or greater. You currently have 0 posts. To view links or images in signatures your post count must be 0 or greater. You currently have 0 posts. & To view links or images in signatures your post count must be 0 or greater. You currently have 0 posts. |
|
|

|
|
|
#26 |
|
Administrator
Join Date: Aug 2008
Location: Germantown, WI
Posts: 5,525
Thanks: 1,162
Thanked 374 Times in 305 Posts
|
Last night I mostly finished up sealing the windows. I just have to move some furniture to get at a few more places in my bedroom.
I also went back and put gaskets on all of the upstairs power outlets and switches. With the hollow walls I can get a ton of air infiltration through them. After its all sealed up, I'll be doing another DIY home pressure test to make sure I didn't miss anything.
__________________
Current project - To view links or images in signatures your post count must be 0 or greater. You currently have 0 posts. To view links or images in signatures your post count must be 0 or greater. You currently have 0 posts. & To view links or images in signatures your post count must be 0 or greater. You currently have 0 posts. Last edited by Daox; 10-01-09 at 08:23 AM.. |
|
|

|
|
|
#27 |
|
Apprentice EcoRenovator
Join Date: Aug 2009
Posts: 123
Thanks: 14
Thanked 1 Time in 1 Post
|
|
|
|

|
|
|
#28 |
|
Administrator
Join Date: Aug 2008
Location: Germantown, WI
Posts: 5,525
Thanks: 1,162
Thanked 374 Times in 305 Posts
|
This whole last week I don't think it has gotten above 65 during the day. So, I have been playing around a bit. I can ABSOLUTELY tell that the caulking and sealing I've been doing upstairs has made a difference. Its still not getting really cold outside at night, maybe high 30s, but I'm only loosing about 2 degrees upstairs at night. I can't say what I was loosing before sealing things up, but I can definitely tell a difference when I wake up in the morning. This is the best 1 tube of caulk I ever spent.

__________________
Current project - To view links or images in signatures your post count must be 0 or greater. You currently have 0 posts. To view links or images in signatures your post count must be 0 or greater. You currently have 0 posts. & To view links or images in signatures your post count must be 0 or greater. You currently have 0 posts. |
|
|

|
|
|
#29 |
|
Administrator
Join Date: Aug 2008
Location: Germantown, WI
Posts: 5,525
Thanks: 1,162
Thanked 374 Times in 305 Posts
|
Oh yeah, in addition to the window and outlet sealing I've been doing, I also have been fixing the attic access. First, I put stick on weather stripping around the base of the access. Now, I am in the middle of making a rigid foam cover to form a dead air space between the hatch itself and the platform that is above the insulation. I'll have pics soon.
__________________
Current project - To view links or images in signatures your post count must be 0 or greater. You currently have 0 posts. To view links or images in signatures your post count must be 0 or greater. You currently have 0 posts. & To view links or images in signatures your post count must be 0 or greater. You currently have 0 posts. |
|
|

|
|
|
#30 |
|
Administrator
Join Date: Aug 2008
Location: Germantown, WI
Posts: 5,525
Thanks: 1,162
Thanked 374 Times in 305 Posts
|
Higgy was bothering me the other day for more pics, so here they are.
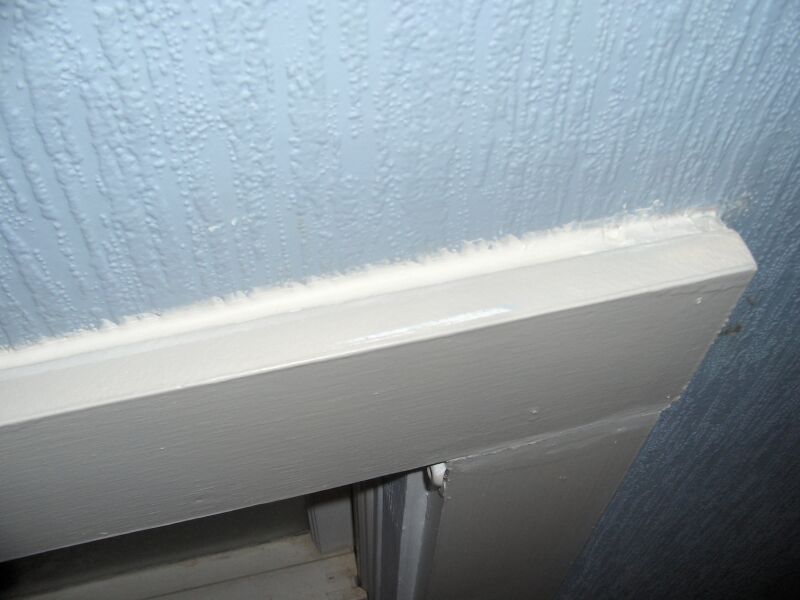
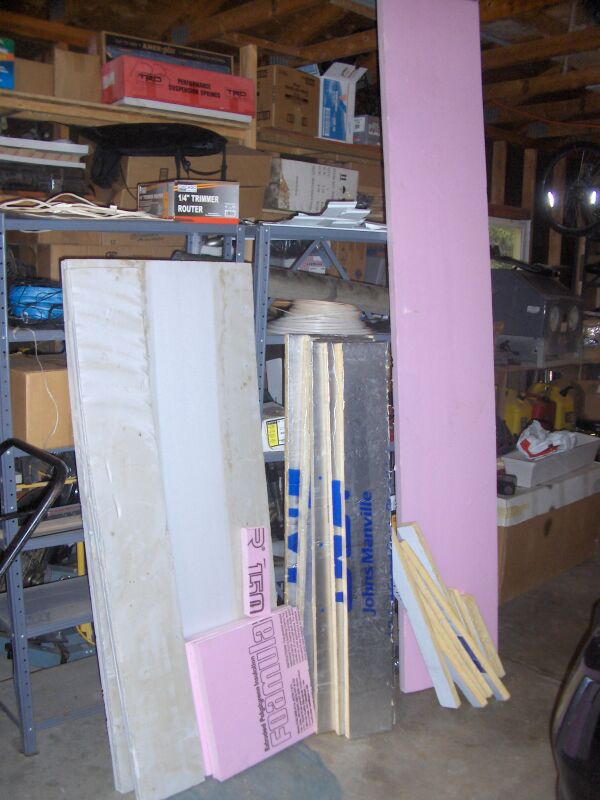
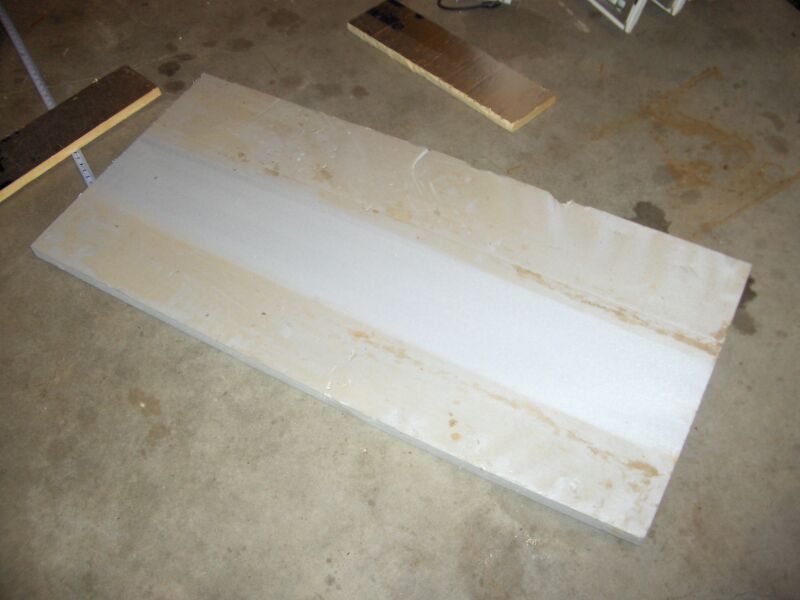
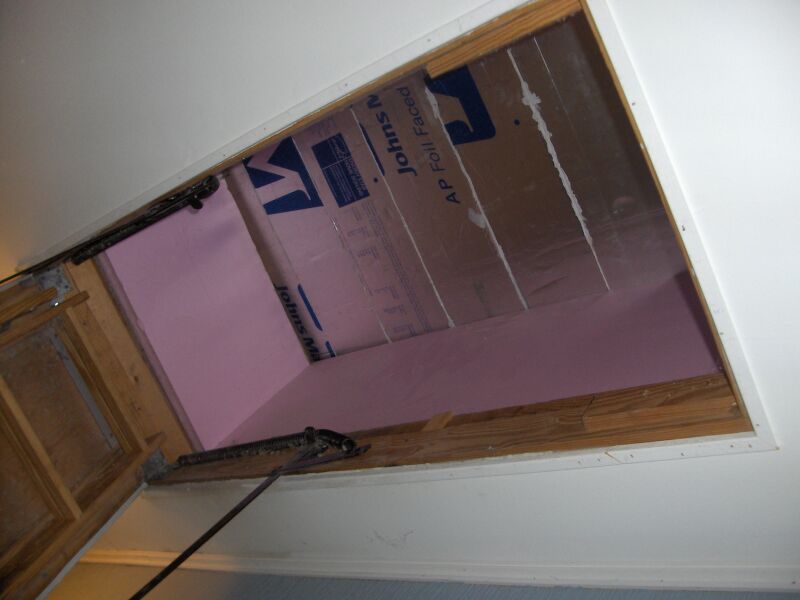
Here is the caulked up windows. As I mentioned, this helped enormously so far. Very noticeable difference.  To make the attic hatch cover, I didn't want to have to go buy materials, so I gathered up the scraps of insulation I had laying around.  I decided to start out with the largest piece I had which was normal 2" polystyrene foam and trimmed it to length. It wasn't quite wide enough to cover completely though.  So, I gathered up the pieces of 1" thick polyiso I had, cut them to length, and glued them to the polystyrene. I put the shiny side down to act as a radiant barrier. I also went back and caulked all the gaps between the polyiso sheets to minimize air leakage.  Next, I fitted it to the hatch area. It fit pretty good with a little trimming here and there. But, it really needs to have a handle attached to the bottom so I can pull it down tightly.  I'm also going to put some expanding foam around the edges of the pink foam, put some newspaper over it, and then put the cover on it to create a better seal. There are still some fairly large gaps since the pink foam isn't all exactly the same height. As you can see, I still have to fill in the gaps around the pink foam too. 
__________________
Current project - To view links or images in signatures your post count must be 0 or greater. You currently have 0 posts. To view links or images in signatures your post count must be 0 or greater. You currently have 0 posts. & To view links or images in signatures your post count must be 0 or greater. You currently have 0 posts. |
|
|

|
 |
| Tags |
| air, caulk, expanding foam, leak, seal, window |
|
|