
 |
|
|
|
|
#1 |
|
Administrator
Join Date: Aug 2008
Location: Germantown, WI
Posts: 5,525
Thanks: 1,162
Thanked 374 Times in 305 Posts
|
My cousin just dropped me off a nice little wood furnace for my garage. Yep, another freebie! But, it does need work. From the name plate on it it looks like its from the early 80s. It is VERY simple which is great. However, it does not have a dedicated inlet for combustion chamber air. Its also pretty small so I'm guessing a lot of heat will escape out of the flue.
I am looking to refurbish this furnace as well as modify it to increase the efficiency. I am looking for ideas! It'll obviously need a dedicated intake for the combustion air. I'm not sure what can be done with the flue to increase efficiency so I'm looking for ideas there. I am also thinking of running some plumbing to it to work as an auxiliary water heater since I'm sure it'll provide more heat than is needed to heat my garage. Anyway, I don't know a lot about furnace design or anything so if anyone has any links to info or anything it would be great. Here are the pictures: Front of the furnace. The rust is not only from use, but sitting outside for a while. 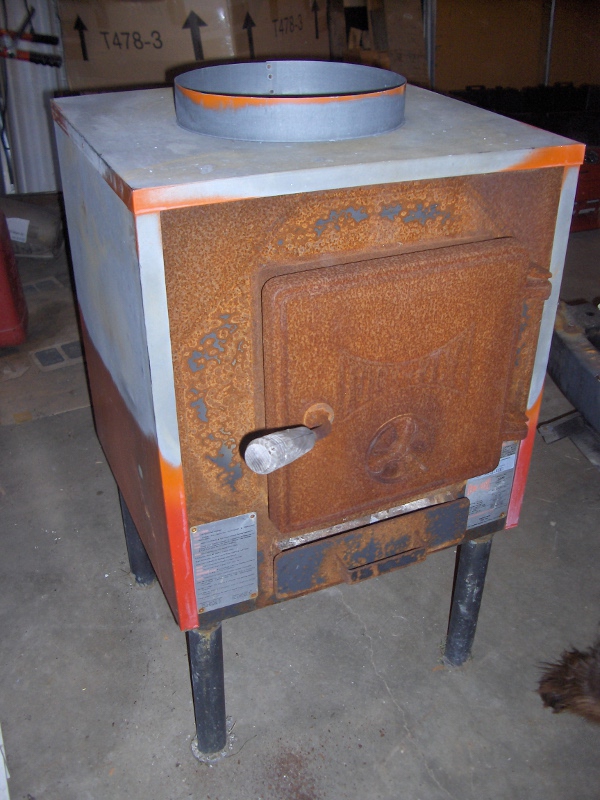 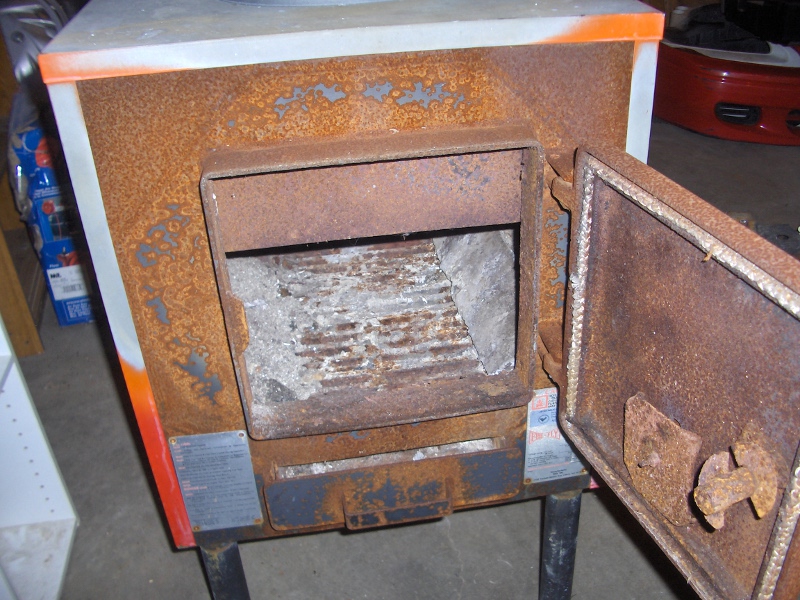 Here you can see the problem with the unit. It has several holes in the back. I'll just weld them shut. 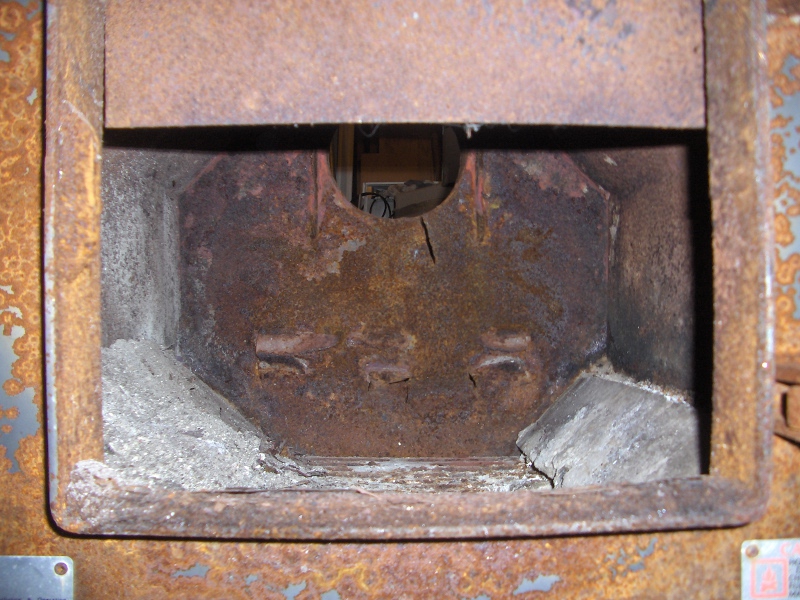 This is the back side. Again you can see the holes.  A nice perspective shot. The one hole under the exhaust flue is fairly good in size. Nothing that can't be fixed though. 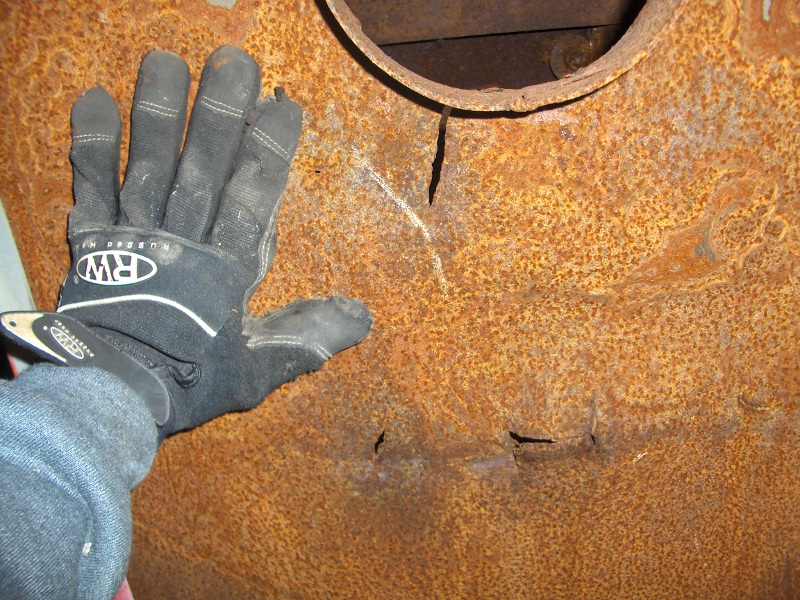 Here is the unit without the cover over it. There is a blower that attaches under the unit and blows air over the combustion chamber and the hot air exits the top via a large duct. Pretty simple design. 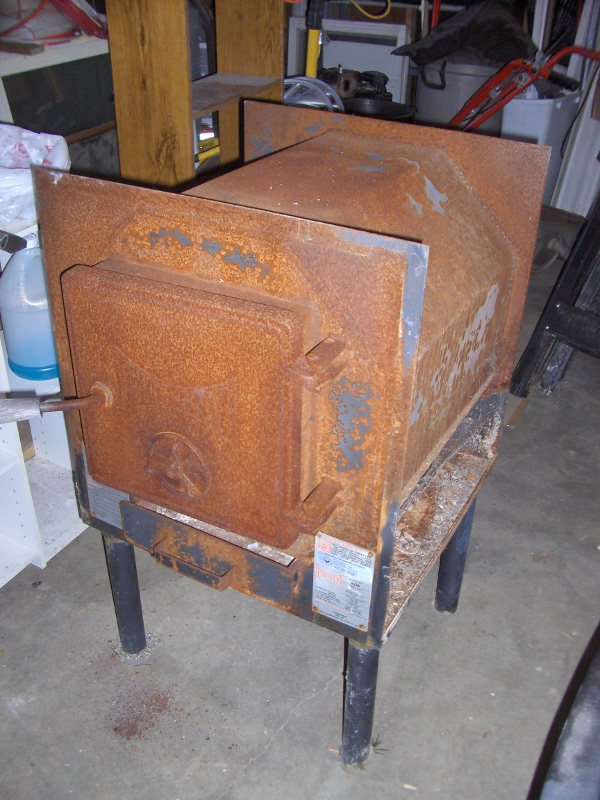 Here is where the blower attaches on the bottom. 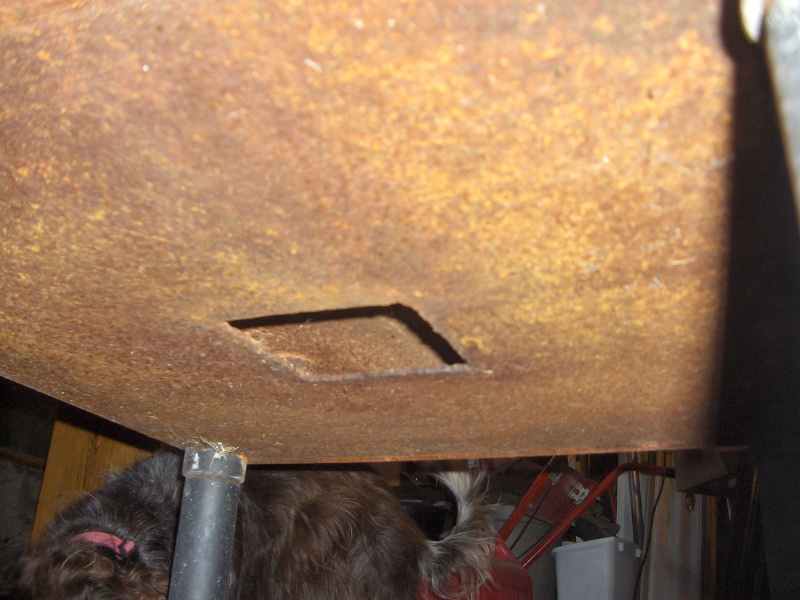 This is where the air comes up from the bottom and around the sides. 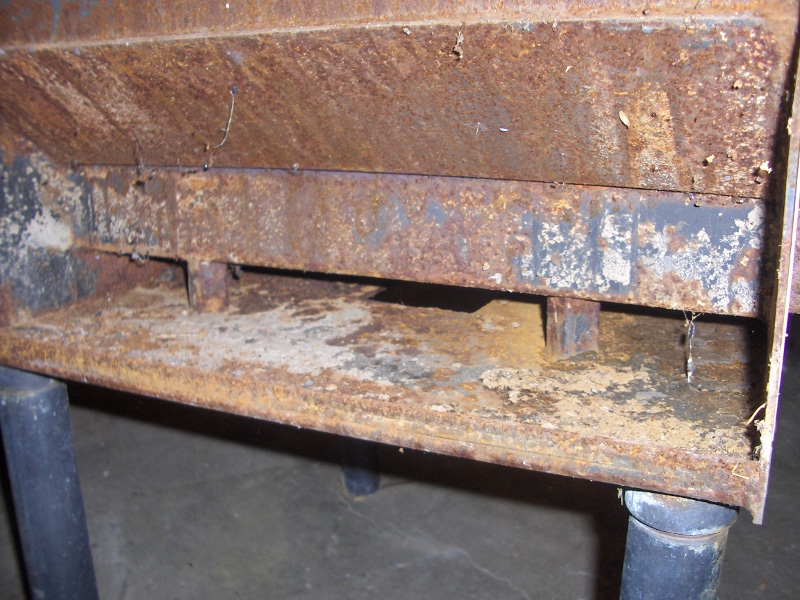
__________________
Current project - To view links or images in signatures your post count must be 0 or greater. You currently have 0 posts. To view links or images in signatures your post count must be 0 or greater. You currently have 0 posts. & To view links or images in signatures your post count must be 0 or greater. You currently have 0 posts. Last edited by Daox; 11-26-10 at 10:47 AM.. |
|
|

|
|
|
#2 |
|
Infrequent noob
Join Date: Aug 2008
Location: 1000 Islands region, Ontario, Canada
Posts: 402
Thanks: 37
Thanked 20 Times in 19 Posts
|
Woohoo! Someone's getting a heated garage
 Very commercial/industrial looking. I found out today I may also be on the receiving end of a "new to me" wood stove to replace the worn out old thing currently heating the workshop.
__________________
.
|
|
|

|
|
|
#3 |
|
Master EcoRenovator
Join Date: Mar 2009
Location: Western Wisconsin.
Posts: 913
Thanks: 127
Thanked 82 Times in 71 Posts
|
I've done wood stove repairs before when they devolped cracks like that and the best thing I can suggest is to put a patch over and zig zag the welds or you will have the cracks reopen, lining the inside with fire brick is really the best idea, welding some angle iron in to hold the fire brick would be a good idea, this keeps the fire box hotter without deforming or burning the steel sides of the box, a hotter fire burns cleaner and burns the fuel more completely.
If you want to keep it simple, have your chimney as it exits the back drop down instead of going up, the downward loop extends down a 2-3 feet then goes up, to get a fire started you are going to need to install a "T" with a solid baffle so the smoke can go straight out and up, this will help extract a great of heat out of the smoke while still in the fire box by only letting the coolest of the smoke exit, more modern furnaces have the chimney opening at the bottom to create the same affect. I am also a big fan of devices like the Magic Heat  I've seen a number of these devices in place and everyone seems really happy with them as they not only help move the warm air but they pull more heat out of the smoke and they have a baffle cleaner built in to keep it cleaning and working. If you want to heat water a single loop of stainless pipe should work as a slow preheat otherwise wrapping a coil around the chimney that then goes through the fire box should heat up faster so you can heat a tank or floor faster. |
|
|

|
| The Following User Says Thank You to Ryland For This Useful Post: | Piwoslaw  (11-27-10) (11-27-10) |
|
|
#4 |
|
Lex Parsimoniae
Join Date: Feb 2009
Location: Woburn, MA
Posts: 4,918
Thanks: 114
Thanked 250 Times in 230 Posts
|
If you plan to locate the stove near a wall (or walls in a corner), you might want to think
about using a reflective shield over any insulation or fire-proofing. A reflector, will keep the radiant heat inside the garage. Without wasting fuel/heat on the interior studs etc and exterior of nearby walls. |
|
|

|
|
|
#5 |
|
Journeyman EcoRenovator
Join Date: Dec 2009
Location: Maynard, MA Eaarth
Posts: 383
Thanks: 78
Thanked 39 Times in 32 Posts
|
16-18 gauge galvanized steel on about 3/4-1" standoffs makes a effective heat shield. We has this around a wood stove, and on the other side of the wall, you could easily find the edge of the shield by feeling the temperature difference. The shield should go several feet beyond the extents of the stove.
|
|
|

|
|
|
#6 |
|
Lex Parsimoniae
Join Date: Feb 2009
Location: Woburn, MA
Posts: 4,918
Thanks: 114
Thanked 250 Times in 230 Posts
|
The stand-offs / air space is very important to get good reflectance.
YouTube - Radiant Barrier Under Shingles Won't Work Without An Air Space |
|
|

|
|
|
#7 |
|
Apprentice EcoRenovator
Join Date: Aug 2010
Location: Lakehills, Tx
Posts: 168
Thanks: 4
Thanked 10 Times in 9 Posts
|
Is that a goats leg in the lower right of the first pic?
 |
|
|

|
|
|
#8 |
|
Lex Parsimoniae
Join Date: Feb 2009
Location: Woburn, MA
Posts: 4,918
Thanks: 114
Thanked 250 Times in 230 Posts
|
|
|
|

|
|
|
#9 |
|
Apprentice EcoRenovator
Join Date: Aug 2010
Location: Lakehills, Tx
Posts: 168
Thanks: 4
Thanked 10 Times in 9 Posts
|
Ha! I missed that one.
 |
|
|

|
|
|
#10 |
|
Super Moderator
Join Date: May 2009
Location: Warsaw, Poland
Posts: 964
Thanks: 189
Thanked 111 Times in 87 Posts
|
Never seen a goat in a collar, in a pink one?
 |
|
|

|
 |
| Tags |
| furnace, modify, stove, wood |
|
|