The next step is obviously to put something on the outside to finish it. We're going paneling since it's far quicker then finishing drywall, less messy, matches the rest of the basement and when painted my wife likes the look saying it's cottage like.
So since I needed to do that I decided I'd insulate the back wall with the windows and do it all in one shot.
So I once again took the trim off the window and pulled the paneling.
This is what I was greeted with.
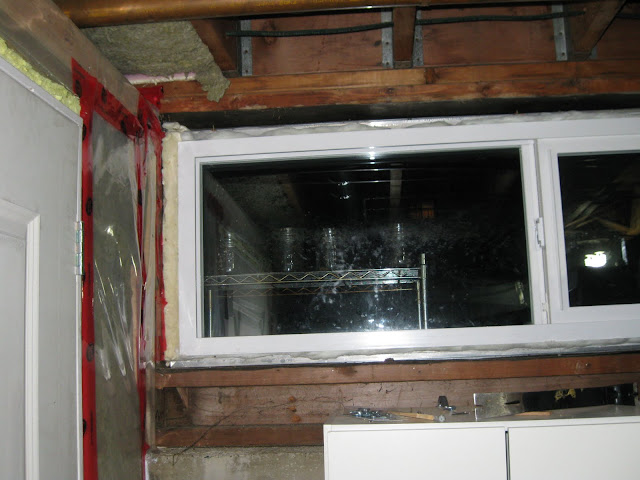
What you are seeing is
- under the window no insulation, I guess the space wasn't large enough to be worth it...
- on the left you'll see my sprayfoam from when I was in there doing the cold closet. On the top and the bottom of the window you'll see why a proper installation of a replace window is important.
The house originally had aluminum single pane windows. When the previous owners had them upgraded to vinyl they picked a decent midrange window but whoever installed them did an awful job. They removed the old glass but left the outside frame in place. They did this because the outside upper window frames go right up to the stucco and it isn't an easy job to get them out. So the new vinyl was sized to fit inside the old frames. They slipped them in, put some screws in place without using any shims and then stuffed some fiberglass in. The gap was covered with trim and that was it. No caulking inside or out.
Here is a closeup of the bottom
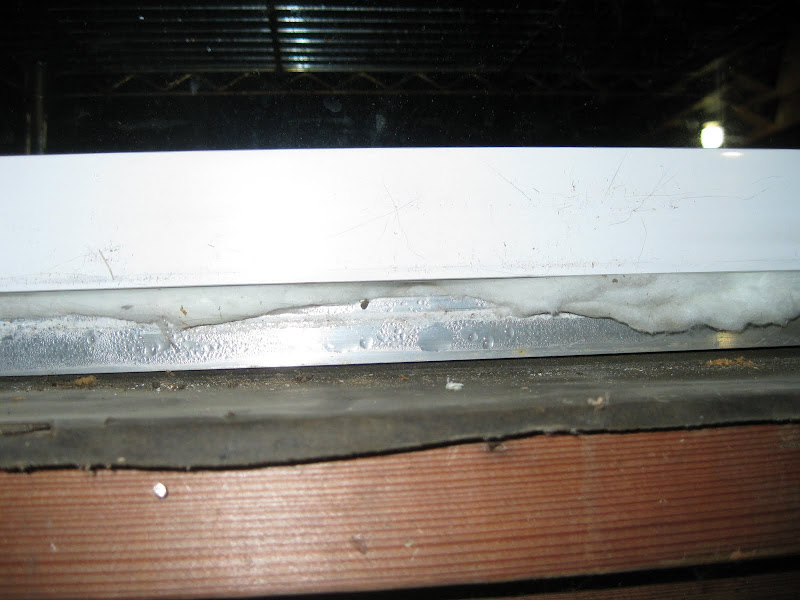
The tar paper is what they used to handle moisture back in the day. It's effective but if you're starting over use blueskin.
Above that is a gap to the outside about 1/8" it's caulked out there because the original window installers weren't morons.
Above that is the aluminum frame acting as a great heat absorber transfering it to the outside. This was at the same temperature as outside and within a couple of minutes of me removing the paneling the condensation you see in the picture started to form.
Above that is a gap to the outside roughly 1/4" here but on the sides and top it's closer to an inch. This is filled with fiberglass. The outside is covered by the vinyl of the window so you don't actually see the aluminum when looking straight at the window. From the top/bottom/side you can see it though.
Then above that is the new vinyl window held in place by 6 screws, 2 in each side and 2 in the top. The bottom just sits on the old frame in places.
The best way to fix this is to remove the window remove the old frame install a new properly sized window correctly and continue on. The other option is replace the aluminum frame with a wood frame the same size then reinstall the vinyl windows in that. The first takes a crap load of time and money, the second just lots of time so I'll be taking option number 3 - try to bodge it into something not horrible via sprayfoam and caulking.
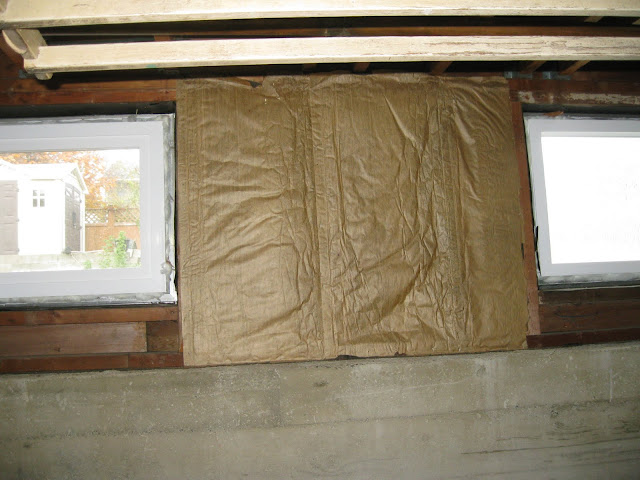
I continued pulling things apart and found insulation in the wall between the two windows. Nothing special, The other window is installed the same way.
The idea to seal this wall up is pretty simple. first spray foam those windows in really good. since there are no shims the foam will act as the strength holding them in. I will make sure that 100% of the aluminum is covered to help stop it from becoming a water magnet. After the windows are sealed I'll put rigid foam in the joists boxes similar to what I did with the cold closet.
Next a 2x4 stub wall will be built out on the edge of the foundation so that it's face is flush with the concrete. Poly will go over the top of this and attach to the rigid in the joists.
The gap between the joists will be filled with rockwool out to just beyond the stub wall. Any remaining rockwool will be placed in the stub wall just to use it up. 1 1/2" rigid will then go on the concrete and the wood frame and the poly will be taped to it. Add some wood to the rigid to attach paneling then trim out the windows making sure to wrap the edges either with poly or rigid to seal that up Add the paneling some trim and we're done for now. Some electrical will go into the stub wall while I'm at it. So that is the plan for tomorrow. I'll make sure to take more pictures while I'm at it.