
This past Friday I installed the cyberstat thermostat. So far, it has been working wonderfully. Setup was a breeze, programming is so fast and easy, and everything has been working great.
The install was a bit long though not hard. As mentioned previously, I needed to run new wires from the furnace to the thermostat so that the thermostat could get its power from the 24V transformer on the furnace. My old setup only had 2 wires, one for RH and one for W. This is just enough to tell the furnace when to turn on and off. I ended up adding two more wires. One is to give me control of the furnace fan. The other is to provide power to the thermostat.
So, lets get into running the new wire. For anyone who has run wire before this is pretty easy. For those of you who dont... well you're why I'm posting this.


First off, I shut off power to the furnace. I have a mine wired to a switch, but you may have to turn off a breaker for yours.

Here is the old thermostat.
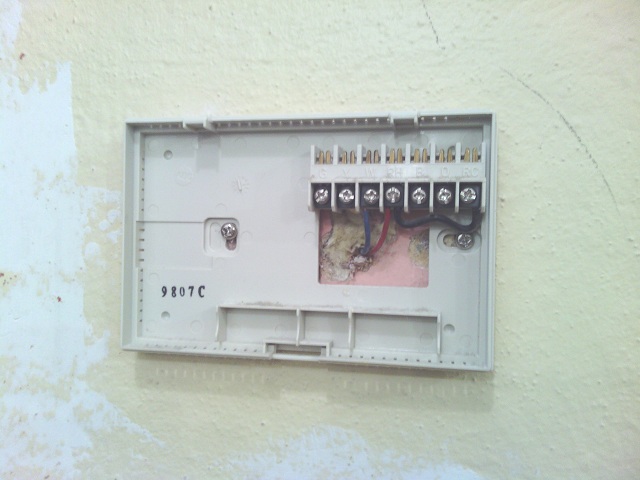
I removed the thermostat from the mounting plate. You can now see the wires going to the furnace. I loosened the screws holding the wires in and pull them out. Be careful not to drop the wire into the wall! I also removed the screws holding the mounting plate to the wall.
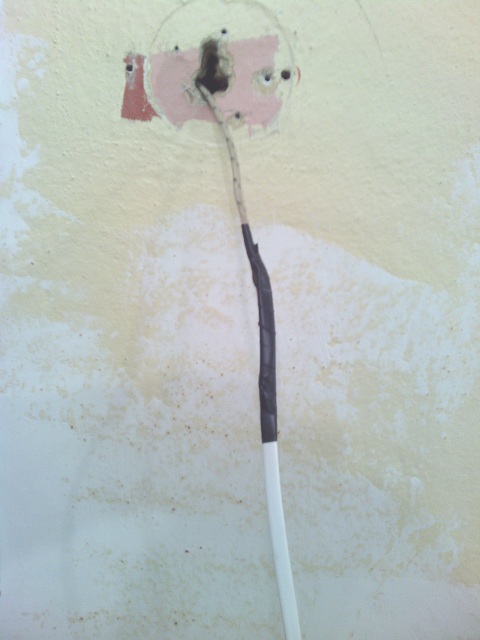
Next, I got the new cable and used electrical tape to tape the new cable to the old cable. I made sure to overlap the cable a few inches to make sure they don't pull loose when I pulled it through the wall.
For wire, I ended up using some network cable. This has 8 wires which is more than I need. I had used (shown - white) a 6 wire phone cable, but it ended up not being long enough, so grabbed some network cable (blue cable you'll see later).
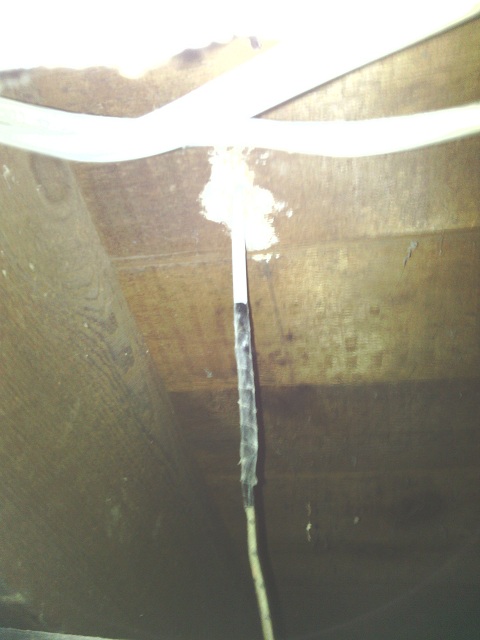
With the cables securely taped together, I went into the basement and started to pull it through the wall. I kept pulling the new cable through until I got it all the way to the furnace.
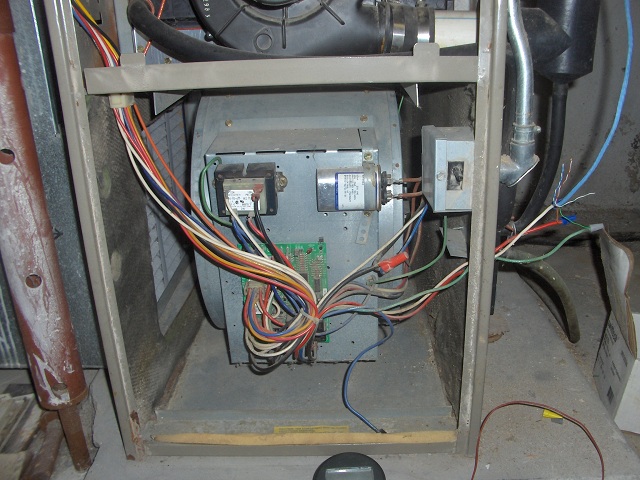
I removed the covers on the furnace to get to the wiring. You can see on the right side of the furnace is where the thermostat wires are going to.
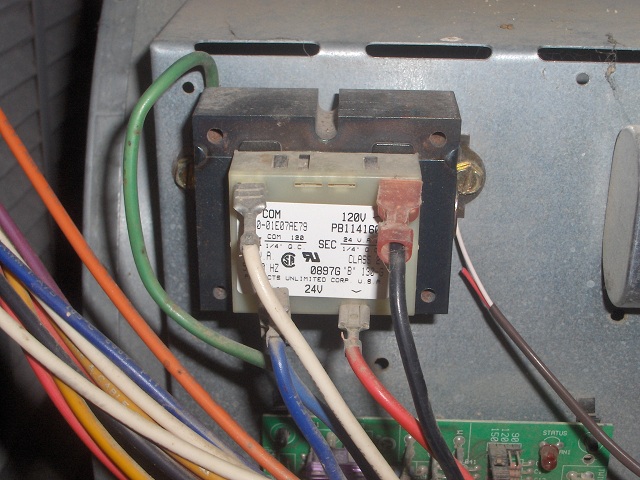
Next, I found the transformer (shown above) and follow the wires out of it. One is going to be for RH and should already be hooked up. The other will be for C. In my case this was a blue wire and already had a wire nut on it to cap it off since it wasn't being used. If in doubt, use a multimeter to check the voltage across RH and C and you should get ~24V.

Now, I wired up the RH, C, W, and G. My colors didn't match up exactly, but that is fine since I just remembered what they were when I connected the thermostat.

The last step of the install includes screwing the new thermostat mounting plate to the wall and connecting the corresponding wires to the mounting plate connections.
After that was done, I put the thermostat on the mounting plate and I setup the thermostat ,which I'll cover in my next post along with programming and operation of it.