About a month ago, my wife started saying our dryer hasn’t been drying as fast as it used to. Also, the auto moisture sensing feature has never worked well. I talked with a few people I knew and went to work. The idea being that the temperature sensor (and humidity sensor) has been caked full of lint and needs to be cleaned off to work properly.
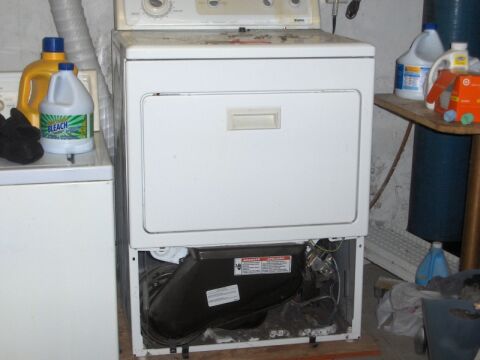
So, going to work, I popped off the front cover.

Immediately, you can see this thing hasn’t been opened up and cleaned in a long time, probably never.

I initially thought the sensors were in the tube heading to the rear of the dryer.

So, I pulled it out and disconnected the vent.

Finding that the elbow piece was full of lint, I went ahead and cleaned it out.

I also went ahead and stuck the shop vac in the vent pipe in the dryer to clean it out. However, I didn’t see any sensors once I had it vacuumed out.

So, I moved back to the front and started removing more parts. This is the first vent piece that holds the filter in the dryer. Of course, another piece caked with lint to clean out.


With that vent piece out, I can finally see the sensors on the right side.


I removed both of them. I believe the black one is the humidity sensor, and the white one is the temperature sensor. The black one was fairly clean yet, but the white one had a bit of lint caked around the edges. I cleaned them both up with a clean rag and reinstalled them.
This whole process was pretty quick. It might have taken me 30 minutes all in all.
It is about a week later now, and my wife says that the dryer is working great again. The auto moisture sensing setting is working just as it should, and no doubt the dryer is running more efficiently now.


{ 9 comments }
Replace that white flex exhaust with hard steel pipe. Then use foil/bubble insulation around the pipe. It will stay cleaner longer and run much better/faster. Also, if you can, relocate the dryer to have the shortest run of exhaust, this change cut my dry time by 12mins.
Replacing the white tubing is on the list of things to do. The run is already pretty short, so I won’t be able to change that unfortunately.
What is the reasoning behind insulating the pipe?
Thanks for the tips.
Insulating the duct will keep the duct warmer longer, reducing water condensing in the duct. The reason the lint sticks to the inside is because of the duct is because of the water. Keep it warm and it will stay cleaner.
Tim –
I can second the “keeping it hot” sentiment. Also, the hotter that tube stays, the faster the exhaust will flow, and the more dry, fresh, heated air will be introduced.
If you want to save a bit more, you can run a heat exchanger from the exhaust back to the intake opening, to pre-heat the intake and save energy on heating room temperature air. You don’t want to route the exhaust directly to the intake for the moisture, obviously. The problem with a heat exchanger is that for it to be efficient, you’ll need to clean it often (like the lint trap, with each load), because it will act like a screen for the lint that shoots through the exhaust port.
A small, simple air-to-air intercooler will work as a heat exchanger. You can purchase them online for ~$100 or less.
I immediately recognized your dryer to be the same or very similar one to the one we own and very much appreciate the information on the sensors.
The main thing I want to note here is that this model of dryer is notorious for lint problems – to the point of being severe enough to cause a fire if this sort of maintenance is not done once in awhile, even for those who religiously clean their lint trap. So efficiency be damned, clean those ducts!
Another thing to look at if you use fabric softener sheets in the dryer: the lint filter itself. After cleaning it of lint, stick it under a faucet and see how much water passes through. If the water puddles up instead of going through the screen, clean the screen with a stiff brush. This needs to be done every few months.
A change I made to my dryer was to replace the electric motor with a motor that has a capacitor. This cut my running amps from 4.4a to 3.1a. My next step, if and when it dies, is to replace the 5500w heater with a 5000w heater. With those two upgrades and a heat exchanger, the dryer could be one of the most energy efficient electric dryers around.
I almost had a fire in the last house I owned. It had a vertical dryer vent, and it was full of lint. The dryer got so hot when running that you would burn your hands when you touched it.
Thanks for the great tip. My dryer just stopped working and was about to call a repairman, but this worked.
Comments on this entry are closed.