
|
 10-30-09, 11:43 AM
|
#171 |
|
Administrator

Join Date: Aug 2008
Location: Germantown, WI
Posts: 5,525
Thanks: 1,162
Thanked 374 Times in 305 Posts
|
I see, so, like welding you just have to use an inert gas to get oxygen away from the workpiece.
Perhaps you could run your vacuum pump on it while brazing?
__________________
Current project - To view links or images in signatures your post count must be 0 or greater. You currently have 0 posts. To view links or images in signatures your post count must be 0 or greater. You currently have 0 posts. & To view links or images in signatures your post count must be 0 or greater. You currently have 0 posts. |

|

|
|
10-30-09, 12:16 PM
|
#172 | ||
|
Supreme EcoRenovator

Join Date: Mar 2009
Location: Portland, OR
Posts: 4,004
Thanks: 303
Thanked 723 Times in 534 Posts
|
Quote:
Quote:
I did work out a way to eliminate the 'little black flake' problem, which will be my next post... Best Regards, -AC_Hacker |
||
|
|
|
|
10-30-09, 12:34 PM
|
#173 |
|
Administrator
Join Date: Aug 2008
Location: Germantown, WI
Posts: 5,525
Thanks: 1,162
Thanked 374 Times in 305 Posts
|
lol, that makes perfect sense.
__________________
Current project - To view links or images in signatures your post count must be 0 or greater. You currently have 0 posts. To view links or images in signatures your post count must be 0 or greater. You currently have 0 posts. & To view links or images in signatures your post count must be 0 or greater. You currently have 0 posts. |
|
|
|
|
10-30-09, 06:21 PM
|
#174 | |
|
Lurking Renovator
Join Date: Oct 2009
Posts: 5
Thanks: 0
Thanked 0 Times in 0 Posts
|
Quote:
* 5m of pipes (16mm) on 1m2 - actually it is possible to calculate the needed amount, but than you have to know the heat loss of house. It is quite complicated to do and I was following the rule that you can't have too much. If pipes are closer, you can't feel the cold and hot spots. * one loop about 50m long and as equal to each other as possible to make equal circulation in all loops. I have very interesting situation - in my hose are three floors and in each floor I have a little different approach used: * in basement I had already concrete floors, there I put polystyrol plates for insulation and reinforcement mesh on top to have something to what pipes could be fixed. I didn't need it for reinforcement because in concrete (estrich) were fibers for it. * in first floor I have wooden beams used as floor construction. I have insulated the space between beams with rockwool (for sound insulation) and then I calculated that it will be cheaper to use perforated sheet metal as structure under concrete not OSB. There also reinforcement mesh was used to fix pipes. * In second floor the wooden/metal joist are used as structure (like Lincolnshire Timber Frame design and construction commercial domestic buildings structures) There I had to think about wight of floor because of long distance between supporting walls (about 5m). In second floor I put OSB on the floor and then laid the pipes on it. Than two layers of drywall were put between pipes and space was filled with concrete. In this way I made good contact between drywall and pipe The the last special floor drywall plate was put as finishing layer. With that approach I got floor which is not so heavy as concrete. The drywall is about 1000kg/m3, but concrete about 2500kg/m3. Of course concrete has better heat transfer properties. I have seen that reflection metal sheets are used for lightweight radiant floors, bit it is more expensive than my approach - I had waste drywall left from wall constructions which I used for that. I will make some photos of heat pump and will post there. Maxis. |
|
|
|
|
|
10-30-09, 08:22 PM
|
#175 |
|
Supreme EcoRenovator
Join Date: Mar 2009
Location: Portland, OR
Posts: 4,004
Thanks: 303
Thanked 723 Times in 534 Posts
|
PLEASE NOTE:
* * * This procedure is dangerous by nature * * * This procedure uses propane gas instead of nitrogen. Nitrogen is used in the HVAC industry because it is non-flammable and relatively safe. When propane is mixed with oxygen, it becomes dangerously flammable. If you already have access to nitrogen, or another inert gas, you should use it instead of propane. * * * This procedure is dangerous by nature * * * * * * So when we left off in Brazing (part 4), the brazed joints were looking pretty good, but there were horrible problems with the little black flakes of copper oxide that had formed outside, but more worrisome, inside our brazed tubes. The flakes were caused by oxygen combining with copper at high heat. Daox suggested using a vacuum pump to pump out the air before we brazed. Good idea, if we could vacuum inside and outside the tube, it would work, but otherwise, we'd have a strong stream of air streaming through our brazed joint. The common practice in HVAC work is to use an inert gas, usually nitrogen, to displace the air. Someone suggested carbon dioxide. I know it is cheaper than nitrogen, and is sometimes used in welding, but doesn't seem to be used in refrigeration brazing, despite its economy. So I trotted down to the welding store and added up the equipment:
That's $260 to chase away tiny black flakes. So I remembered that some idiot tried propane as an inert gas for welding. Well, I sensed that I had some natural kinship to that guy so I decided to give it a try. Here's what I came up with: First I unscrewed the flame tip from the propane torch, which was worthless for brazing anyway. Then I used a 3/8 inch ID plastic tube. Next, I used one of the 3/8 to 1/4 reducers that I made when I was practicing my brazing. Then came some 1/4 inch tube. The reason for all this is to reduce the volume of the gas as much as possible. I also made another 3/8 to 1/4 adapter for when I want to hook up to 3/8 inch tube. So here's the whole setup: The gas from the propane bottle feeds into the tubing, via adapters to the tube to be brazed. The vice acts as a heat sink, but not very well. I may get another cheap flaring tool to use as a heat sink because the one I have over the brazed part is working very well. More surface area around the tube to carry off the heat. Finally, the tube from the other end of the brazed part goes into a dish of water, to act as a flame trap and also as a visual indicator of the volume of gas that is flowing. So the way I did it was first to make sure that the windows were open and that there was no flame or pilot light or spark source or nearby flammable material that could be a problem. Then I cracked open the propane bottle and let the propane bubble vigorously for a few seconds to purge any oxygen out of the line. The I reduced the flow of the propane until there was a bubble every second or two. I allowed about ten seconds for any local concentrations of propane to dissipate. Then I fired up the MAPP tourch and started to braze as usual, this time I used 5% sliver rod. I was expecting to see a small flame near the joint I was going to braze, but I saw no flame at all. I did see a small leak where the plastic tube joined with the copper. I extinguished the MAPP torch, and blew the leak flame out quickly and added the small hose clamp at the leak point. Then I repeated the purge procedure, then the reduction in flow, then the 10 second wait. This time the brazing worked just fine, not leak, no problem... NOTE: BE SURE TO TURN OFF THE PROPANE BOTTLE AS SOON AS THE JOINT IS BRAZED. OTHERWISE, TERRIBLE THINGS CAN HAPPEN. And here's the result: Top photo shows the tube cut open, I banged on the tube for all I was worth with a screwdriver, trying to dislodge any tiny black flakes... As you can see, there were none. Bottom photo tells why... This is a microscope shot down the barrel of the tube I just brazed. The cut was made about 3/4 inch from the brazed joint and about 5 minutes earlier, it was glowing cherry red. As you can see, there is no copper oxide, not even any discoloration. Problem solved. ...also here is a YOUTUBE video on the same topic. However this guy who is brazing is using Nitrogen gas to prevent copper oxidation. Much safer practice! Best regards, -AC_Hacker %%%%%%%%%%% Last edited by AC_Hacker; 05-16-11 at 09:25 AM.. Reason: finish entry |
|
|
|
|
10-30-09, 11:35 PM
|
#176 |
|
Supreme EcoRenovator

Join Date: Oct 2008
Location: Austin, TX
Posts: 1,154
Thanks: 14
Thanked 257 Times in 241 Posts
|
What about helium? It's truly an inert gas and it's easy enough to find. The high thermal conductivity might make it difficult to work but I'm not sure.
__________________
To my surprise, shortly after Naomi Wu gave me a bit of fame for making good use of solar power, Allie Moore got really jealous of her... |
|
|
|
|
10-31-09, 02:07 AM
|
#177 | |
|
Supreme EcoRenovator
Join Date: Mar 2009
Location: Portland, OR
Posts: 4,004
Thanks: 303
Thanked 723 Times in 534 Posts
|
Quote:
Pictures too, I hope... Regards, -AC_Hacker |
|
|
|
|
|
10-31-09, 07:55 AM
|
#178 |
|
Administrator
Join Date: Aug 2008
Location: Germantown, WI
Posts: 5,525
Thanks: 1,162
Thanked 374 Times in 305 Posts
|
Nice job. I'd be very eery working with propane, but it looks like it turned out well.
I'm quite curious as to why CO2 isn't used. As you mentioned, its very common in welding.
__________________
Current project - To view links or images in signatures your post count must be 0 or greater. You currently have 0 posts. To view links or images in signatures your post count must be 0 or greater. You currently have 0 posts. & To view links or images in signatures your post count must be 0 or greater. You currently have 0 posts. |
|
|
|
|
10-31-09, 09:29 AM
|
#179 |
|
Supreme EcoRenovator
Join Date: Oct 2008
Location: Austin, TX
Posts: 1,154
Thanks: 14
Thanked 257 Times in 241 Posts
|
I used CO2 when I built my CPU cooler. (I used a CO2 tank and regulator originally designed to power air tools with a length of capillary tube to restrict the flow. I was able to borrow it from a friend.) It works just fine. I think nitrogen is used because it is cheaper in bulk.
__________________
To my surprise, shortly after Naomi Wu gave me a bit of fame for making good use of solar power, Allie Moore got really jealous of her... |
|
|
|
|
10-31-09, 11:54 AM
|
#180 |
|
Lex Parsimoniae

Join Date: Feb 2009
Location: Woburn, MA
Posts: 4,918
Thanks: 114
Thanked 250 Times in 230 Posts
|
Wow! You risked your life for science (or risked being horribly disfigured)!
 I'm too forgetful to be using that kind of 'inert' gas. I would need to keep my large CO2 very close by..  If CO2 would work (and not interact with the copper), I would visit the local paint-ball store and buy a CO2 tank.. They do refills for 2 to 4 bucks.  You just need a Fill-Adapter so you can turn on the gas and connect a hose. Amazon.com: Ninja Paintball UFA Universal Fill Adapter: Sports & Outdoors Grease gun hose works fine. The gas is under about 850 PSI inside the tank. The cheaper method might be to buy a more complete kit.. paintball gun remote  I got mine for about $20 at the PB shop. Just toss the piece on the end.. (I didn't get one with the quick-disconnect hardware). Open the valve VERY slowly for a limited flow.. PS: ClockWise opens it.. The valve knob is a screw that goes down to depress the pin-valve in the tank neck. I forgot to add, some PB shops have Nitrogen fills too. Those tanks have a 900 PSI regulator on them, so they cost more.. But off EBay they aren't too bad. 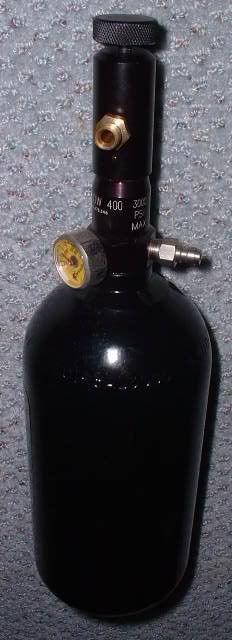 Depending on the tank, they can be filled (with air or Nitrogen) from 3,000 to 4,000 PSI. Last edited by Xringer; 10-31-09 at 12:13 PM.. |
|
|
|
 |
| Tags |
| air conditioner, diy, gshp, heat pump, homemade |
|
|


 Linear Mode

